Posted on 6 Comments

SVG file format for Crafters

What is an SVG?

The SVG file format stands for “Scalable Vector Graphic”. Let’s break that down.

First, “scalable” means that making the image larger or smaller does not change the image. Imagine you have a photo and would like to make it much larger. Chances are that your image will come out grainy and lose much of the detail you can see in the original. This is not the case for the SVG file. No matter how big or small you make it, an svg file will maintain its original detail. This is fantastic because we can take the same file and make it exactly the size we want for our crafting project and it won’t change how the image looks.

 

Second, the word “vector” indicates how this scalability is achieved. Allow me a moment of indulgence as I was a mathematics major. A vector is simply a term to indicate a line of a certain length and direction. A vector is usually situated within the Cartesian plane (you know, the grid with x and y). To achieve scalability, the SVG file is saved in terms of a bunch of vectors at certain points going certain directions at certain lengths. Therefore, if you want to make your SVG image bigger, the computer just has to multiply all of these vectors by the correct scale which is a simple task for the computer.

Lastly, the ‘G’ in SVG stands for “Graphic”. That is, the image or object in the SVG file. I don’t feel like this warrants much more elaboration.


Why should I care about the SVG file format?
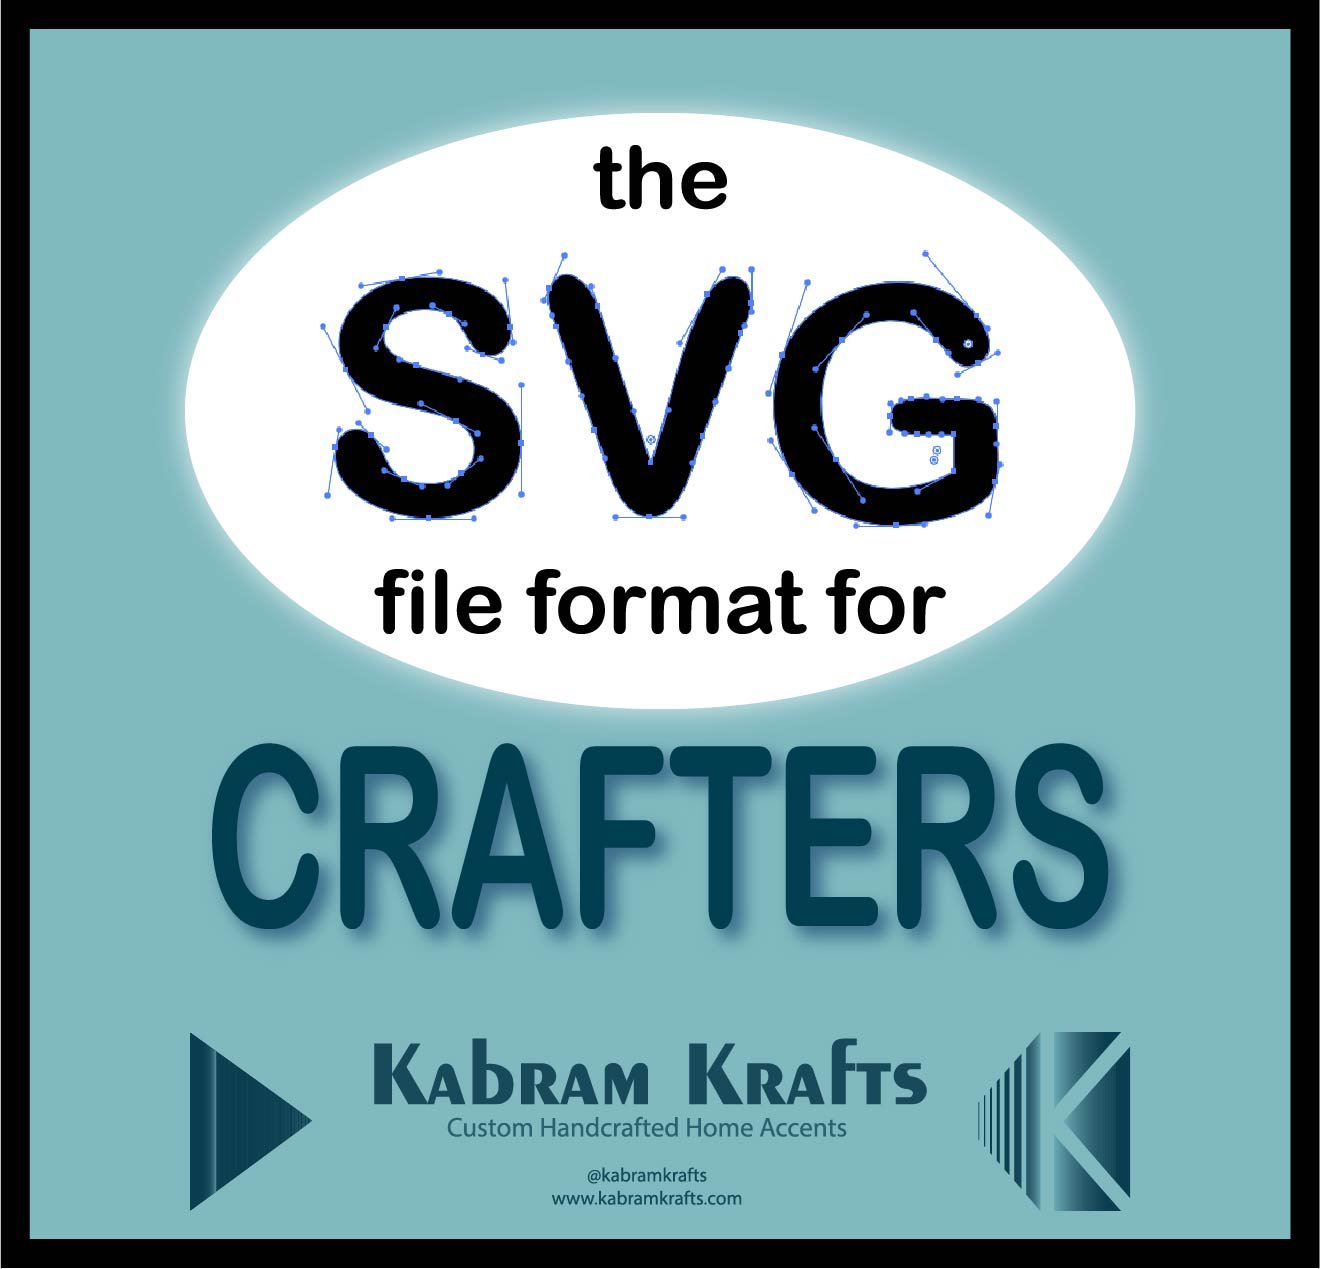
the SVG file format for CRAFTERS by Kabram Krfats

Well, why do we care? You can probably be a wonderful crafter without ever delving deeply into this subject. However, if you ever have an image that would be better with a tweak or an extra spike, then knowing a little bit about the SVG file could come in very handy. The SVG file is a natural choice for the hobby and professional level cutting machines precisely because of its natural scalability.


What cutting machines use the SVG file format?
Silhouette Studio Designer Edition

As far as I know, all of the current generation of common hobby cutting machines can process the SVG file format. The only hiccup you may run into is that some companies will make you upgrade to their paid software in order to open the SVG file format rather than their own proprietary file format. For example, I upgraded to the Designer Edition of Silhouette Studio precisely for this reason. Check out my reasons in this post.

Other Programs for editing SVG files

In addition to Cricut design Space and the DE and up of Silhouette Studio, there are a few other programs that can open and edit the SVG file. My favorite of these programs is definitely Adobe Illustrator. Once I started Adobe’s subscription based Creative Cloud program, I loved it and don’t wish to go back. If you have the budget for it I would highly recommend looking into it. Not only do you get the ability to edit your SVG files in Adobe Illustrator, you also get access to Photoshop, Lightroom, and a slew of other top of the line programs. Seriously, it is super awesome and even comes with companion apps for your phone. The graphic above was made using one of Adobe’s apps. It is addicting and productive at the same time!

If you do decide it is right for you, make my day and purchase it through my affiliate link. 😉 I earn a small (pretty small sadly) commission for the referral at no cost to you.

If your budget is not up for the Adobe software package, have no fear. I used Inkscape for years and it is definitely a great option as well. Plus, it is freely available!

I found it useful to make, edit, and save SVG files though either AI or Inkscape rather than through the cutting machine’s software itself. First, the software that accompanies your machine often can’t save in the SVG file format even if it can open it. Second, I like having the ability to catalog and backup my files separately from the machine software itself in case I change machines or lose access to it for any other reason.


Are there other formats I can use?

There are other formats that are scalable. One that I have used is the DXF file format which stands for “Drawing Exchange Format”. It was developed for use with the AutoCAD program. I have used it in the past before I purchased the Designer Edition of Silhouette Studio as it is a format that can be read by the basic (free) edition of Silhouette Studio. However, it is not as widely used and it isn’t as reliable in my experience. If you want to read more about my experience with DXF, read my post on why I purchased the Designer Edition of the software.

Another format that is used is the EPS file format. This stands for “Encapsulated PostScript” and is also scalable and vector based. It is the standard format for vector images created by Adobe Illustrator. You probably will have no reason to use the EPS format.

What is next?

Learning more about the SVG file is important if you want to have more control over your designs.
 

Please be on the look out for the second article in this series. I plan to cover the details of actually editing an SVG file in various programs. Also, I will go over what a node is, what the handles are and how to add and delete nodes. These are very useful skills!

Posted on 7 Comments

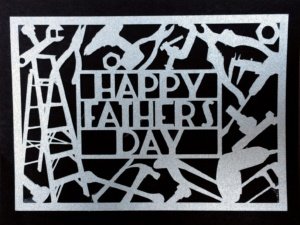
Free Father’s Day SVG Cutting Overlays for making your own Cards!

Well, Father’s Day is almost upon us again! Time goes by so fast it is hard to keep up with things!

Speaking of time, I don’t know if anyone actually notices when I have been absent for a while, but I have been. Sorry!

We have been moving. First, we moved from a large house in Michigan (Michigan has great prices on housing if you plan to be there a while). Then, we were then in a one room hotel room in Colorado for the summer with our two young girls. Then we moved into an apartment near my husband’s new job. Now, we are finally back in a house! Yay!

However, all that moving has put a serious cramp on my crafting and blogging time, so I apologize. I did however manage to make a new father’s day card overlay. My first was tool themed for my dad, then I made a fishing themed one last year, and now I present my gold themed overlay!

What does your dad like to do? I would love some inspiration for other overlays. Actually, I really like this collection of svg files. After all, a one cut and adhere card that still looks great is an awesome time saver!

Previous Father’s Day Cards

Take a look at the card I made a couple years ago. My dad was always fixing my toys, working on a project, or just being a handy man. He even built me doll bunk beds one year!

So, this is the card I made for him several years ago.

Father's Day Card

Last Year’s Father’s Day Fishing SVG Overlay

While I do not fish and no one I know fishes, these fishing images were just too cute. Plus, Father’s Day makes me think of dads and fishing!

So, for all of you with fishermen in your lives, this card overlay svg file is for you. I haven’t had time to test cut it out, so let me know if you run into any snags.

Check out this file and the blank template in this post.

Happy Father's Day


This year’s golf themed Father’s Day Free SVG overlay file!

Does your dad love to golf? Check out this new overlay. I think this one is cute too. Please make your father and awesome Father’s Day card.

Happy Father’s Day to all the great Father’s out there!

 >>>>> And… be sure to check out my other SVG freebies! <<<<<<

Posted on 16 Comments

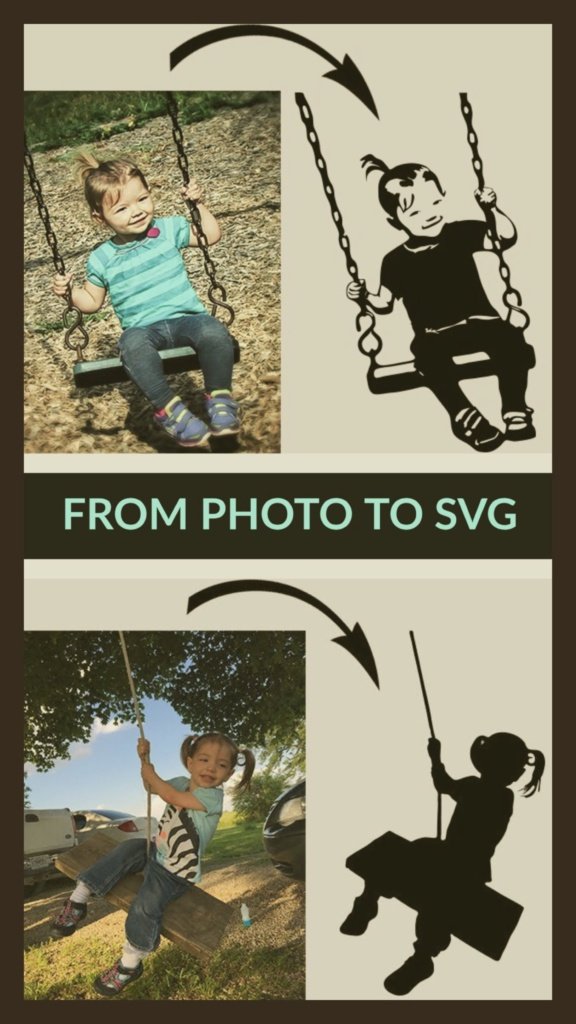
From Photo to SVG

Turning your Photo to SVG file has satisfying results

From Photo to SVG: The topic of taking a photo and making an SVG is one I keep coming back to. Perhaps it is because custom images from your own photos are simply delightful. Also, it is a great way to get some adorable silhouettes just in general. Whatever your reason for wanting an SVG from your photograph, you can do it! It may take some patience and attention to detail, but it is totally worth it.

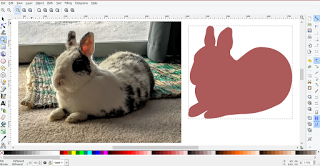
My first attempt at a silhouette was one of our bunny rabbit Geronimo. It came out nicely, but wasn’t a very hard shape. With this shape I basically made a bunch of little shapes and then combined them with the path merge tools.

from photo to svg Geronimo the bunny silhouette by kabram krafts
Geronimo the Bunny

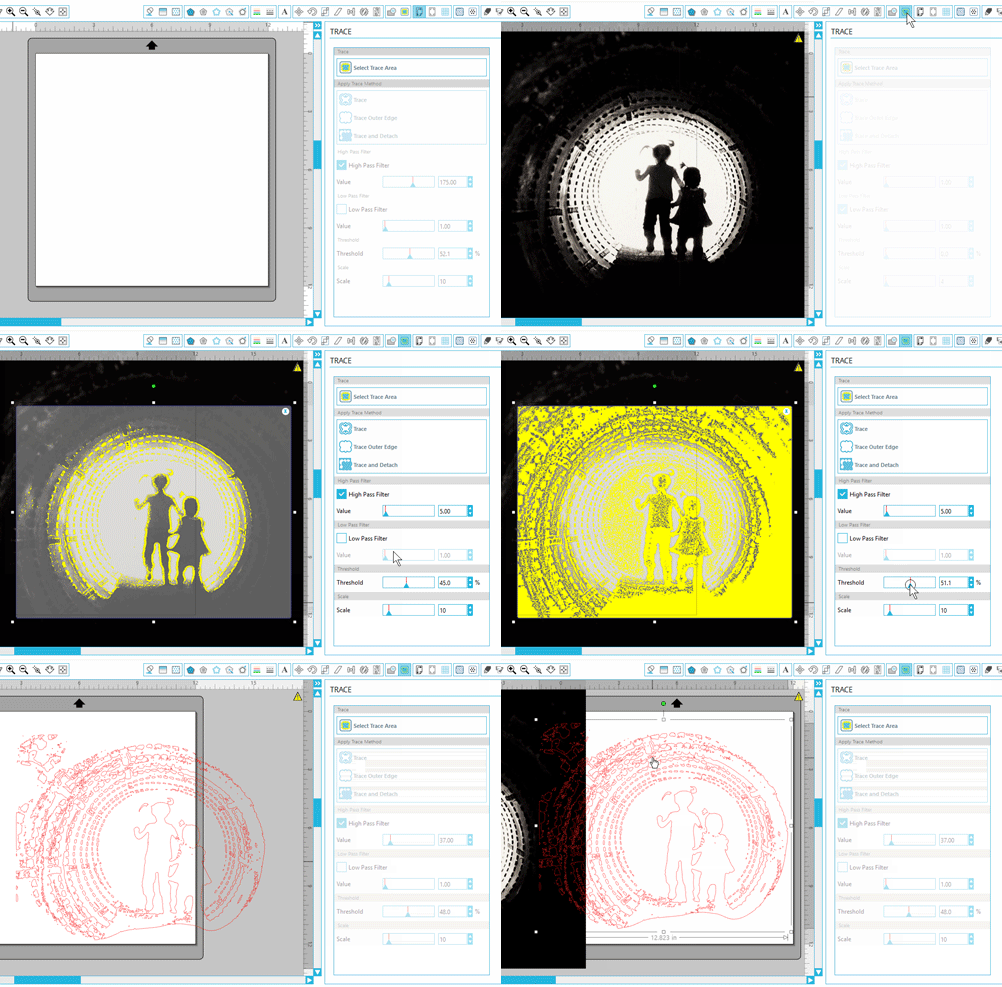
Then, for my second attempt I created some custom artwork for my girls’ playroom. These images were definitely more complex and took a lot longer, but with spectacular results. I used a different approach for these images. First, I edited the original photos to make them as black and white as possible.

gif of silhouette studio trace function from photo to svg

Second, I traced the images using Inkscape (you can also use Adobe Illustrator or your cutting machine’s software). Lastly, and most tediously, I hand edited the nodes of the path until it was just the way I wanted it. At last, you have converted your photo to svg.

From Photo to SVG

While I am not going to go into detail in this post as it is not my first on this topic, I will hit a few important points.

Check out this post if you want the details!

First, you need to find the right photo – a crisp, clean silhouetted photo with nothing in the background will be much easier to create a custom silhouette cutting file from than one that has a lot going on.

Second, you want to use a photo editing software to get it as close to a silhouette as you can from the start so it will be easier to trace. Like the ones shown below.

image edited for contrast with father and daughters ready for converting photo to svg
image edited for contrast of girls in tunnel ready for converting photo to svg

Third, you trace the image using a Vector capable software to go from your photo to svg file. I have used Silhouette Studio, Inkscape, and Adobe Illustrator.

Lastly, unless you are really lucky, there will be some hand editing to do to get it just right. And sometimes, when the background of the image just won’t cooperate, you may just have to use the path tool and trace your image point by point!

From Photo to SVG: my latest results

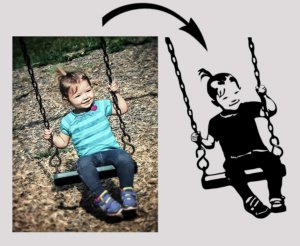
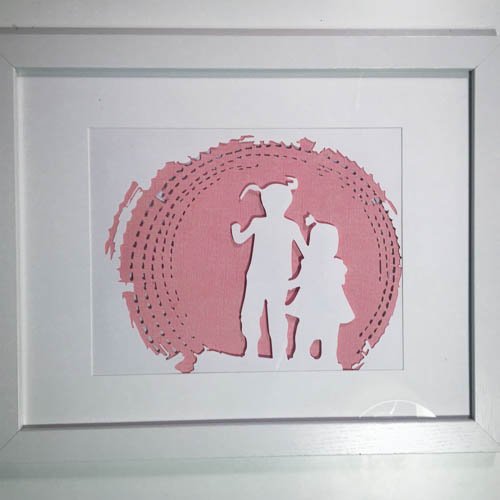
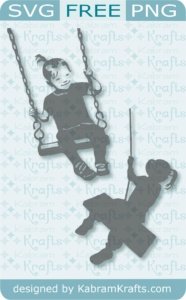
While I haven’t cut these images out yet, I can’t wait to do so. From pictures of my daughters swinging, I arrived at these adorable cutting files. One was begging for extra detail and ended up not being a true silhouette. I tried my best to make it all one connected path, but couldn’t see a way to connect in the facial details without compromising on the cuteness!

example of detailed photo to svg project

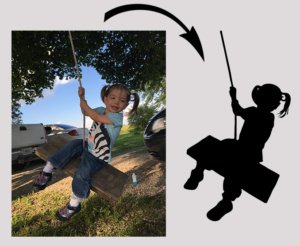
For the second image, I went true silhouette all the way. There is enough detail in the overall shape that you can still tell what is going on in the image.

from photo to svg despite a cluttered background image

While they may not hold the same emotional signifigance for you as they do for me, I am posting my final SVG files here because they are simply so adorable. Feel free to use them for your own personal projects if you so desire or make your own silhouettes using some of these photo to svg methods!

My silhouette cameo is my go to for creating beautiful home decor from these files!

To download these files, just click the DOWNLOAD button below.

from photo to svg free svg images of girls on swings

Thanks for stopping by and have a wonderful April!

FROM PHOTO TO SVG
Posted on 8 Comments

Free SVG four leaf clover for St. Patrick’s Day!

UPDATED POST CLICK HERE!

Can you believe March is here? Well, here I have a free SVG file to remind you that St. Patrick’s Day is on its way. So, who likes four leaf clovers? Did you ever spend hours in a field trying to find one? I feel like I did as a kid, but I don’t remember ever finding one.

Do you celebrate St. Patrick’s Day? We didn’t do much for it growing up, except for wear some green to avoid being pinched! Occasionally we would go out for lunch or dinner to somewhere vaguely Irish. What are your traditions? Is it a Holiday you take note of or just skip over? I have never been a big drinker, so I imagine that those who enjoy that pastime may do more to celebrate than I do.

Free SVG Cutting File

At any rate, this is a really cute little four leaf clover cutting file. I think it would look great cut out in glitter heat transfer vinyl on a shirt. Maybe with a cute little saying of some sort underneath? Well, I hope you enjoy! And have a fabulous March!!

Here I present to you this St. Patrick’s Day SVG file freebie, the famed four leaf clover!

Check out my other SVG Files Too!

And, if you are already looking forward to Easter, check out these adorable little Easter Egg cutting files!

Posted on Leave a comment

9 DIY Valentine’s Cards to Inspire You Today

bemine

Easy DIY Valentine’s Day Card Made with Minimal Supplies – kwernerdesign blog

Happy Valentine’s Day!

Do you want to make your own DIY Valentine’s Day Card? Well, Valentine’s Day is approaching rapidly! Therefore, you should start as soon as you can! Since time flies by so quickly, you should start now before it is too late. I would know. While I have lots of ideas, I have so little time.

So, take a look at these and make your own today. Then you will feel great and have something wonderful to give to a loved one.

While I have read a lot of these type of collection posts, this is my first time trying my hand at one so I hope you enjoy. All of these cards are very beautiful, and as a bonus, the rose overlay card has a free svg file too!

DIY Valentine’s Card Inspiration

Which is your favorite? Personally, I am excited to try the watercolor heart cards, as I have been very excited about water color these days. If you want to see what I have been up to, check out my Instagram Feed.

Simple or Elaborate?

First, using a needle and thread to make a simple but beautiful card with a little texture is a fabulous idea for a DIY Valentine’s Card. Or, if you don’t want to break out a needle and thread but love the texture, try the heart overlaying a bunch of pretty ribbons.

In reality, the DIY Valentine’s Day card with the rose overlay may be just my speed this week. Since it is just one overlay and the file is already made for you, it shouldn’t take long. All you need is a cutting machine, cut it out and slap in on a background. Done!

Lastly, I will say that the mini envelopes cards is probably my very favorite. But, as it looks time consuming, will probably not be getting made in my house this year at least.

What do you do for Valentine’s Day? Do you exchange cards, go for dinner, go on a romantic getaway, or do nothing at all? Wishing you lots of love this February.

Oh, and don’t forget to take a look at my past Valentine’s Day Creations!

https://kabramkrafts.com/2017/01/love-card-free-svg-cutting-file-download/https://kabramkrafts.com/2016/02/make-your-own-easy-valentines-day-card/https://kabramkrafts.com/2018/01/free-svg-hearts-download-valentine/https://kabramkrafts.com/2015/01/heart-of-hearts-free-svg-cutting-file/https://kabramkrafts.com/2016/02/striped-heart-card-overlay-free-svg/
Posted on Leave a comment

Hearts for your Valentine! Free SVG download for your card making and crafting.

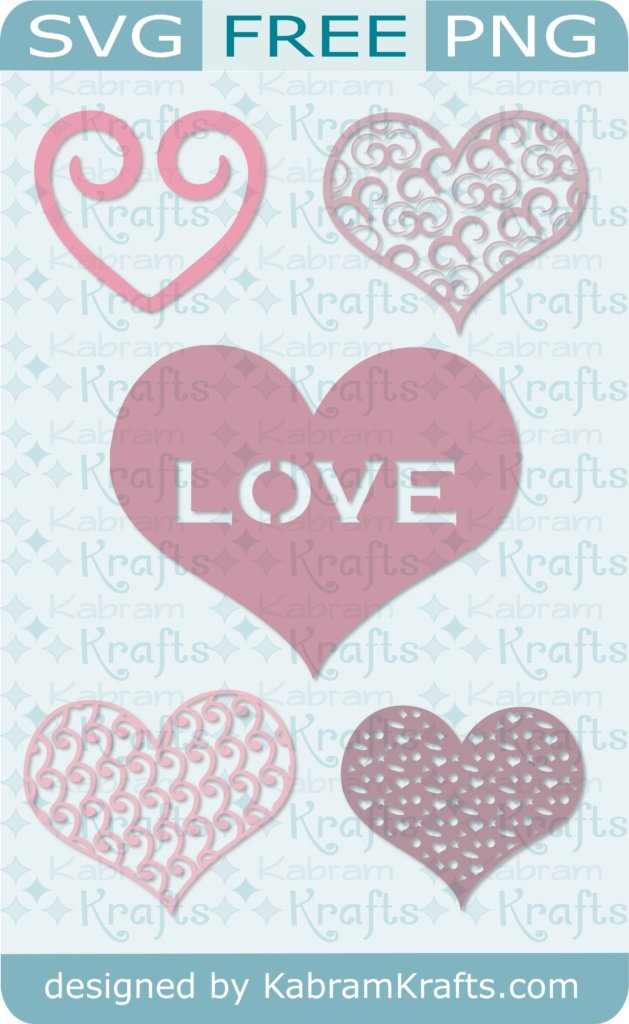
Are you making lots of handmade Valentine’s Day cards this year? These free SVG hearts should make a wonderful addition to your projects whether you are making a new shirt with HTV, a super special handmade card for your sweetheart, or a card for everyone. Please enjoy and also check out my past Valentine’s Day freebies!

Free SVG Hearts for Valentine’s Day

Happy Valentine’s Day – a bit early!


I think these hearts would look great on a t-shirt with sparkly HTV! Sorry, I haven’t had time to try it out yet, but here is a mock up for you all the same. Please pardon my Photoshop skills, they are still in progress!


Also check out my other Valentine’s Day cutting files:


Have a wonderful Day!

Posted on Leave a comment

Start your New Year off with a free SVG file!

Make your 2018 a year filled with crafting. You can start by using this free SVG New Year’s file to make an awesome motivational decoration, picture, print, or anything else you can think of.

New Year’s Resolutions

While I can’t make any promises, one of my main resolutions for this year is to grow my Etsy business and post more regularly on this blog. So, that ought to translate to more free SVG files for you! Just let me know if you have anything you would love to see featured here. One of my top priorities for the year is to simply do more. I don’t know about you, but I simply get lazy. When I don’t actively plan my days, I end up squandering them. So, I am resolved to try harder to stay motivated and quite simply, to be more active in every way.


Anyhow, enough about myself. What are your plans for the year? For instance, is there a new craft you would like to learn or perfect? Could you see yourself trying some hand lettering challenges on Instagram? How about knitting or sewing?

On to the Free SVG file!

Well, that is enough lead up for today. How about the free svg file? I really like this one and it goes with my resolution to be more active this year. I want to cut it out and hang it up on the wall by my desk as a daily reminder of my goals!


HAPPY NEW YEAR EVERYONE!

Posted on 10 Comments

DIY Stencils for your Silhouette Cameo or Cricuit – Use ANY design!

Have you ever tried to make your own stencils with your cutting machine? If you have, you know that your design options are limited. No fancy fonts, only stencil fonts. You can’t have any designs that have inner details, or they will not be connected to your finished stencil. Unless you want to hand position each and every element, you have to be very careful in creating or selecting your stencil design.

THE RULE FOR STENCILS

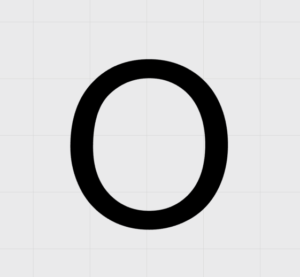
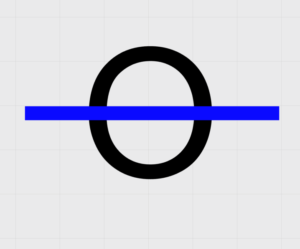
In summary, there can be no inner shapes or details in your finished stencil. If you are having trouble understanding this, think about the letter “O”. If you cut out a stencil for the “O” there will be an outer circle and an inner circle. The inner circle will simply fall out. This is why every stencil font has at least one, usually two connections to the middle of the “O”.


For example, the following is an excellent stencil design. It will cut out easily with no inner parts left to fall out.


On the other hand, this design is not so good:


Then, what if you really want to stencil a more complex image on your card? How can you create more detailed and intricate stencils? You need a stencil that looks impossible, and you need it now! Luckily for you, now you can.

A Stencil Solution

While I am sure I am not the only person to do this, it was a light bulb moment for me. Reflecting on it, I have seen videos of spray paint artists using a series of stencils to make awesome composite pictures. This method is very similar. The idea is to use two stencils instead of one so that you can have details that you can’t get with just one stencil.

Just a note on stencils in general. If you want to make one car with an image like the tools above, you are probably better off just cutting it out of card stock without any hassle converting it to a stencil. However, if you want to put the image on a bunch of things you may want to use a stencil. That way you only have to cut and weed your image once (or twice for these two part stencils) instead of over and over again.

As I outline my solution, I will illustrate with the letter “O” as a simplified case to demonstrate how it works.

My Method

    1. First, open up your image in your editing software. Typically, I open mine in Adobe Illustrator. If you don’t have access to this, Silhouette Studio, Inkscape, or Cricuit Design Space should work just fine. Here, I will illustrate with Silhouette Studio.
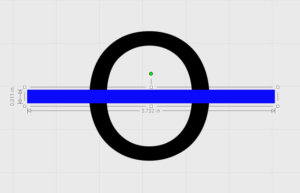
    2. Create a thin rectangle in a contrasting color to your design and place it over your image.
    3. Select both your design and the rectangle.
    4. Copy and paste the two objects. Keep them in the same relative position.
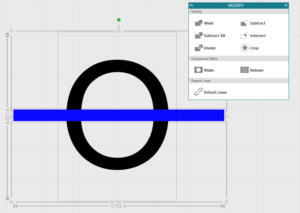
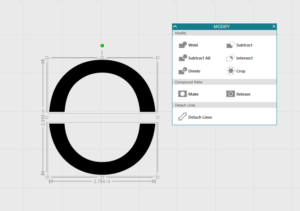
    5. Open the modify panel (or the tools to modify paths if you are working with another software). Working on just the first copy with both the “O” and the rectangle selected, Click “Subtract”.
    6. Now, select just the rectangle on the second copy of your design. Be careful not to move it out of place.
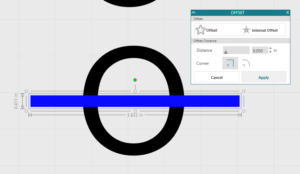
    7. Open the offset Panel. We need to enlarge it just slightly to ensure a little wiggle room in our finished stencil. Create an offset. This is something you will have to judge for yourself. I used a distance of .05 inches and square corners.
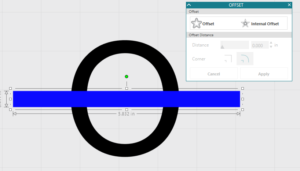
    8. Select both rectangles and weld them together. You should now have a rectangle that is just slightly bigger than the original one.
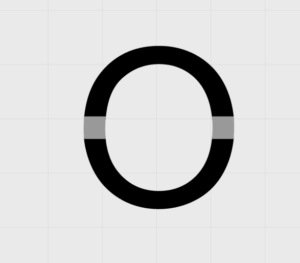
    9. Select both the rectangle and the copy of the “O”, which should still be in the same relative position. Using the Modify Panel, click “Intersect”. NOTE: If, like me, you have the whole thing disappear when you click “Intersect”, it is likely that one or both of your images are not paths. Select them, click “Object -> Convert To Path” and then try the previous step again. If you got it right, it should look something like this:
    10. Select these pieces, right click, and hit “Make Compound path”. Do this to the original pieces of the “O” as well. Here are your two paths now:
    11. Change the color and overlap them if you want to see what the finished stencil will look like.
    12. Cut your finished pieces out on separate stencils. Then use one stencil followed by the other to create an “O” with no lines through it!

    Going Further

    While the “O” was a very simple case, this method can be expanded to more complicated images. In theory, it could even have many more than two stencils to make the finished image, although I have not tried it.

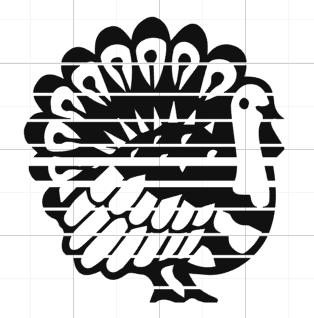
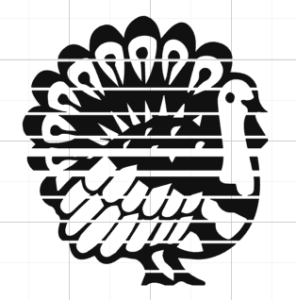
    Here is an example of a turkey that I have made into a two part stencil using an extrapolation of the method I outlined above. The key is creating enough rectangles to overlap any inner parts, there should be no islands in your finished stencils!


    Stencil Time

    I have just a few parting remarks about stencils for you. First, there are stencil materials to consider. Both Silhouette and Cricuit make “stencil” blanks and rolls. I have not tried them because I haven’t found their materials to be high quality in the past. Freezer paper (usually found near foil and wax paper) does work fairly well as a stencil for fabric. You can iron it lightly to get the waxy side to adhere, but you have to be careful not to get the stencil too wet with paint or it will bleed through.

    However, my favorite and economical stencil material is simply overhead transparency paper. It is thin and flexible and can be reused as long as you are careful. If needed, I spray the back with a light adhesive spray to adhere it to my project. You will want to play around with your cut settings, but once you get them set it cuts really well.


Posted on Leave a comment

Give Thanks SVG Hand Lettered Freebie!

Thanksgiving is coming! What better way to celebrate than to give thanks with a nice free hand lettered SVG file!? Thanksgiving is a wonderful holiday as gratitude can significantly improve your satisfaction and happiness levels! The more you appreciate what you have, the happier you will be. So, give thanks!

Personally, I have tons to be thankful for! Beautiful girls, wonderful husband, the opportunity to live in Colorado near my family again. I am sure it can be harder if you are going through a difficult time or situation in your life right now, but try to think of something, even something very small, to give thanks for. It could be the sun on your face, the warm cup of coffee, a smile on your child’s face, or even just a warm blanket. Give thanks.

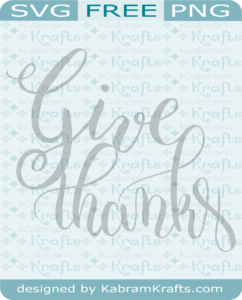
So, without further ado, here is the freebie.


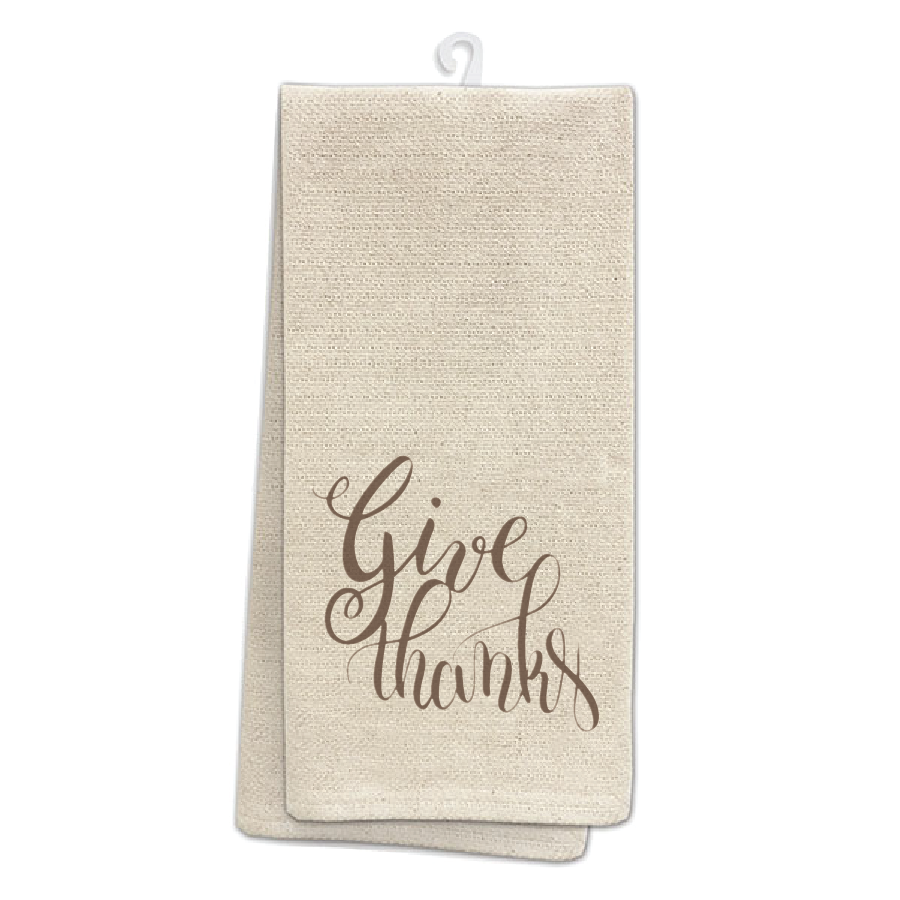
I think this file would look great on a sign, a plaque, or on a dishtowel! Sorry, I haven’t had time to try it out yet, but here is a mock up for you all the same:


And if you want to obey the command to “Give Thanks” directly, here is another free svg file you may want to check out. Make a nice thank you card and put it in the mail today. You will brighten someone’s day using these free svg files, I am sure of it!


Thank You Sentiment – Free Cutting File SVG Download


Posted on 2 Comments

Bin Labels HTV DIY – Organize your life!

Move Complete!

Have you moved lately? Well, we just moved from Michigan to Colorado! It is lots and lots of work. And requires a lot of good organization. All of which is made better by these adorable bin labels!


If you missed me, that is where I have been. Packing. Unpacking. Packing. Unpacking. Repeat.

Having grown up in Colorado, I am happy to be back and near family again.

Unfortunately, since Colorado is so awesome and everyone else wants to be here too, housing prices are much steeper here. Not just a little steeper. I’m talking 7 or 8 times steeper! For example, coming from our lovely 6 bedroom house on 4 acres in Michigan, we will have trouble finding a condo for the same price!


Getting Organized with Bin Labels

Downsizing was actually some amount of fun, until we got to our apartment and realized that getting rid of half our stuff wasn’t enough! So, that is what I have been doing the past month or so. Organizing. Getting rid of stuff. Organizing is the fun part though.

Knowing this, you can see where this project came from. It was born of necessity and the desire to have my children put their toys away so that I can preserve my sanity in our new 2 bedroom living space! Thus, the idea for our new bin labels was born. Well, it was actually in my head for quite a while. It was going to be one of my finishing touches on the playroom I was working on in Michigan. Take a look at how awesome it was!

Playroom in Michigan

Alas, it was time to move on. Hopefully someone else will move in and enjoy the fun colors and the animal alphabet that I left on the wall!

Do you also have seemingly hundreds of toys underfoot? Are you constantly frustrated with different types and sets of toys getting jumbled into one big mess? Do your kids need help knowing where everything ought to go? Then you need some of these bins and these adorable bin labels!

Take Stock of Your Items

First, you need to take stock of what you are trying to organize. For me, this meant categorizing the toys in my girls’ room and putting them in different bins. Undoubtedly, they have too many toys. However, once in bins and labeled with these cute bin labels, it looks much more manageable. Also, remember to try to match the number of categories to the number of bins you have available.

Here are the bin label categories I came up with for the toys we have:

  • DOCTOR
  • DRESS UP
  • CALICO CRITTERS
  • PLAYMOBIL
  • BOOKS ON TAPE
  • LEGO
  • MUSIC
  • CARS
  • DOLLS
  • BLOCKS
  • LITTLE PEOPLE
  • DISHES
  • FOOD
  • TOOLS

In addition, I added each of my daughter’s names so that they could have a bin of their own. Next, I looked for a simple, cute design for each category. The idea was to have a cohesive looking set of images that helped my not yet literate daughters identify each bin on their own.

Most of the images I found doing a quick google image search. Some I had to work more on to get what I wanted. The font I used is called “Mail Ray Stuff”. I really like how the images turned out. I am especially fond of the cute baby on the “LITTLE PEOPLE” bin.


Create your Bin Labels

Feel free to use my labels and images for your own personal use. However, I do not recommend using them for commercial uses as I am not positive on the copyrights of each one.


REMEMBER TO CUT THESE OUT IN REVERSE ON YOUR HTV!


REMEMBER TO CUT THESE OUT IN REVERSE ON YOUR HTV!


Quality Materials

Since this was my very first Heat Transfer Vinyl project, I wanted to use the good stuff. And, from what I hear, Siser Easy Weed is where it is at. I found a roll at my local Michaels and it was on a great sale to boot! All in all, I was very impressed by the stuff. Also, it is actually much easier to weed than Oracle vinyl that I am used to working with.

So, back to the project.

Decide how large you want things and cut it out! This is on you. Then cut out each label and weed out the extra. Your image is reversed, right?

Finally, the fun part – ironing the bin labels on and seeing the results. I followed the directions on the packaging of my HTV and used a grill mat to place over the images while ironing.

Results – Bin material matters too!

If you look at my results, you can see that some of my bins turned out spectacular. Unfortunately, some have nice imprints of the iron. This was largely due to the bins themselves. My nice large fabric IKEA ones look great. No iron imprints, just clean and crisp.


My cheap polyester bins which came from who knows where, did not hold up well. Since I didn’t want to buy new bins, I just went with it. They still work. Some are just much prettier than others!


Now, sit back and admire your work. Wait, scratch that. Go get to organizing!