Posted on 4 Comments

Pumpkin Stack SVG – Fall Freebie!

Pumpkin Stack SVG – Fall Freebie!

It is fall! It is mid-October and a pumpkin stack svg is just what you need. Halloween is coming quickly. What does your October typically look like? For me, Halloween is a chance for the kids to play dress up and have fun going trick-or-treating. I don’t get too into the ghoulish and ghastly side of the holiday. I do, however, enjoy the fall leaves, crisp air and fun fall traditions. So, pumpkins are always fun!

So, I present you with a stack of pumpkins. A cute, free svg pumpkin stack file. I think they would make a great little picture on the wall for the season. Or perhaps a little card or a temporary window decal! Whatever you use them for, I hope you enjoy.

Meanwhile, Life Goes On

By the way, I don’t know if anyone has missed me or noticed that my posts have been a bit on the few and far between side. If you have, I will tell you that life has been more hectic than normal for us. After just completing a move into a new house here in Denver in the Spring, my husband unexpectedly changed jobs.

The new job is great, the new area is great, but the timing was not! In fact, as I am writing this I am one day past my due date with our third child. We just got some moving containers delivered to our driveway. And, the furniture is being literally moved out from under me! On the bright side, we should hopefully be getting all settled into a nice new house in San Antonio in less than a month. God willing, we will be settling in to a nice new life with a brand new baby girl.

In the meantime, however, my posts are going to stay very few and far between and I have put my Etsy shop on vacation mode. While I wanted to keep it open, the fact that I will have a brand new baby and that my supplies are already packed up meant that reality trumped my desire to keep it open.

At any rate, I hope you enjoy this cutting file. I haven’t (perhaps obviously) had time to test it, but this mock up makes it look really cute.


If you happen to make something adorable with any of my files, I would love to see it!

Free Pumpkin Stack SVG Cutting File – A cute little pumpkin stack for you

Without further to do, here is the free pumpkin stack SVG file.


Check out my other SVG Files Too!

Free Pumpkin SVG File – Fall is Here!

Posted on 2 Comments

My First Day SVG Freebie File Download for Back to School Pictures

JPG - Color Example

My First Day SVG File Freebie – Just in time for back to school pictures!

Tomorrow is August. Yes, AUGUST! For many that means summer is almost gone and school is starting up. We just launched our first year of homeschooling with our oldest. It is Kindergarten time! So far, it has been a lot of fun. Still, it doesn’t seem like summer is over. Weather here has been very hot and then very stormy. This is strange weather for Colorado!


At any rate, Iam looking ahead to August. I love new school supplies. Did you know that the fat crayola markers make an excellent tool for hand-lettering? AND they don’t cost a fortune. Especially if you shop the school supply sales this coming month. The sale can be really good, so be sure to shop around. If you are like me, you may already have a good stockpile of supplies, but the sales are sooooo tempting, who can stay away?


The My First Day SVG freebie I am bringing you today is perfect for those first day of school pictures. I only went from 1st to 6th grade with the apples, because I can’t really imagine a junior high or high schooler cooperating for custom shirt school photos. However, if you have an exceptional child who will cooperate, the font is Segoe Print if you need to add other numbers or customize the text in any way.

If, like me, you would like a simplified project that mitigates the need for layering, I have you covered. Included with this download are the following welded apples with the numbers inside for a more silhouetted version. The key here is that you only need one layer of vinyl and should look adorable all the same!


So, will I do first day of Kindergarten photos? I want to, but that doesn’t mean I will. Life gets in the way. Hopefully, however, I will get on the ball with photos. We need some. Do you do professional photo shoots or just take your own? Either way, this “My First Day SVG” would be a great photo prop or t-shirt.

Free SVG Cutting File

Without further to do, here is the file. It includes each grade text and apples for you to swap in as needed. I think it would look great cut out in glitter heat transfer vinyl on a shirt. As you see above, it looks very cute on the shirt of this adorable girl I found searching for free stock photos. I wish you and your kids a happy August and hope they enjoy their first day of School!


Check out my other SVG Files Too!


Awesome Animal Alphabet Cutting File Download


Posted on 16 Comments

From Photo to SVG

Turning your Photo to SVG file has satisfying results

From Photo to SVG: The topic of taking a photo and making an SVG is one I keep coming back to. Perhaps it is because custom images from your own photos are simply delightful. Also, it is a great way to get some adorable silhouettes just in general. Whatever your reason for wanting an SVG from your photograph, you can do it! It may take some patience and attention to detail, but it is totally worth it.

My first attempt at a silhouette was one of our bunny rabbit Geronimo. It came out nicely, but wasn’t a very hard shape. With this shape I basically made a bunch of little shapes and then combined them with the path merge tools.

from photo to svg Geronimo the bunny silhouette by kabram krafts
Geronimo the Bunny

Then, for my second attempt I created some custom artwork for my girls’ playroom. These images were definitely more complex and took a lot longer, but with spectacular results. I used a different approach for these images. First, I edited the original photos to make them as black and white as possible.

gif of silhouette studio trace function from photo to svg

Second, I traced the images using Inkscape (you can also use Adobe Illustrator or your cutting machine’s software). Lastly, and most tediously, I hand edited the nodes of the path until it was just the way I wanted it. At last, you have converted your photo to svg.

From Photo to SVG

While I am not going to go into detail in this post as it is not my first on this topic, I will hit a few important points.

Check out this post if you want the details!

First, you need to find the right photo – a crisp, clean silhouetted photo with nothing in the background will be much easier to create a custom silhouette cutting file from than one that has a lot going on.

Second, you want to use a photo editing software to get it as close to a silhouette as you can from the start so it will be easier to trace. Like the ones shown below.

image edited for contrast with father and daughters ready for converting photo to svg
image edited for contrast of girls in tunnel ready for converting photo to svg

Third, you trace the image using a Vector capable software to go from your photo to svg file. I have used Silhouette Studio, Inkscape, and Adobe Illustrator.

Lastly, unless you are really lucky, there will be some hand editing to do to get it just right. And sometimes, when the background of the image just won’t cooperate, you may just have to use the path tool and trace your image point by point!

From Photo to SVG: my latest results

While I haven’t cut these images out yet, I can’t wait to do so. From pictures of my daughters swinging, I arrived at these adorable cutting files. One was begging for extra detail and ended up not being a true silhouette. I tried my best to make it all one connected path, but couldn’t see a way to connect in the facial details without compromising on the cuteness!

example of detailed photo to svg project

For the second image, I went true silhouette all the way. There is enough detail in the overall shape that you can still tell what is going on in the image.

from photo to svg despite a cluttered background image

While they may not hold the same emotional signifigance for you as they do for me, I am posting my final SVG files here because they are simply so adorable. Feel free to use them for your own personal projects if you so desire or make your own silhouettes using some of these photo to svg methods!

My silhouette cameo is my go to for creating beautiful home decor from these files!

To download these files, just click the DOWNLOAD button below.

from photo to svg free svg images of girls on swings

Thanks for stopping by and have a wonderful April!

FROM PHOTO TO SVG
Posted on 8 Comments

Free SVG four leaf clover for St. Patrick’s Day!

UPDATED POST CLICK HERE!

Can you believe March is here? Well, here I have a free SVG file to remind you that St. Patrick’s Day is on its way. So, who likes four leaf clovers? Did you ever spend hours in a field trying to find one? I feel like I did as a kid, but I don’t remember ever finding one.

Do you celebrate St. Patrick’s Day? We didn’t do much for it growing up, except for wear some green to avoid being pinched! Occasionally we would go out for lunch or dinner to somewhere vaguely Irish. What are your traditions? Is it a Holiday you take note of or just skip over? I have never been a big drinker, so I imagine that those who enjoy that pastime may do more to celebrate than I do.

Free SVG Cutting File

At any rate, this is a really cute little four leaf clover cutting file. I think it would look great cut out in glitter heat transfer vinyl on a shirt. Maybe with a cute little saying of some sort underneath? Well, I hope you enjoy! And have a fabulous March!!

Here I present to you this St. Patrick’s Day SVG file freebie, the famed four leaf clover!

Check out my other SVG Files Too!

And, if you are already looking forward to Easter, check out these adorable little Easter Egg cutting files!

Posted on Leave a comment

Start your New Year off with a free SVG file!

Make your 2018 a year filled with crafting. You can start by using this free SVG New Year’s file to make an awesome motivational decoration, picture, print, or anything else you can think of.

New Year’s Resolutions

While I can’t make any promises, one of my main resolutions for this year is to grow my Etsy business and post more regularly on this blog. So, that ought to translate to more free SVG files for you! Just let me know if you have anything you would love to see featured here. One of my top priorities for the year is to simply do more. I don’t know about you, but I simply get lazy. When I don’t actively plan my days, I end up squandering them. So, I am resolved to try harder to stay motivated and quite simply, to be more active in every way.


Anyhow, enough about myself. What are your plans for the year? For instance, is there a new craft you would like to learn or perfect? Could you see yourself trying some hand lettering challenges on Instagram? How about knitting or sewing?

On to the Free SVG file!

Well, that is enough lead up for today. How about the free svg file? I really like this one and it goes with my resolution to be more active this year. I want to cut it out and hang it up on the wall by my desk as a daily reminder of my goals!


HAPPY NEW YEAR EVERYONE!

Posted on 10 Comments

DIY Stencils for your Silhouette Cameo or Cricuit – Use ANY design!

Have you ever tried to make your own stencils with your cutting machine? If you have, you know that your design options are limited. No fancy fonts, only stencil fonts. You can’t have any designs that have inner details, or they will not be connected to your finished stencil. Unless you want to hand position each and every element, you have to be very careful in creating or selecting your stencil design.

THE RULE FOR STENCILS

In summary, there can be no inner shapes or details in your finished stencil. If you are having trouble understanding this, think about the letter “O”. If you cut out a stencil for the “O” there will be an outer circle and an inner circle. The inner circle will simply fall out. This is why every stencil font has at least one, usually two connections to the middle of the “O”.


For example, the following is an excellent stencil design. It will cut out easily with no inner parts left to fall out.


On the other hand, this design is not so good:


Then, what if you really want to stencil a more complex image on your card? How can you create more detailed and intricate stencils? You need a stencil that looks impossible, and you need it now! Luckily for you, now you can.

A Stencil Solution

While I am sure I am not the only person to do this, it was a light bulb moment for me. Reflecting on it, I have seen videos of spray paint artists using a series of stencils to make awesome composite pictures. This method is very similar. The idea is to use two stencils instead of one so that you can have details that you can’t get with just one stencil.

Just a note on stencils in general. If you want to make one car with an image like the tools above, you are probably better off just cutting it out of card stock without any hassle converting it to a stencil. However, if you want to put the image on a bunch of things you may want to use a stencil. That way you only have to cut and weed your image once (or twice for these two part stencils) instead of over and over again.

As I outline my solution, I will illustrate with the letter “O” as a simplified case to demonstrate how it works.

My Method

    1. First, open up your image in your editing software. Typically, I open mine in Adobe Illustrator. If you don’t have access to this, Silhouette Studio, Inkscape, or Cricuit Design Space should work just fine. Here, I will illustrate with Silhouette Studio.
    2. Create a thin rectangle in a contrasting color to your design and place it over your image.
    3. Select both your design and the rectangle.
    4. Copy and paste the two objects. Keep them in the same relative position.
    5. Open the modify panel (or the tools to modify paths if you are working with another software). Working on just the first copy with both the “O” and the rectangle selected, Click “Subtract”.
    6. Now, select just the rectangle on the second copy of your design. Be careful not to move it out of place.
    7. Open the offset Panel. We need to enlarge it just slightly to ensure a little wiggle room in our finished stencil. Create an offset. This is something you will have to judge for yourself. I used a distance of .05 inches and square corners.
    8. Select both rectangles and weld them together. You should now have a rectangle that is just slightly bigger than the original one.
    9. Select both the rectangle and the copy of the “O”, which should still be in the same relative position. Using the Modify Panel, click “Intersect”. NOTE: If, like me, you have the whole thing disappear when you click “Intersect”, it is likely that one or both of your images are not paths. Select them, click “Object -> Convert To Path” and then try the previous step again. If you got it right, it should look something like this:
    10. Select these pieces, right click, and hit “Make Compound path”. Do this to the original pieces of the “O” as well. Here are your two paths now:
    11. Change the color and overlap them if you want to see what the finished stencil will look like.
    12. Cut your finished pieces out on separate stencils. Then use one stencil followed by the other to create an “O” with no lines through it!

    Going Further

    While the “O” was a very simple case, this method can be expanded to more complicated images. In theory, it could even have many more than two stencils to make the finished image, although I have not tried it.

    Here is an example of a turkey that I have made into a two part stencil using an extrapolation of the method I outlined above. The key is creating enough rectangles to overlap any inner parts, there should be no islands in your finished stencils!


    Stencil Time

    I have just a few parting remarks about stencils for you. First, there are stencil materials to consider. Both Silhouette and Cricuit make “stencil” blanks and rolls. I have not tried them because I haven’t found their materials to be high quality in the past. Freezer paper (usually found near foil and wax paper) does work fairly well as a stencil for fabric. You can iron it lightly to get the waxy side to adhere, but you have to be careful not to get the stencil too wet with paint or it will bleed through.

    However, my favorite and economical stencil material is simply overhead transparency paper. It is thin and flexible and can be reused as long as you are careful. If needed, I spray the back with a light adhesive spray to adhere it to my project. You will want to play around with your cut settings, but once you get them set it cuts really well.


Posted on 3 Comments

Hand Lettered Art on a Watercolor Background – Free Hand Lettered SVG file too!

DIY Hand Lettered Art Project

Welcome to my website and today’s journey through my hand lettered artwork project! Have you tried hand lettering? With all the amazing hand lettering on Pinterest and Instagram, I just couldn’t stay away. Such pretty lettering ought to be admired by imitation, in my opinion! 

Well, my hand lettering led to water brush pens and watercolors, which led in turn to watercolor doodles. Then, I saw this on Instagram. Watercolor hexagons! Perfect, I thought, I can usually make patterns and I love playing with the colors. Of course, I didn’t attempt the project free-handed, like the lady I saw as my inspiration. We’ll save that for a later date.

Instead, I drew nice little evenly spaced guidelines for myself. I used the materials listed below. These are Amazon affiliate links, but buy wherever you like! I generally buy new supplies at the craft stores with coupons. I love coupons.

Very, very relaxing, at least for me! Try to leave a little border between the hexagons. I found that it helped to put a dot where each corner ought to go and then connect the dots. You can also add a little extra color to the hexagon while it is still wet to get some fun variation!

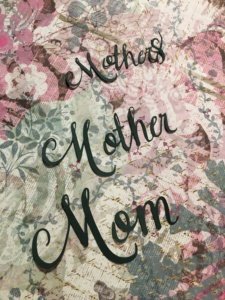
Adding a Hand Lettered Word, Saying, or Sentiment

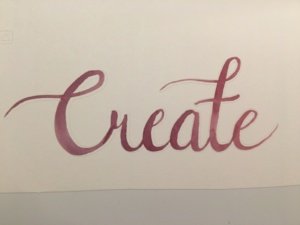
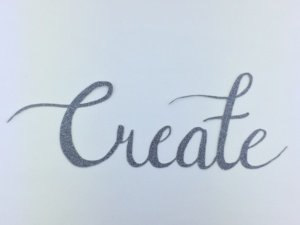
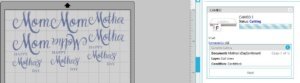
I don’t know if it is a craze right now or not, but hand lettering is highly addicting! For my piece of craft room artwork, I thought “Create” would be an apt word to add. I used my Pentel water brush again to letter this on another piece of watercolor paper with the plan to cut it out and put it on top of my hexagon masterpiece.

create watercolor

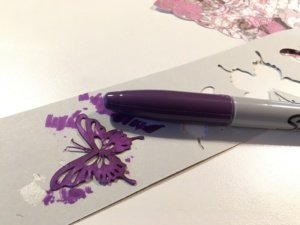
As a sidenote, I have also been playing with brush markers for hand lettering practice. Take a look at my Instagram feed if you want to see what I have been up to in my spare time.  Here are the pens I have been playing with (there are many more that I want to try as well!):

Hand Lettering Tools I have been playing with lately


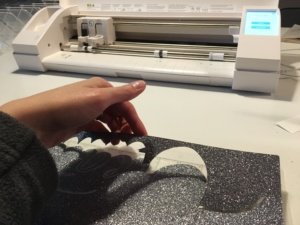
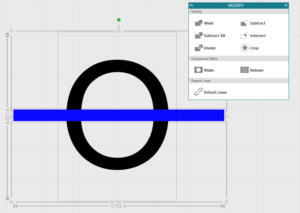
After it dried, I cut the watercolor paper down a bit and stuck it on my PixScan mat for my Silhouette Cameo to cut out.

create watercolor on pixscan mat

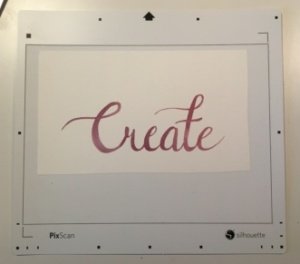
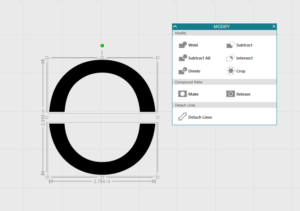
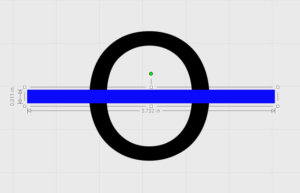
After several tries, it finally registered and cut. While it went through and cut smoothly, it was off a bit. I took it off and played around with it a bit on top of the hexagons.

create watercolor

It would have been okay, but I didn’t really like the look of it on top of the hexagons anyhow. So, I scrapped it, and kept just the outline.

When in doubt, use Glitter!

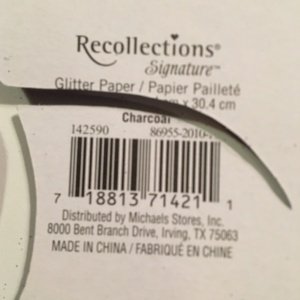
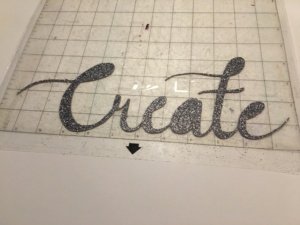
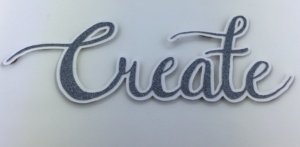
Glitter to the rescue! I found this lovely piece of VERY THICK glitter paper in a nice dark gray. It looked like it would go well, so I set about to cut out my lettering. Does anyone know if this particular glitter cardstock is thicker than normal?


I have not previously cut out glitter cardstock. Looking in the materials list on my silhouette, I found and choose the “glitter cardstock” settings. After running the file through the cutter, I pulled it out. Sadly, it was not cut all the way through.glitter in my blade

So, I stuck it back in the Silhouette Cameo for another double-cut run through. Took it out, and it was still not cut through. This time I checked my blade to find it filled with glitter.

finally it cut through!

After cleaning it out, I upped the blade depth a bit and stuck it back in. Almost this time! Cleaned out the blade again. Fourth time was a charm and it looked great!

create cut in glitter cardstock

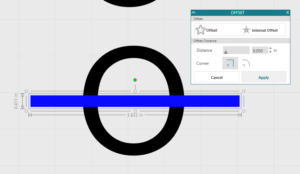
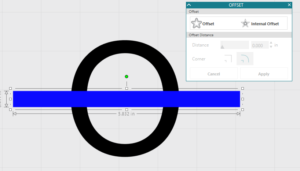
Persistence paid off and I was very thankful that it stayed aligned despite its many trips in and out of the machine. I then did a quick offset and cut a second one out of another piece of white cardstock. Isn’t it pretty?

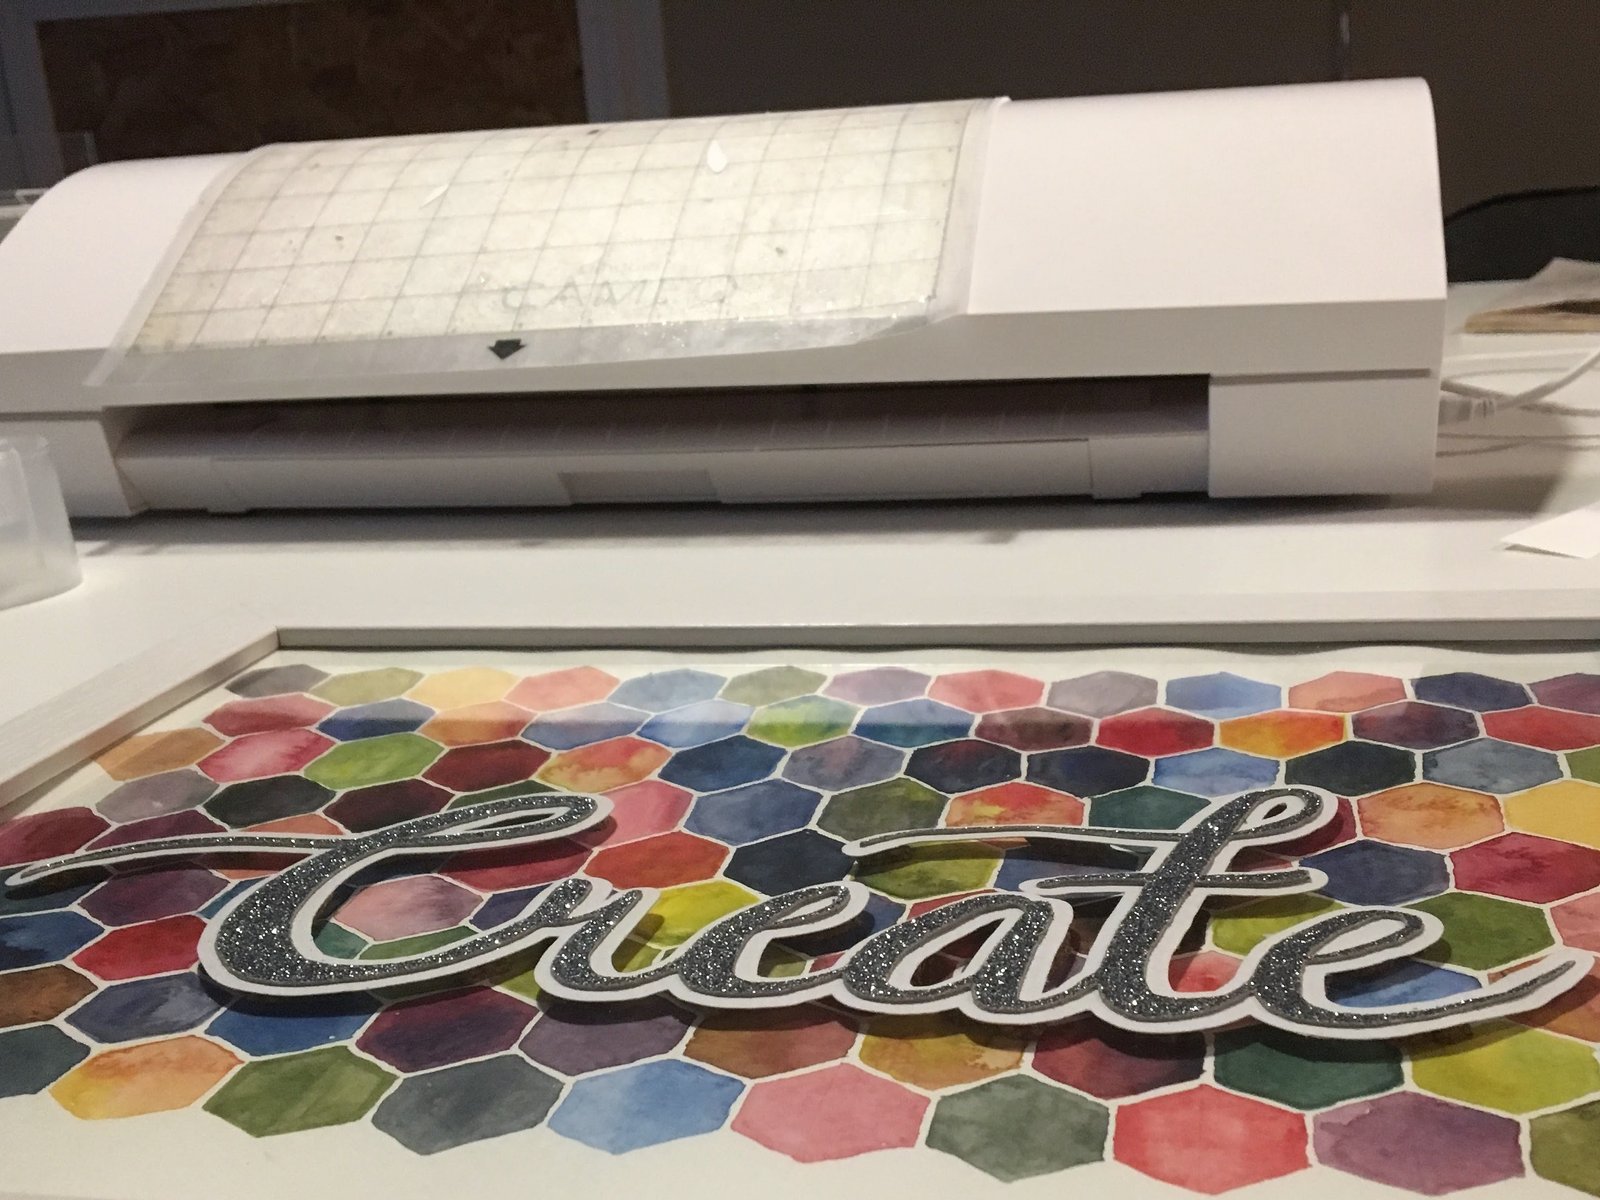
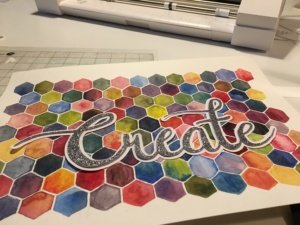
Look at how pretty it looks on top of the hexagons! I am thrilled that the 4 times through the Silhouette Cameo paid off. Just in case you didn’t put this together, that is 8 cutting passes since it was set to double cut!

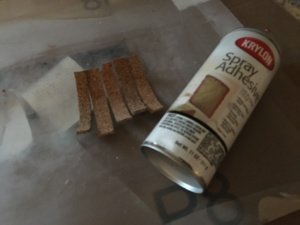
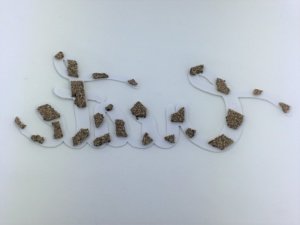
Now, it just needed a little extra depth. For this, I turn once again to my large supply of cork scraps. Use anything with a bit of thickness, I just have a lot of cork scraps lying around from making coasters!

In fact, if you need some coasters, please head over to my Etsy shop and take a look. I welcome custom orders if there is something in particular you are looking for!

[etsy-include=KabramKrafts;21231028]

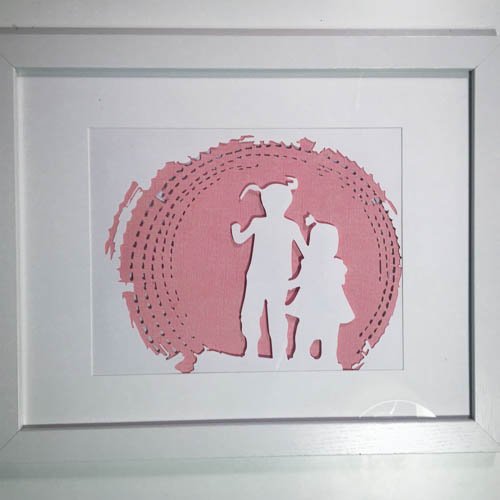
Also, check out the other pictures I made for my playroom using this same technique.

Except, this time, I just sprayed the cork on both sides with spray adhesive. That seemed to do the trick nicely! Also, I didn’t get any photos of this, but I adhered the glitter cardstock to the offset white cardstock cut.

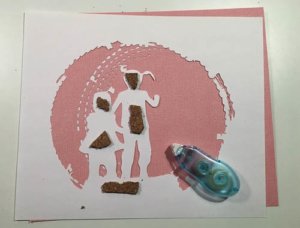
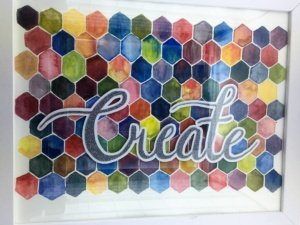
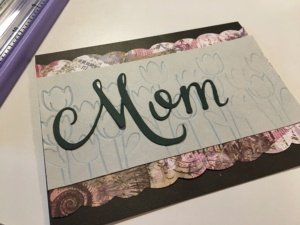
Almost Done! Now just position your lovely hand lettering on your lovely hand painted background

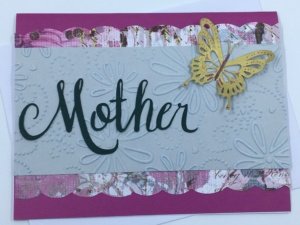
Beautiful! All set to frame.

A nice little glamour shot of my framed artwork next to my Silhouette Cameo.


And, if you were waiting for this, I’m sorry for the long post. Here is the FREE HAND LETTERED CUTTING FILE! Just click the link below and the free SVG file should download.
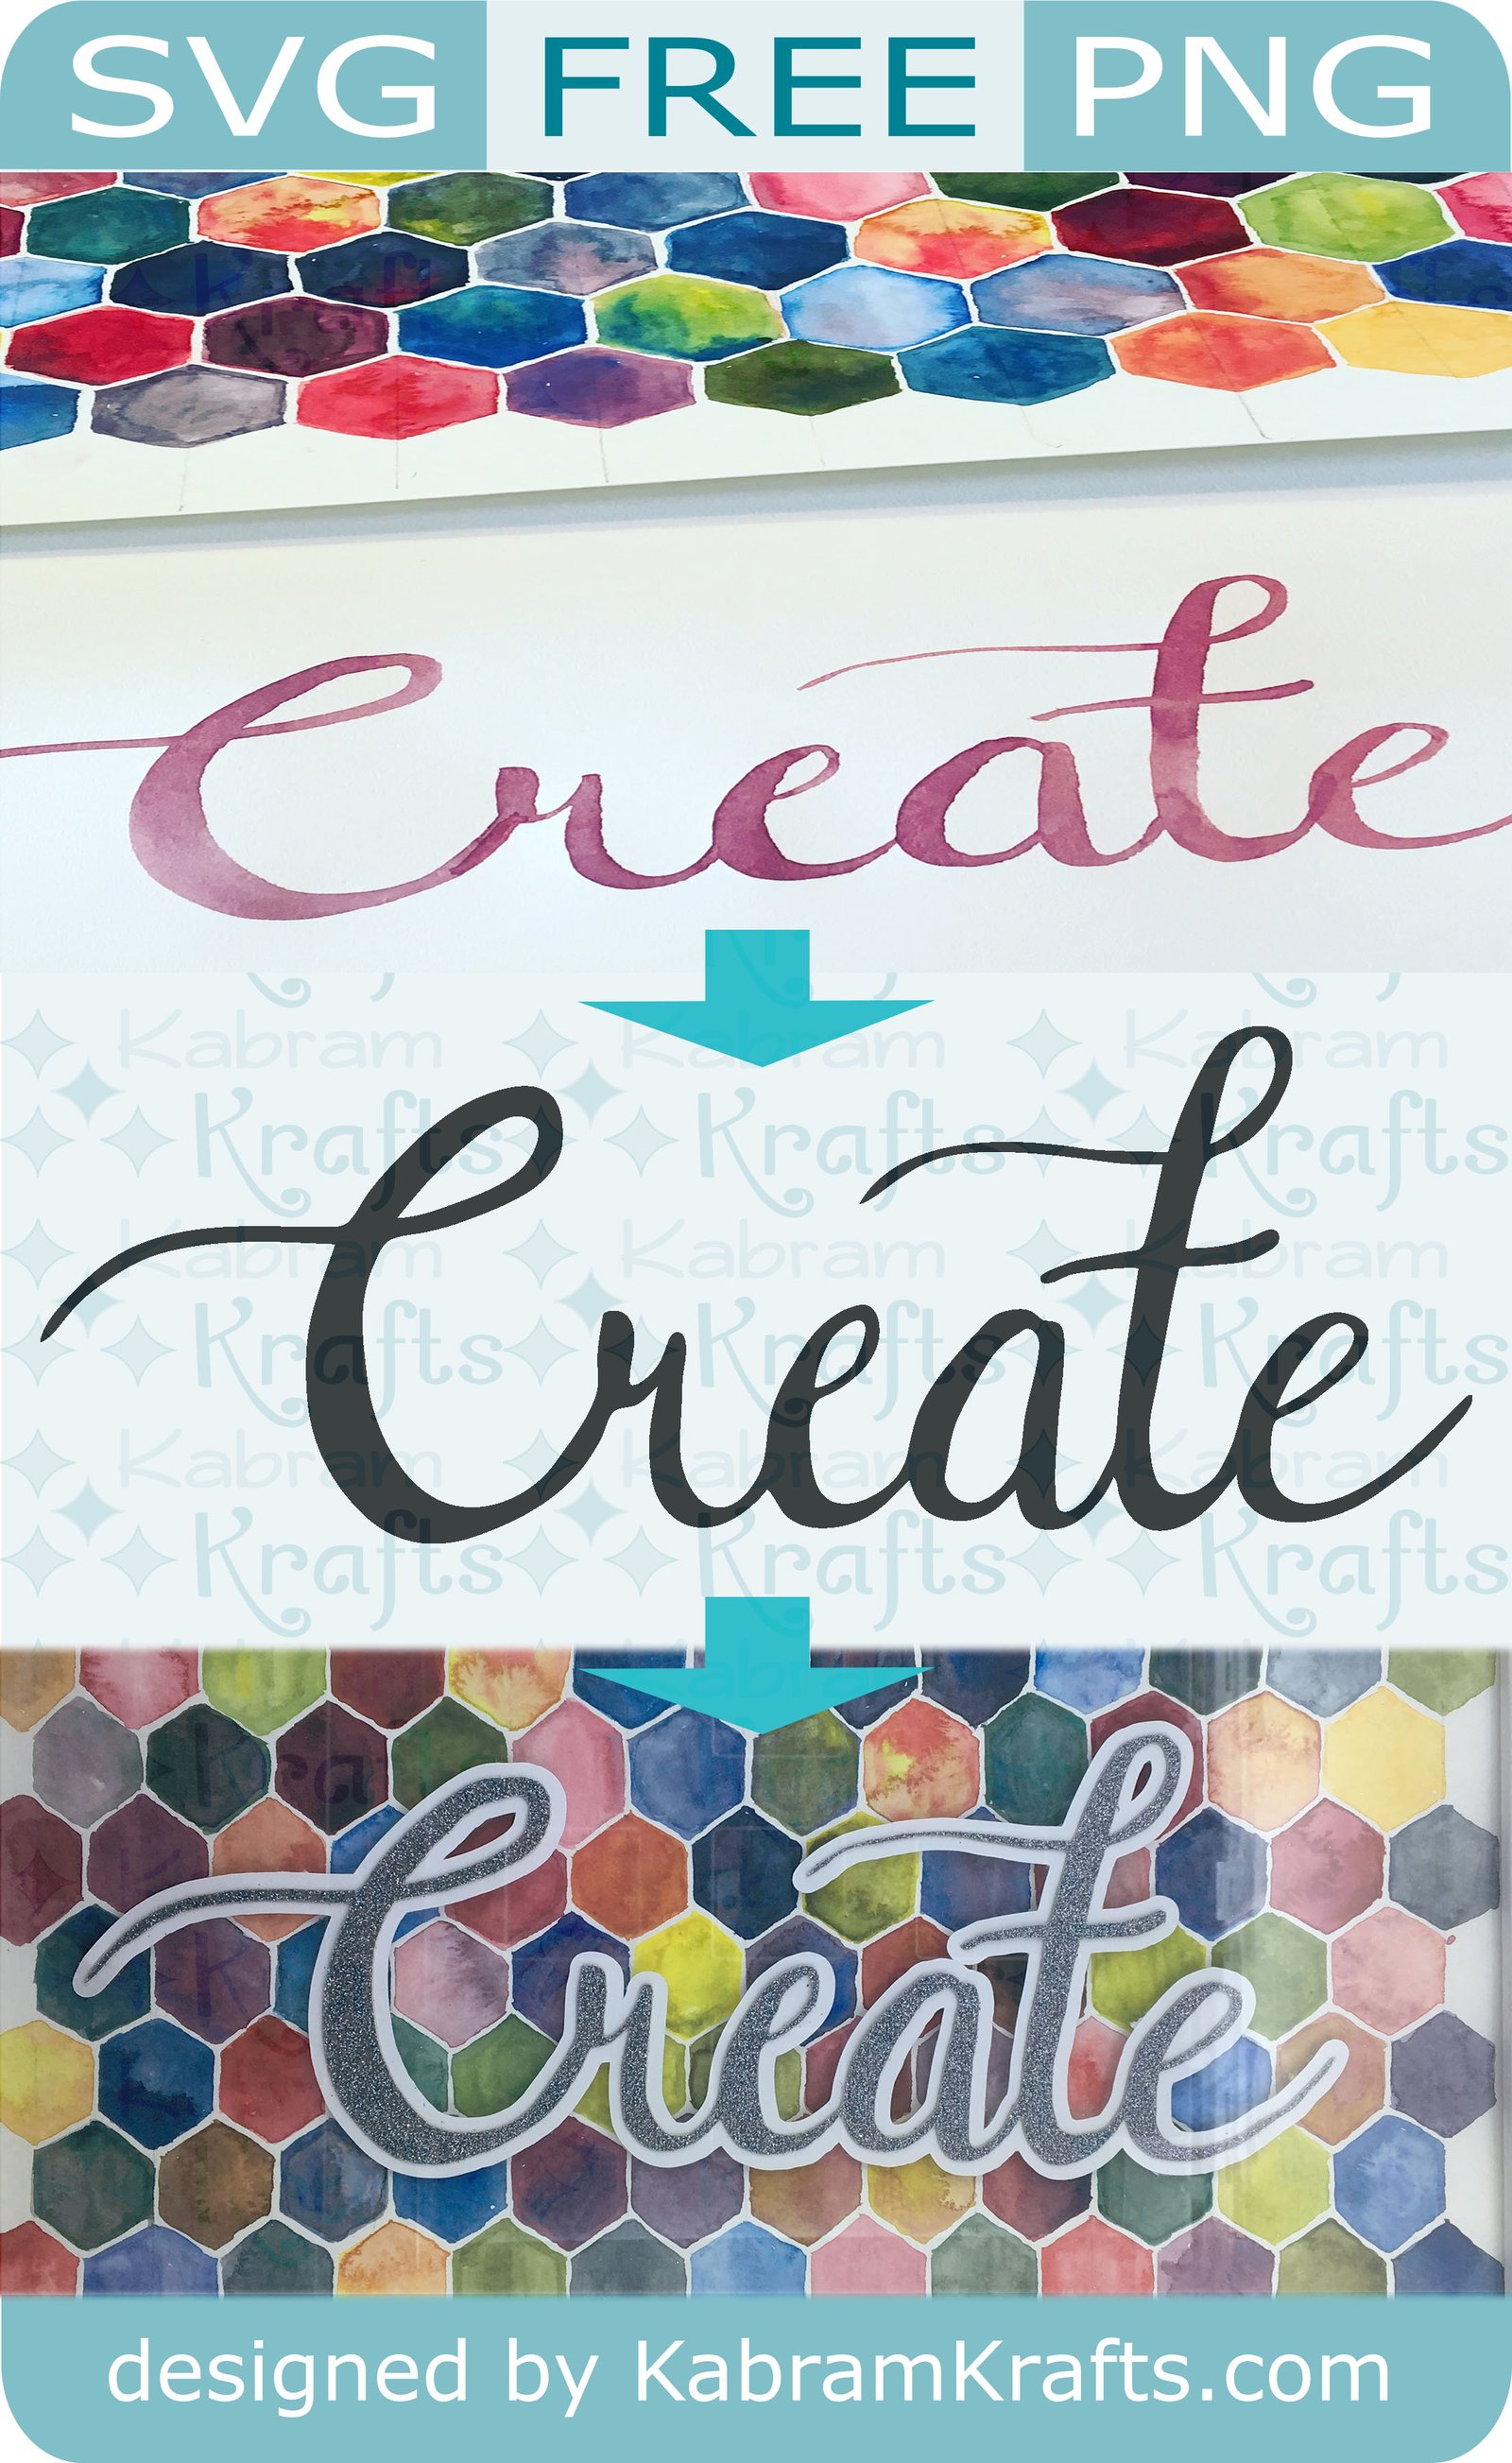


Posted on Leave a comment

Mother’s Day Card Making with the Silhouette Cameo

Happy Mothers Day

Mother’s Day!

Hello to all you of you mothers out there! This image of a mother and baby is beautiful, don’t you think. I really want to make it into a cutting file, of course, but haven’t captured it well enough in my attempts yet. I will share my results though if I do succeed!

Good news if you create your own cards – there is still time to get that Mother’s Day card out of your head and onto the paper for your own mother. Especially if she lives nearby!

Also, though a bit more somber, I wanted to acknowledge all the bereaved mothers out there too. There are many women who are mothers, but do not have a child to hold. This day may hold its own meaning for them as well. Please think of them this week and don’t be afraid to say something to acknowledge them and their pain. At least, this is what I have learned from an article I read recently shared by a friend who knows this pain!

Hand Lettered

On a lighter note, here is the pretty little watercolor lettering page I started this process with. Just recently I have started playing with watercolors. I just started, so don’t judge too harshly, but I am having a lot of fun! And, I am also having fun with hand lettering.

More particularly, I have discovered the water brush pen! It is a pen. It is a brush. It is full of water. Awesome.

If you want to play with one, these are the two I have currently. I think I like the Pentel one better, but I’m not sure.

  1. Pentel Medium Brush Pen 
  2. Ranger Ink Water Brush Pen Fine Detail
  3. A lot of other ones online look great, but I just got the ones I could find in the craft stores immediately. No patience here!

Simply moisten some water color ink, dip your water brush pen in and have fun.

Mom Mother Mother’s Day on the Screen

Next, I traced my lettering in Adobe Illustrator. In the past, I have used Inkscape forthis and it works well too (and is free!). There are plenty of tutorials on this around, but I may add my own at some point as well. Here is what I ended up with in Silhouette Studio at the end of the day.

Once I cut it out, I realized that the “HAPPY” and “DAY” parts of my lettering were too tiny for me to hassle with. So, I opted to just hand-letter those words in on my final cards.

Mother’s Day Card Construction Time!

Then, construct your card. Many of you, I’m sure, have more card making experience than I. However, a few layers, a little texture from my embossing folders, and these sentiments made for a pretty nice looking card.

I also cut out a few of the butterflies that came with the Silhouette Cameo (I think).

Thought I wanted this in silver, but I changed my mind. Sharpie to the rescue!

Here is my finished product and the cutting file for the sentiments too!

I made two cards. One for me to send, and one for my husband. Who knows if my mother-in-law would get one otherwise? Plus, she loves butterflies.


Mothers Day Card on Green


Mothers Day Card on Purple

If you need ideas for the card base, take a look at this card. She makes absolutely gorgeous free cutting files! Or, take a look at the pretty floral cards I made a while back. You will need to scroll to the end of this post.

And, what you might have been waiting for all along, the promised Mother’s Day cutting file!


And, what would a post be without a nice little picture for Pinterest?


Posted on Leave a comment

Mommy Duck and Ducklings Card


Ducklings! 

A mommy duck and ducklings just screams Spring! I am so glad that Spring has arrived and the flowers and birds have come to stay a while.

We had a little yellow duckling once. Sadly, it was a part of our failed run with guinea hens and a duck. Apparently, we have a hungry m
ink nearby good enough to weasel in almost anywhere.

Find the FREE SVG File in THIS POST

Happily, this little SVG cutting file is much more cheerful in nature. The bow, the ducklings, the flowers, it is hard to pass up.


Pretty Little Cards

Well, I have finally gotten around to actually cutting out this little file from a while back. Take a look at the original post for this cut file if you would like the free svg file download.

ducklings cutout

You can see the cute little results. You can also see my first experiment with watercolor for a background. While it looks nice enough, I think I have significant room for improvement!

two duckling cutouts

Sentiment?

As of today, they are ready to go on cards but haven’t been assembled yet.

ducklings in hand


What sentiment would you attach to these? Is there something nice and springy? Or perhaps a simple “hello”? I may try to incorporate it into a Mother’s Day card.

Thanks for stopping by. Have a wonderful Spring!

~Kristin


Ducklings

Posted on 2 Comments

HOPE – free svg file download – hope for the future!

Hope.

I ALWAYS NEED HOPE!

Hope is what I feel as though I need lately. Sometimes life is heavy whether you have good reasons or not. As Easter approaches, it reminds me that there is a lot to appreciate and a wonderful source for true joy and true hope. However, it can often be hard to internalize it!

While I was going to create a lovely lettering file to give you a very nice free svg file download, I found one lovelier than I could make already in existence!


While I’m not sure where this was originally posted, everywhere I found it credited it to José. This is the location I got the image I used to create this SVG from.

Well, I HOPE you enjoy this free svg file download. It is a beautiful hand lettered expression and I would love to see it framed on my wall in the near future! Hoping all is well for you and yours, enjoy this free svg file download. Alright, I am done with the hope puns. For now.

And, while you are here, stop by and get this adorable free duckling svg file. This one also need a frame. It most definitely needs a frame.

These ducklings are Ready for Spring. Are you??