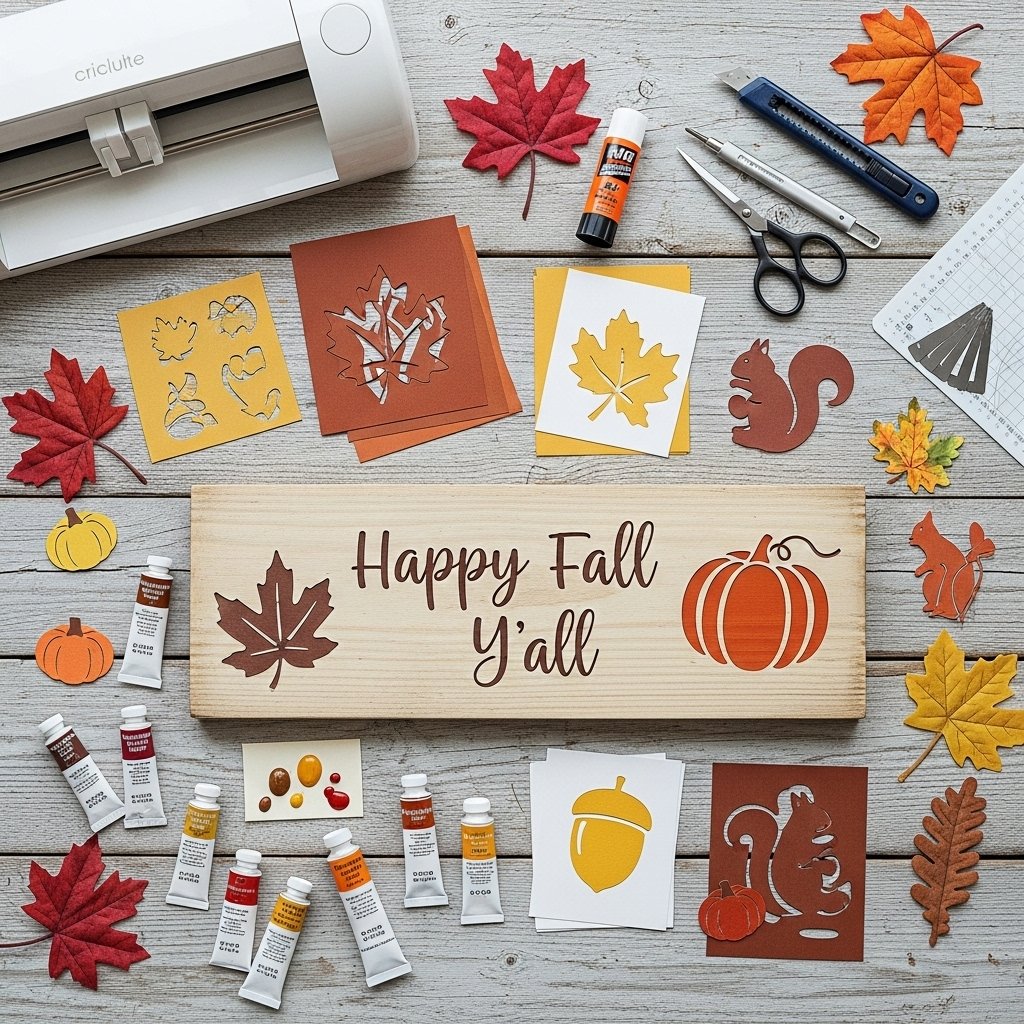
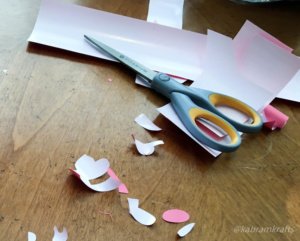
SVGs meet traditional crafting — perfect for fall and early winter projects!
SVGs Aren’t Just for Vinyl — Let’s Mix It Up!
If you’ve been crafting with SVGs for a while, you probably think of them as designs for vinyl decals or laser cuts — but they’re so much more versatile! As the weather cools and we spend more time inside, it’s the perfect season to experiment with mixed media crafting — blending paper, fabric, paint, and wood with your favorite SVG files.
Today, I’m sharing a few ideas to help you bring your SVG designs to life in new, tactile ways that add warmth and dimension to your projects.
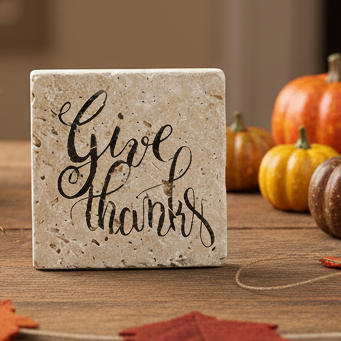
🎨 Project 1: Stone Coasters or Trivets with Laser-Cut or Cricut Stencil Overlay
SVGs make excellent stencils for coasters – stone, wood, etc. Cut your design from removable vinyl or transparency film to create a crisp stencil overlay. Then paint through it onto your project, let it dry, and peel it back for that professional look.
Try this:
Use a simple quote SVG (“Give Thanks,” “Bless This Home,” or “Stay Cozy”).
Cut from stencil vinyl using your Cricut or laser cutter.
Paint the sign in warm autumn tones — deep orange, mustard, and cream.
Tip: If you’re using a laser-cut stencil, tape the edges down well before painting to avoid overspray.Connect
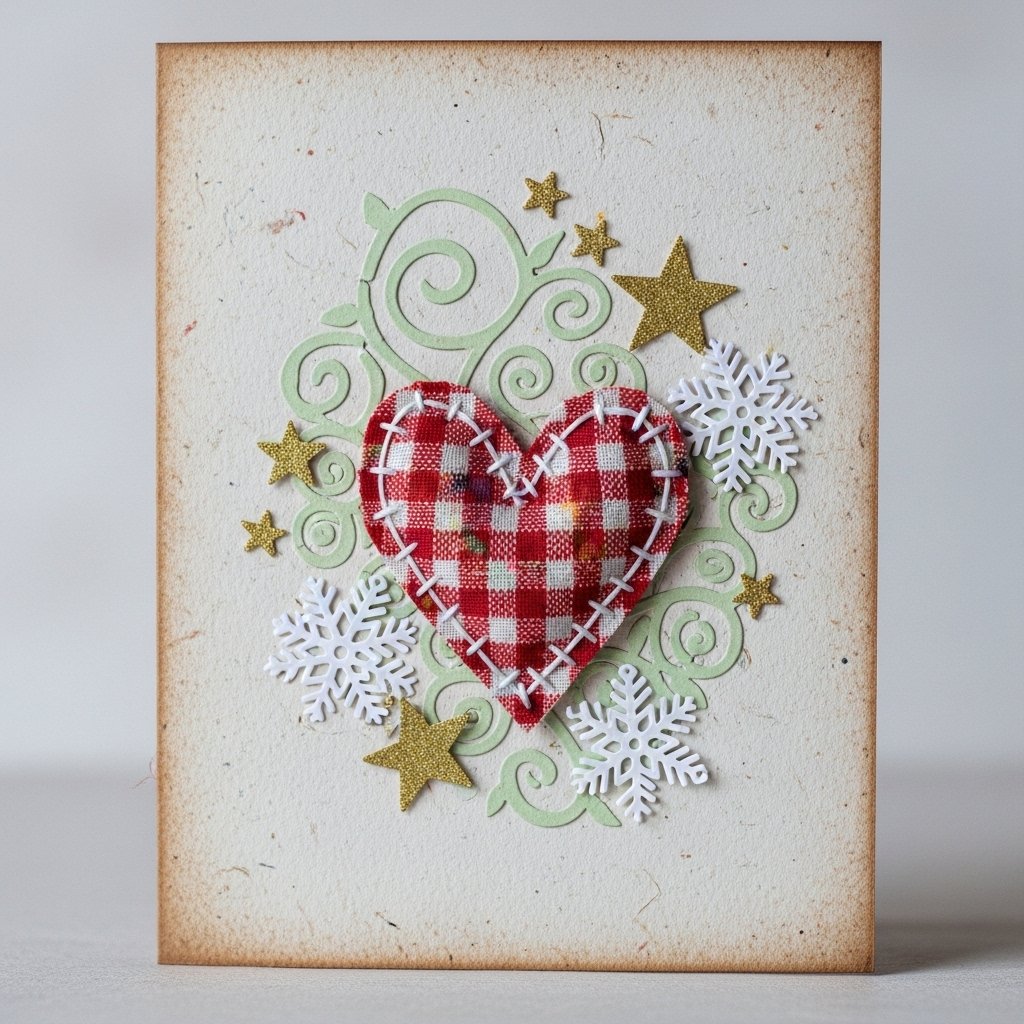
✂️ Project 2: Paper + Fabric Combination Cards
Combine SVG-cut cardstock shapes with fabric scraps or felt pieces for texture and charm. You can even stitch or glue them onto handmade cards or gift tags for a rustic look.
Try this:
Cut leaves, pumpkins, or stars from paper and layer over a square of burlap or cotton.
Add a stitched border with thread or a faux-stitch pen.
Use heat-bond or craft glue to hold fabric in place.
This project is great for Thanksgiving place cards or early winter gift tags — fast, personal, and perfect for using up your scrap bin!
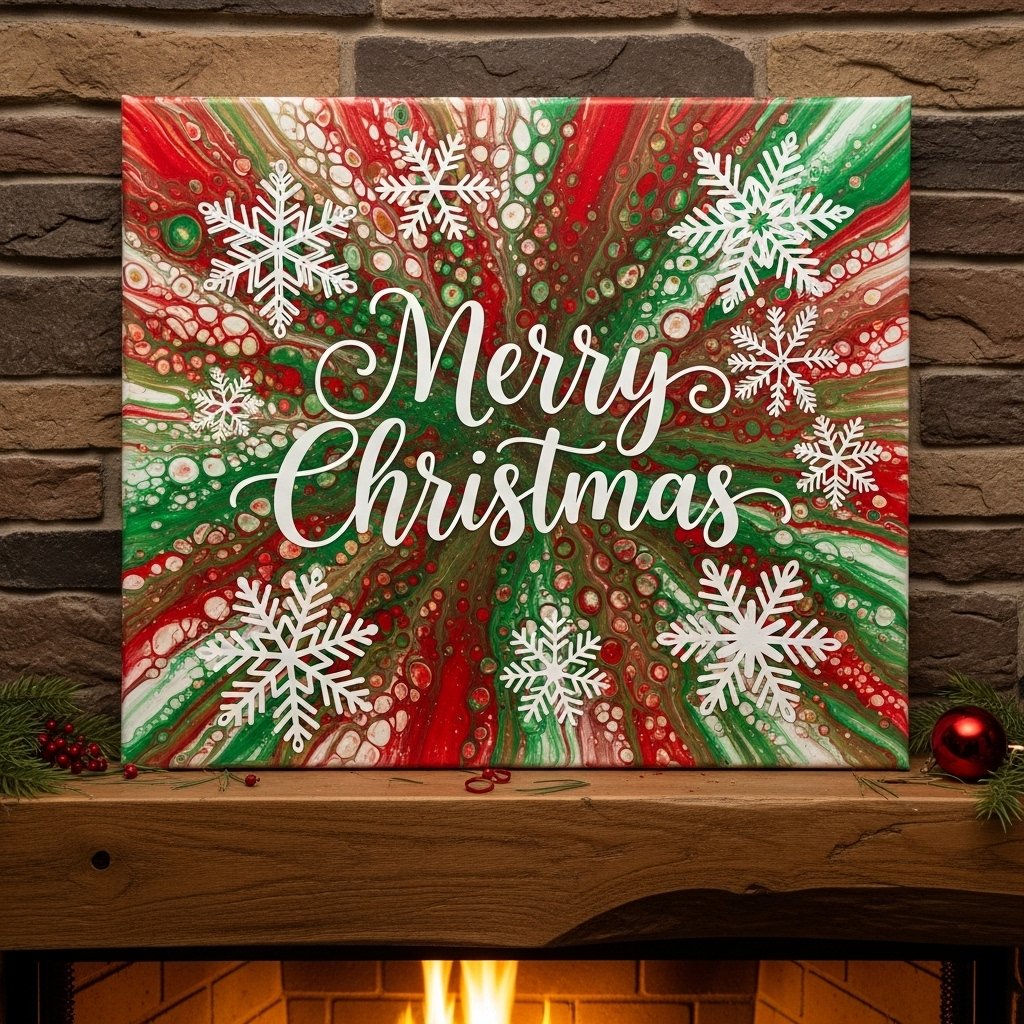
🖼️ Project 3: Vinyl Accents on Painted Canvases
A painted canvas gets an instant upgrade with vinyl embellishments. Try mixing acrylic paint backgrounds with SVG-cut vinyl words, shapes, or outlines to add contrast and polish.
Try this:
Paint a simple winter background (snowy scene, ombre blue, or abstract swirls).
OR – Try acrylic paint pouring for something different and fun!
Add “Joy,” “Peace,” or “Thankful” in adhesive vinyl.
Finish with layered snowflakes, stars, or hearts cut from metallic vinyl.
You can even seal it with Mod Podge or clear acrylic spray for a long-lasting, mixed media effect.
🧩 Tips for Mixed Media Success
Layering: Always plan from base to top — paint → paper → vinyl → embellishments.
Adhesives:
Paper & fabric: Glue sticks or double-sided tape.
Wood & canvas: Mod Podge or spray adhesive.
Vinyl: Stick-on vinyl or transfer tape.
Sealing: For pieces combining materials, a matte acrylic sealer or decoupage glue helps protect and blend layers.
📸 Share Your Mixed Media Creations!
I’d love to see how you combine SVGs with other crafting materials! Share your projects on social media with #KabramKrafts — it helps inspire others and might just get featured in a future roundup.
Mixing SVGs with traditional crafts opens up endless creative possibilities. Whether you’re layering vinyl on canvas, painting through a stencil, or sewing fabric accents onto cards, the beauty of mixed media is that it’s personal and perfectly imperfect.
Grab your glue, brushes, and cutting machine — and let’s make something amazing!
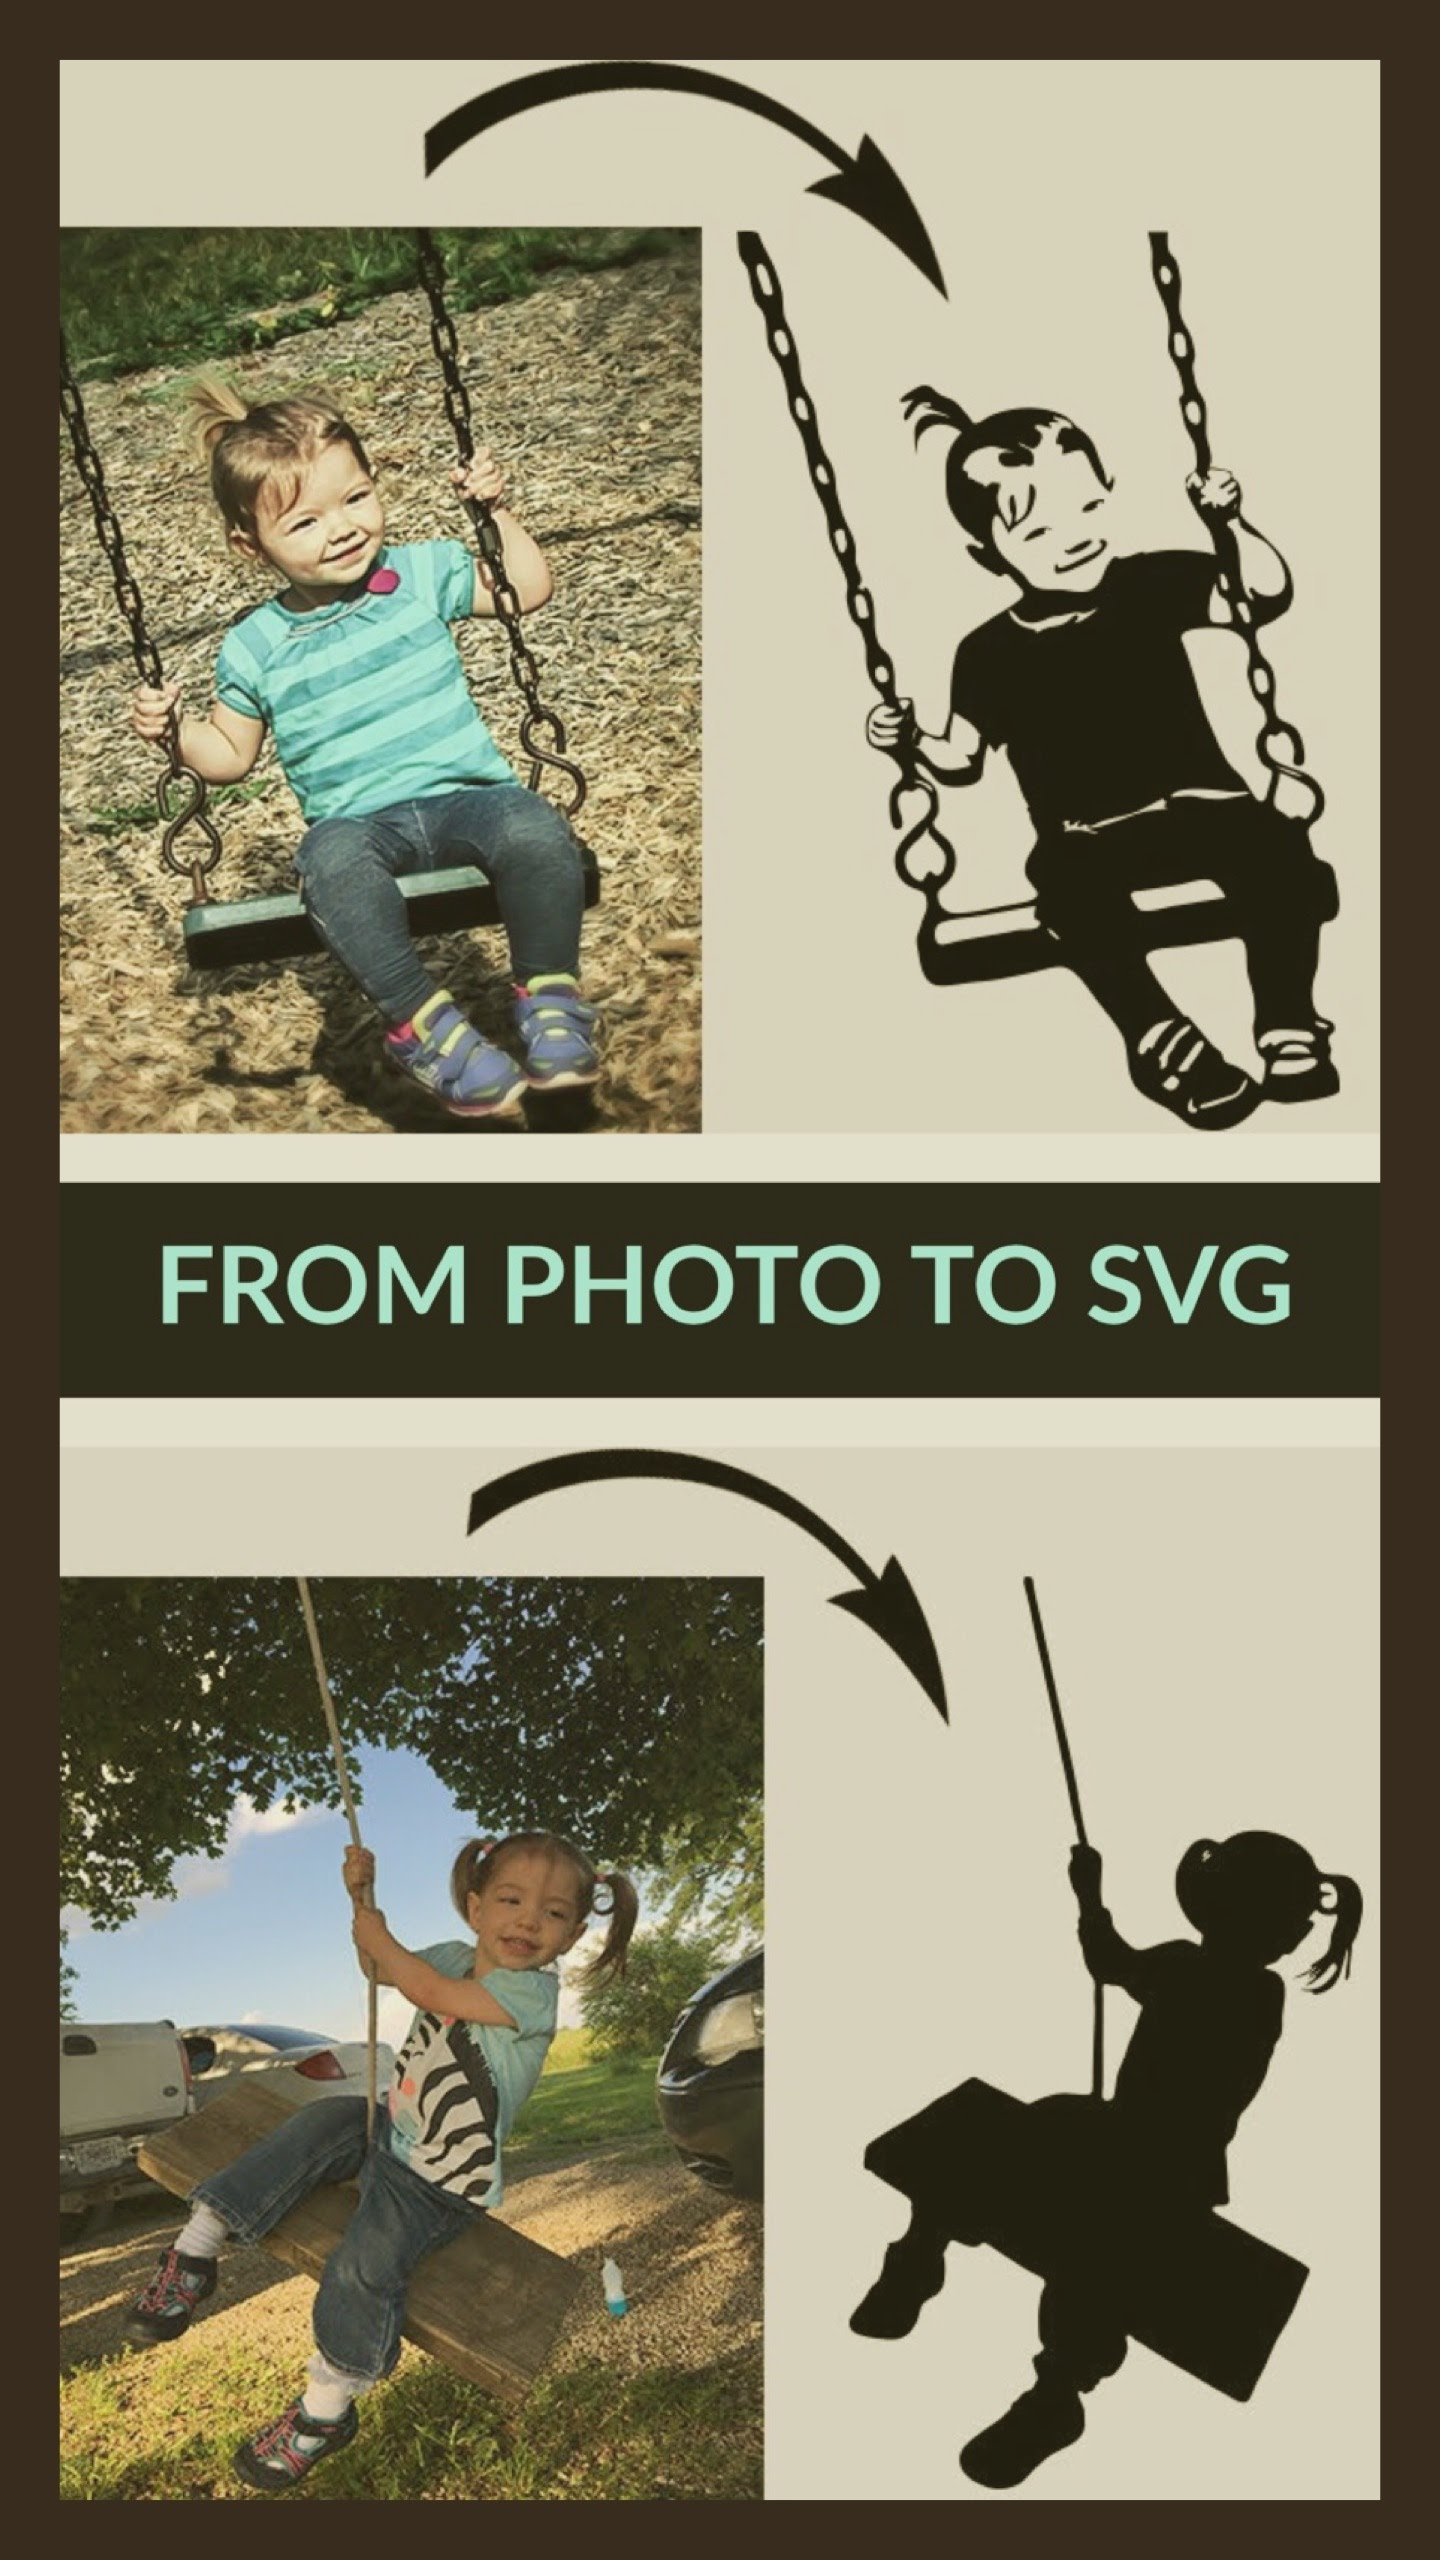
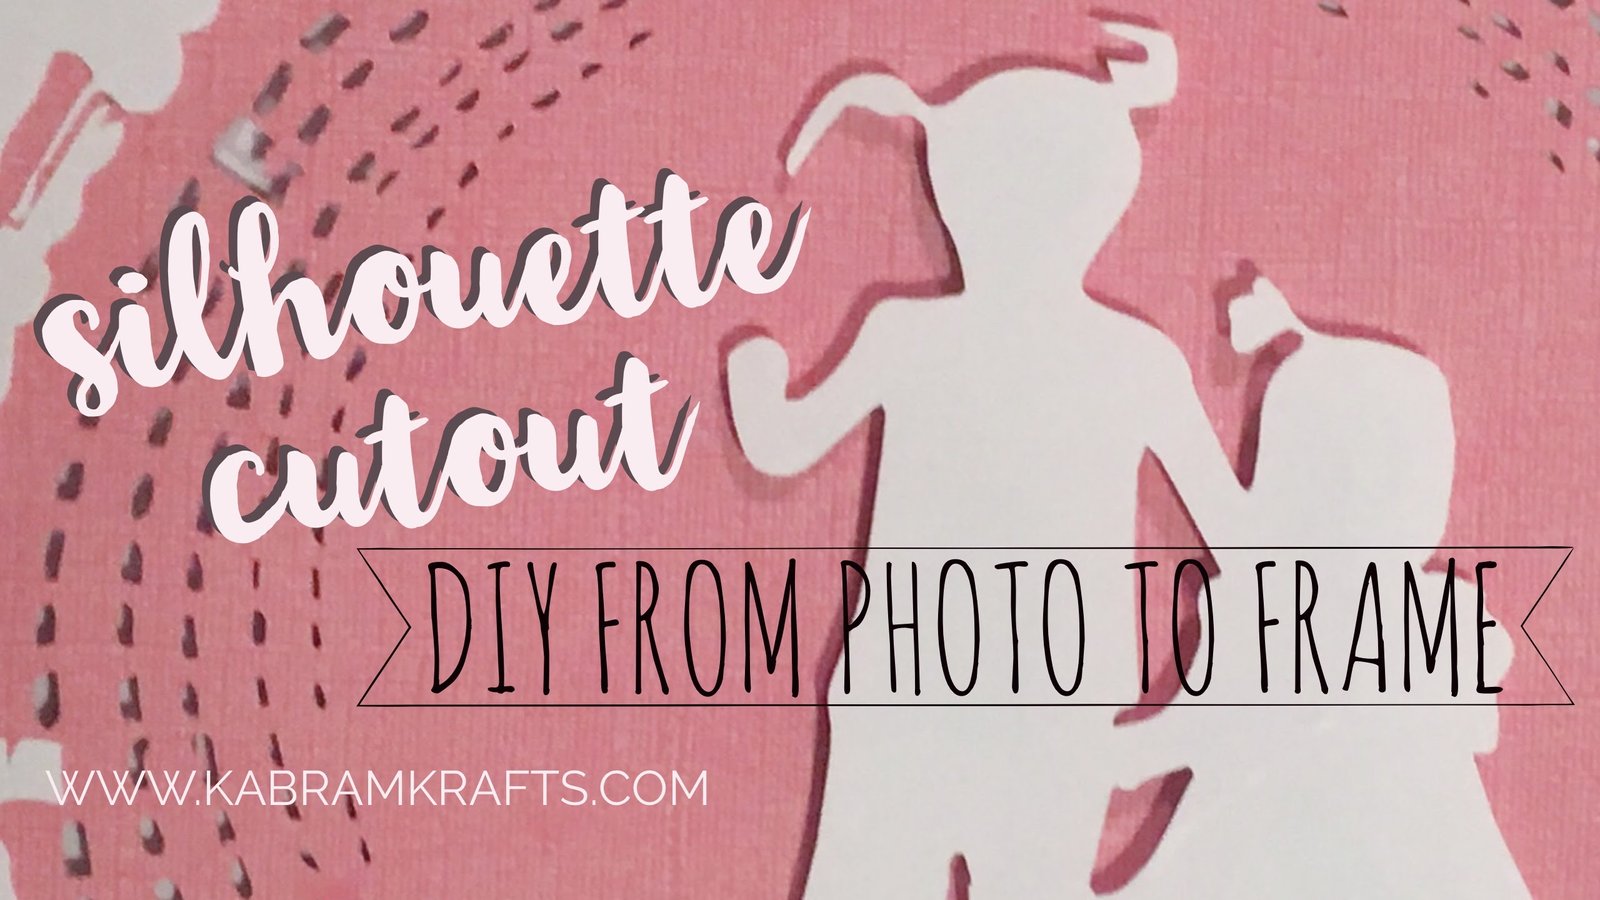
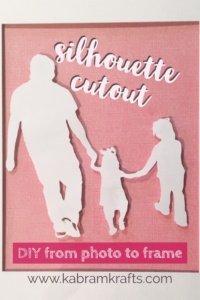
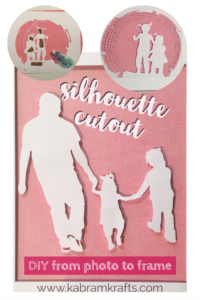
Turning your Photo to SVG file has satisfying results
From Photo to SVG: The topic of taking a photo and making an SVG is one I keep coming back to. Perhaps it is because custom images from your own photos are simply delightful. Also, it is a great way to get some adorable silhouettes just in general. Whatever your reason for wanting an SVG from your photograph, you can do it! It may take some patience and attention to detail, but it is totally worth it.
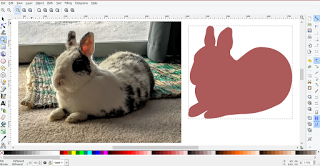
My first attempt at a silhouette was one of our bunny rabbit Geronimo. It came out nicely, but wasn’t a very hard shape. With this shape I basically made a bunch of little shapes and then combined them with the path merge tools.
Geronimo the Bunny
Then, for my second attempt I created some custom artwork for my girls’ playroom. These images were definitely more complex and took a lot longer, but with spectacular results. I used a different approach for these images. First, I edited the original photos to make them as black and white as possible.
Second, I traced the images using Inkscape (you can also use Adobe Illustrator or your cutting machine’s software). Lastly, and most tediously, I hand edited the nodes of the path until it was just the way I wanted it. At last, you have converted your photo to svg.
From Photo to SVG
While I am not going to go into detail in this post as it is not my first on this topic, I will hit a few important points.
First, you need to find the right photo – a crisp, clean silhouetted photo with nothing in the background will be much easier to create a custom silhouette cutting file from than one that has a lot going on.
Second, you want to use a photo editing software to get it as close to a silhouette as you can from the start so it will be easier to trace. Like the ones shown below.
Third, you trace the image using a Vector capable software to go from your photo to svg file. I have used Silhouette Studio, Inkscape, and Adobe Illustrator.
Lastly, unless you are really lucky, there will be some hand editing to do to get it just right. And sometimes, when the background of the image just won’t cooperate, you may just have to use the path tool and trace your image point by point!
From Photo to SVG: my latest results
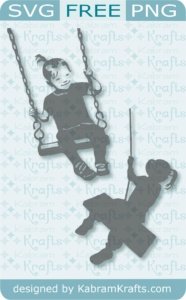
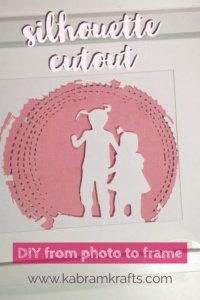
While I haven’t cut these images out yet, I can’t wait to do so. From pictures of my daughters swinging, I arrived at these adorable cutting files. One was begging for extra detail and ended up not being a true silhouette. I tried my best to make it all one connected path, but couldn’t see a way to connect in the facial details without compromising on the cuteness!
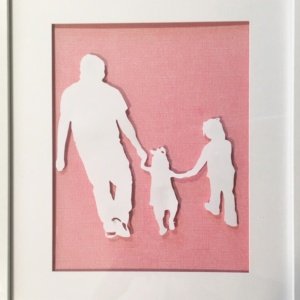
For the second image, I went true silhouette all the way. There is enough detail in the overall shape that you can still tell what is going on in the image.
While they may not hold the same emotional signifigance for you as they do for me, I am posting my final SVG files here because they are simply so adorable. Feel free to use them for your own personal projects if you so desire or make your own silhouettes using some of these photo to svg methods!
My silhouette cameo is my go to for creating beautiful home decor from these files!
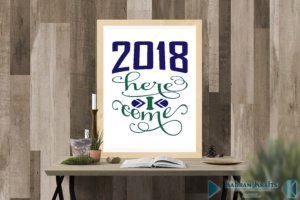
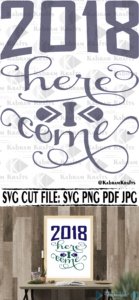
Make your 2018 a year filled with crafting. You can start by using this free SVG New Year’s file to make an awesome motivational decoration, picture, print, or anything else you can think of.
New Year’s Resolutions
While I can’t make any promises, one of my main resolutions for this year is to grow my Etsy business and post more regularly on this blog. So, that ought to translate to more free SVG files for you! Just let me know if you have anything you would love to see featured here. One of my top priorities for the year is to simply do more. I don’t know about you, but I simply get lazy. When I don’t actively plan my days, I end up squandering them. So, I am resolved to try harder to stay motivated and quite simply, to be more active in every way.
Anyhow, enough about myself. What are your plans for the year? For instance, is there a new craft you would like to learn or perfect? Could you see yourself trying some hand lettering challenges on Instagram? How about knitting or sewing?
On to the Free SVG file!
Well, that is enough lead up for today. How about the free svg file? I really like this one and it goes with my resolution to be more active this year. I want to cut it out and hang it up on the wall by my desk as a daily reminder of my goals!
Have you moved lately? Well, we just moved from Michigan to Colorado! It is lots and lots of work. And requires a lot of good organization. All of which is made better by these adorable bin labels!
If you missed me, that is where I have been. Packing. Unpacking. Packing. Unpacking. Repeat.
Having grown up in Colorado, I am happy to be back and near family again.
Unfortunately, since Colorado is so awesome and everyone else wants to be here too, housing prices are much steeper here. Not just a little steeper. I’m talking 7 or 8 times steeper! For example, coming from our lovely 6 bedroom house on 4 acres in Michigan, we will have trouble finding a condo for the same price!
Getting Organized with Bin Labels
Downsizing was actually some amount of fun, until we got to our apartment and realized that getting rid of half our stuff wasn’t enough! So, that is what I have been doing the past month or so. Organizing. Getting rid of stuff. Organizing is the fun part though.
Knowing this, you can see where this project came from. It was born of necessity and the desire to have my children put their toys away so that I can preserve my sanity in our new 2 bedroom living space! Thus, the idea for our new bin labels was born. Well, it was actually in my head for quite a while. It was going to be one of my finishing touches on the playroom I was working on in Michigan. Take a look at how awesome it was!
Alas, it was time to move on. Hopefully someone else will move in and enjoy the fun colors and the animal alphabet that I left on the wall!
Do you also have seemingly hundreds of toys underfoot? Are you constantly frustrated with different types and sets of toys getting jumbled into one big mess? Do your kids need help knowing where everything ought to go? Then you need some of these bins and these adorable bin labels!
Take Stock of Your Items
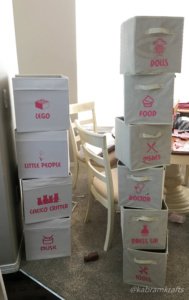
First, you need to take stock of what you are trying to organize. For me, this meant categorizing the toys in my girls’ room and putting them in different bins. Undoubtedly, they have too many toys. However, once in bins and labeled with these cute bin labels, it looks much more manageable. Also, remember to try to match the number of categories to the number of bins you have available.
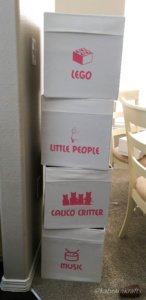
Here are the bin label categories I came up with for the toys we have:
DOCTOR
DRESS UP
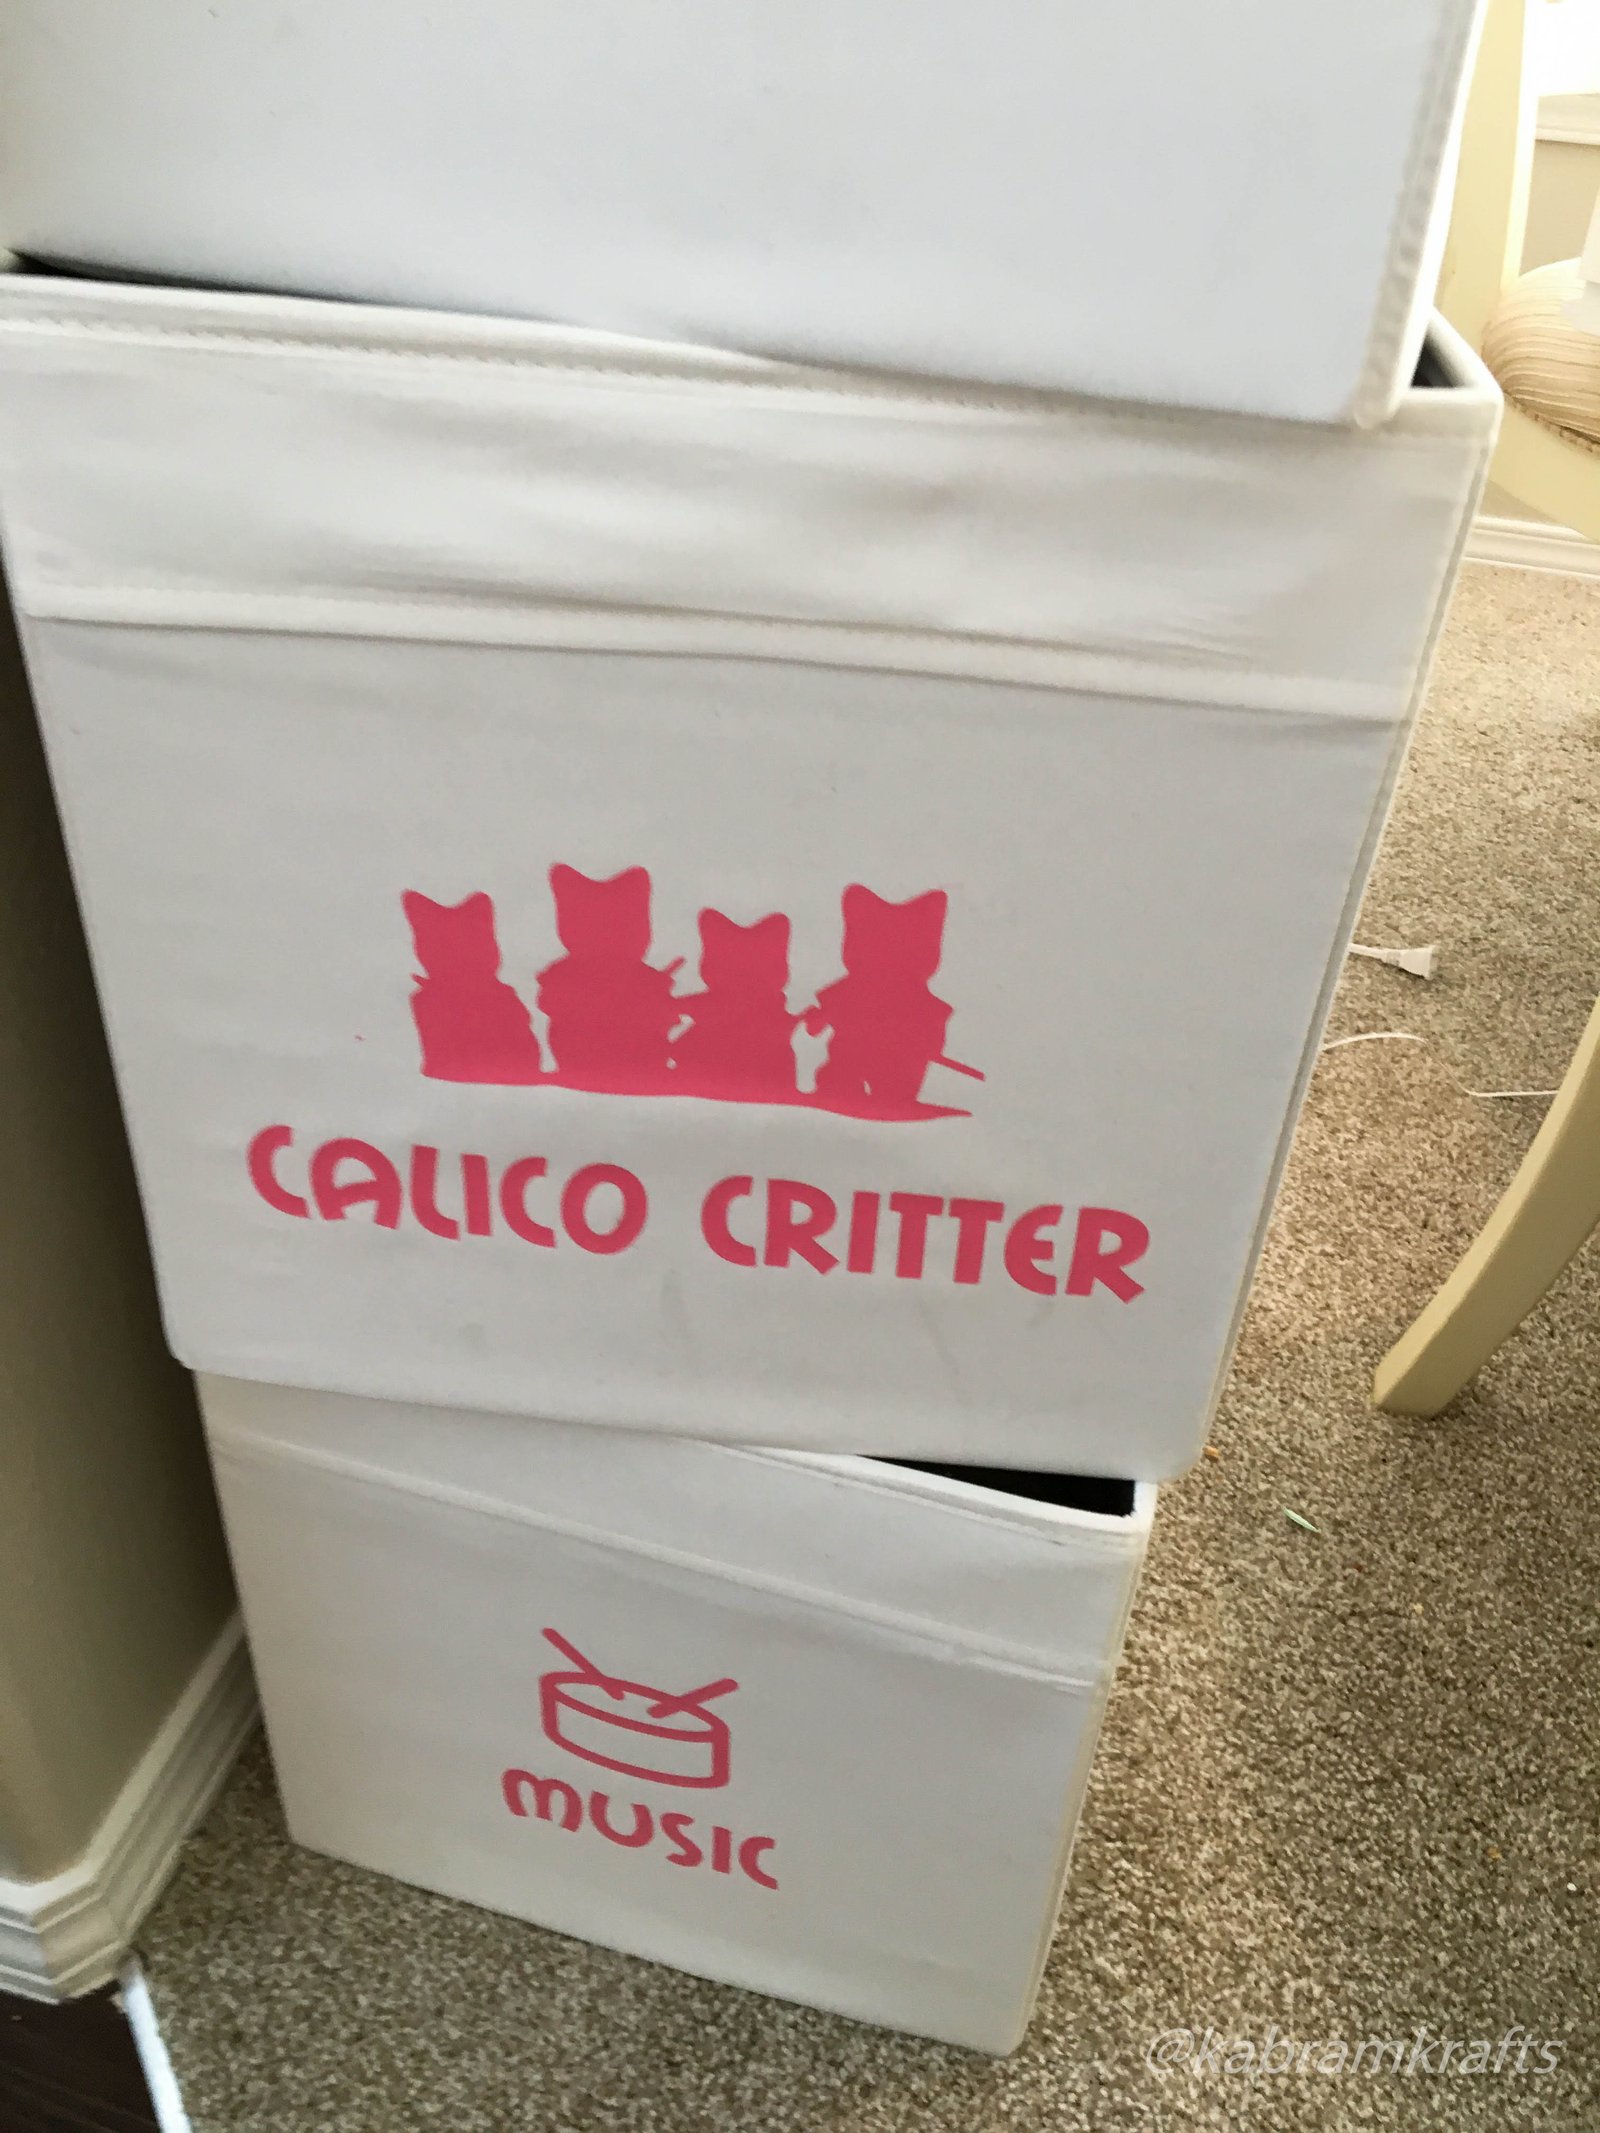
CALICO CRITTERS
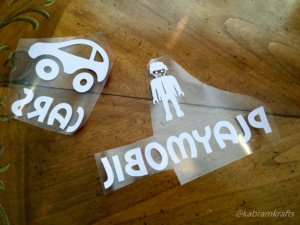
PLAYMOBIL
BOOKS ON TAPE
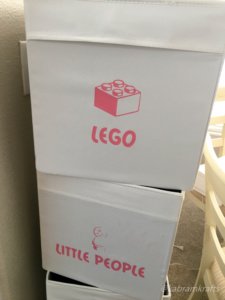
LEGO
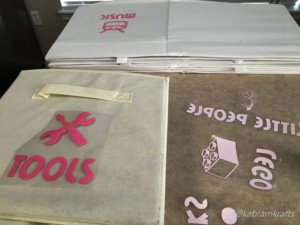
MUSIC
CARS
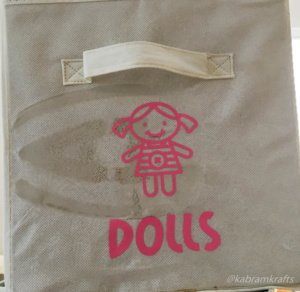
DOLLS
BLOCKS
LITTLE PEOPLE
DISHES
FOOD
TOOLS
In addition, I added each of my daughter’s names so that they could have a bin of their own. Next, I looked for a simple, cute design for each category. The idea was to have a cohesive looking set of images that helped my not yet literate daughters identify each bin on their own.
Most of the images I found doing a quick google image search. Some I had to work more on to get what I wanted. The font I used is called “Mail Ray Stuff”. I really like how the images turned out. I am especially fond of the cute baby on the “LITTLE PEOPLE” bin.
Create your Bin Labels
Feel free to use my labels and images for your own personal use. However, I do not recommend using them for commercial uses as I am not positive on the copyrights of each one.
REMEMBER TO CUT THESE OUT IN REVERSE ON YOUR HTV!
REMEMBER TO CUT THESE OUT IN REVERSE ON YOUR HTV!
Quality Materials
Since this was my very first Heat Transfer Vinyl project, I wanted to use the good stuff. And, from what I hear, Siser Easy Weed is where it is at. I found a roll at my local Michaels and it was on a great sale to boot! All in all, I was very impressed by the stuff. Also, it is actually much easier to weed than Oracle vinyl that I am used to working with.
So, back to the project.
Decide how large you want things and cut it out! This is on you. Then cut out each label and weed out the extra. Your image is reversed, right?
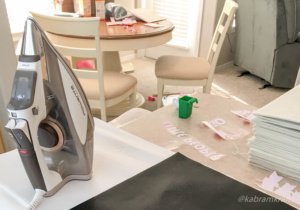
Finally, the fun part – ironing the bin labels on and seeing the results. I followed the directions on the packaging of my HTV and used a grill mat to place over the images while ironing.
Results – Bin material matters too!
If you look at my results, you can see that some of my bins turned out spectacular. Unfortunately, some have nice imprints of the iron. This was largely due to the bins themselves. My nice large fabric IKEA ones look great. No iron imprints, just clean and crisp.
My cheap polyester bins which came from who knows where, did not hold up well. Since I didn’t want to buy new bins, I just went with it. They still work. Some are just much prettier than others!
Now, sit back and admire your work. Wait, scratch that. Go get to organizing!
Welcome to my website and today’s journey through my hand lettered artwork project! Have you tried hand lettering? With all the amazing hand lettering on Pinterest and Instagram, I just couldn’t stay away. Such pretty lettering ought to be admired by imitation, in my opinion!
Well, my hand lettering led to water brush pens and watercolors, which led in turn to watercolor doodles. Then, I saw this on Instagram. Watercolor hexagons! Perfect, I thought, I can usually make patterns and I love playing with the colors. Of course, I didn’t attempt the project free-handed, like the lady I saw as my inspiration. We’ll save that for a later date.
Instead, I drew nice little evenly spaced guidelines for myself. I used the materials listed below. These are Amazon affiliate links, but buy wherever you like! I generally buy new supplies at the craft stores with coupons. I love coupons.
Very, very relaxing, at least for me! Try to leave a little border between the hexagons. I found that it helped to put a dot where each corner ought to go and then connect the dots. You can also add a little extra color to the hexagon while it is still wet to get some fun variation!
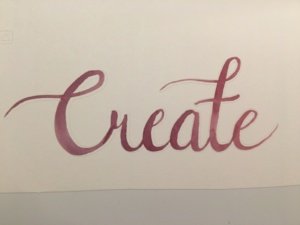
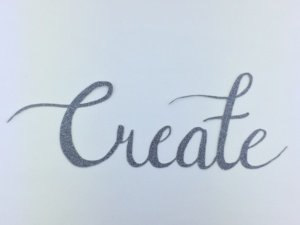
Adding a Hand Lettered Word, Saying, or Sentiment
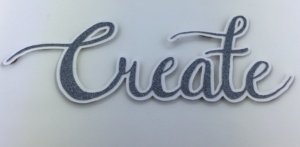
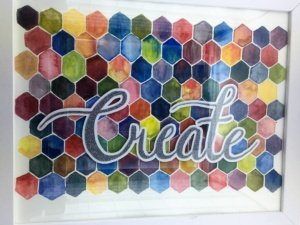
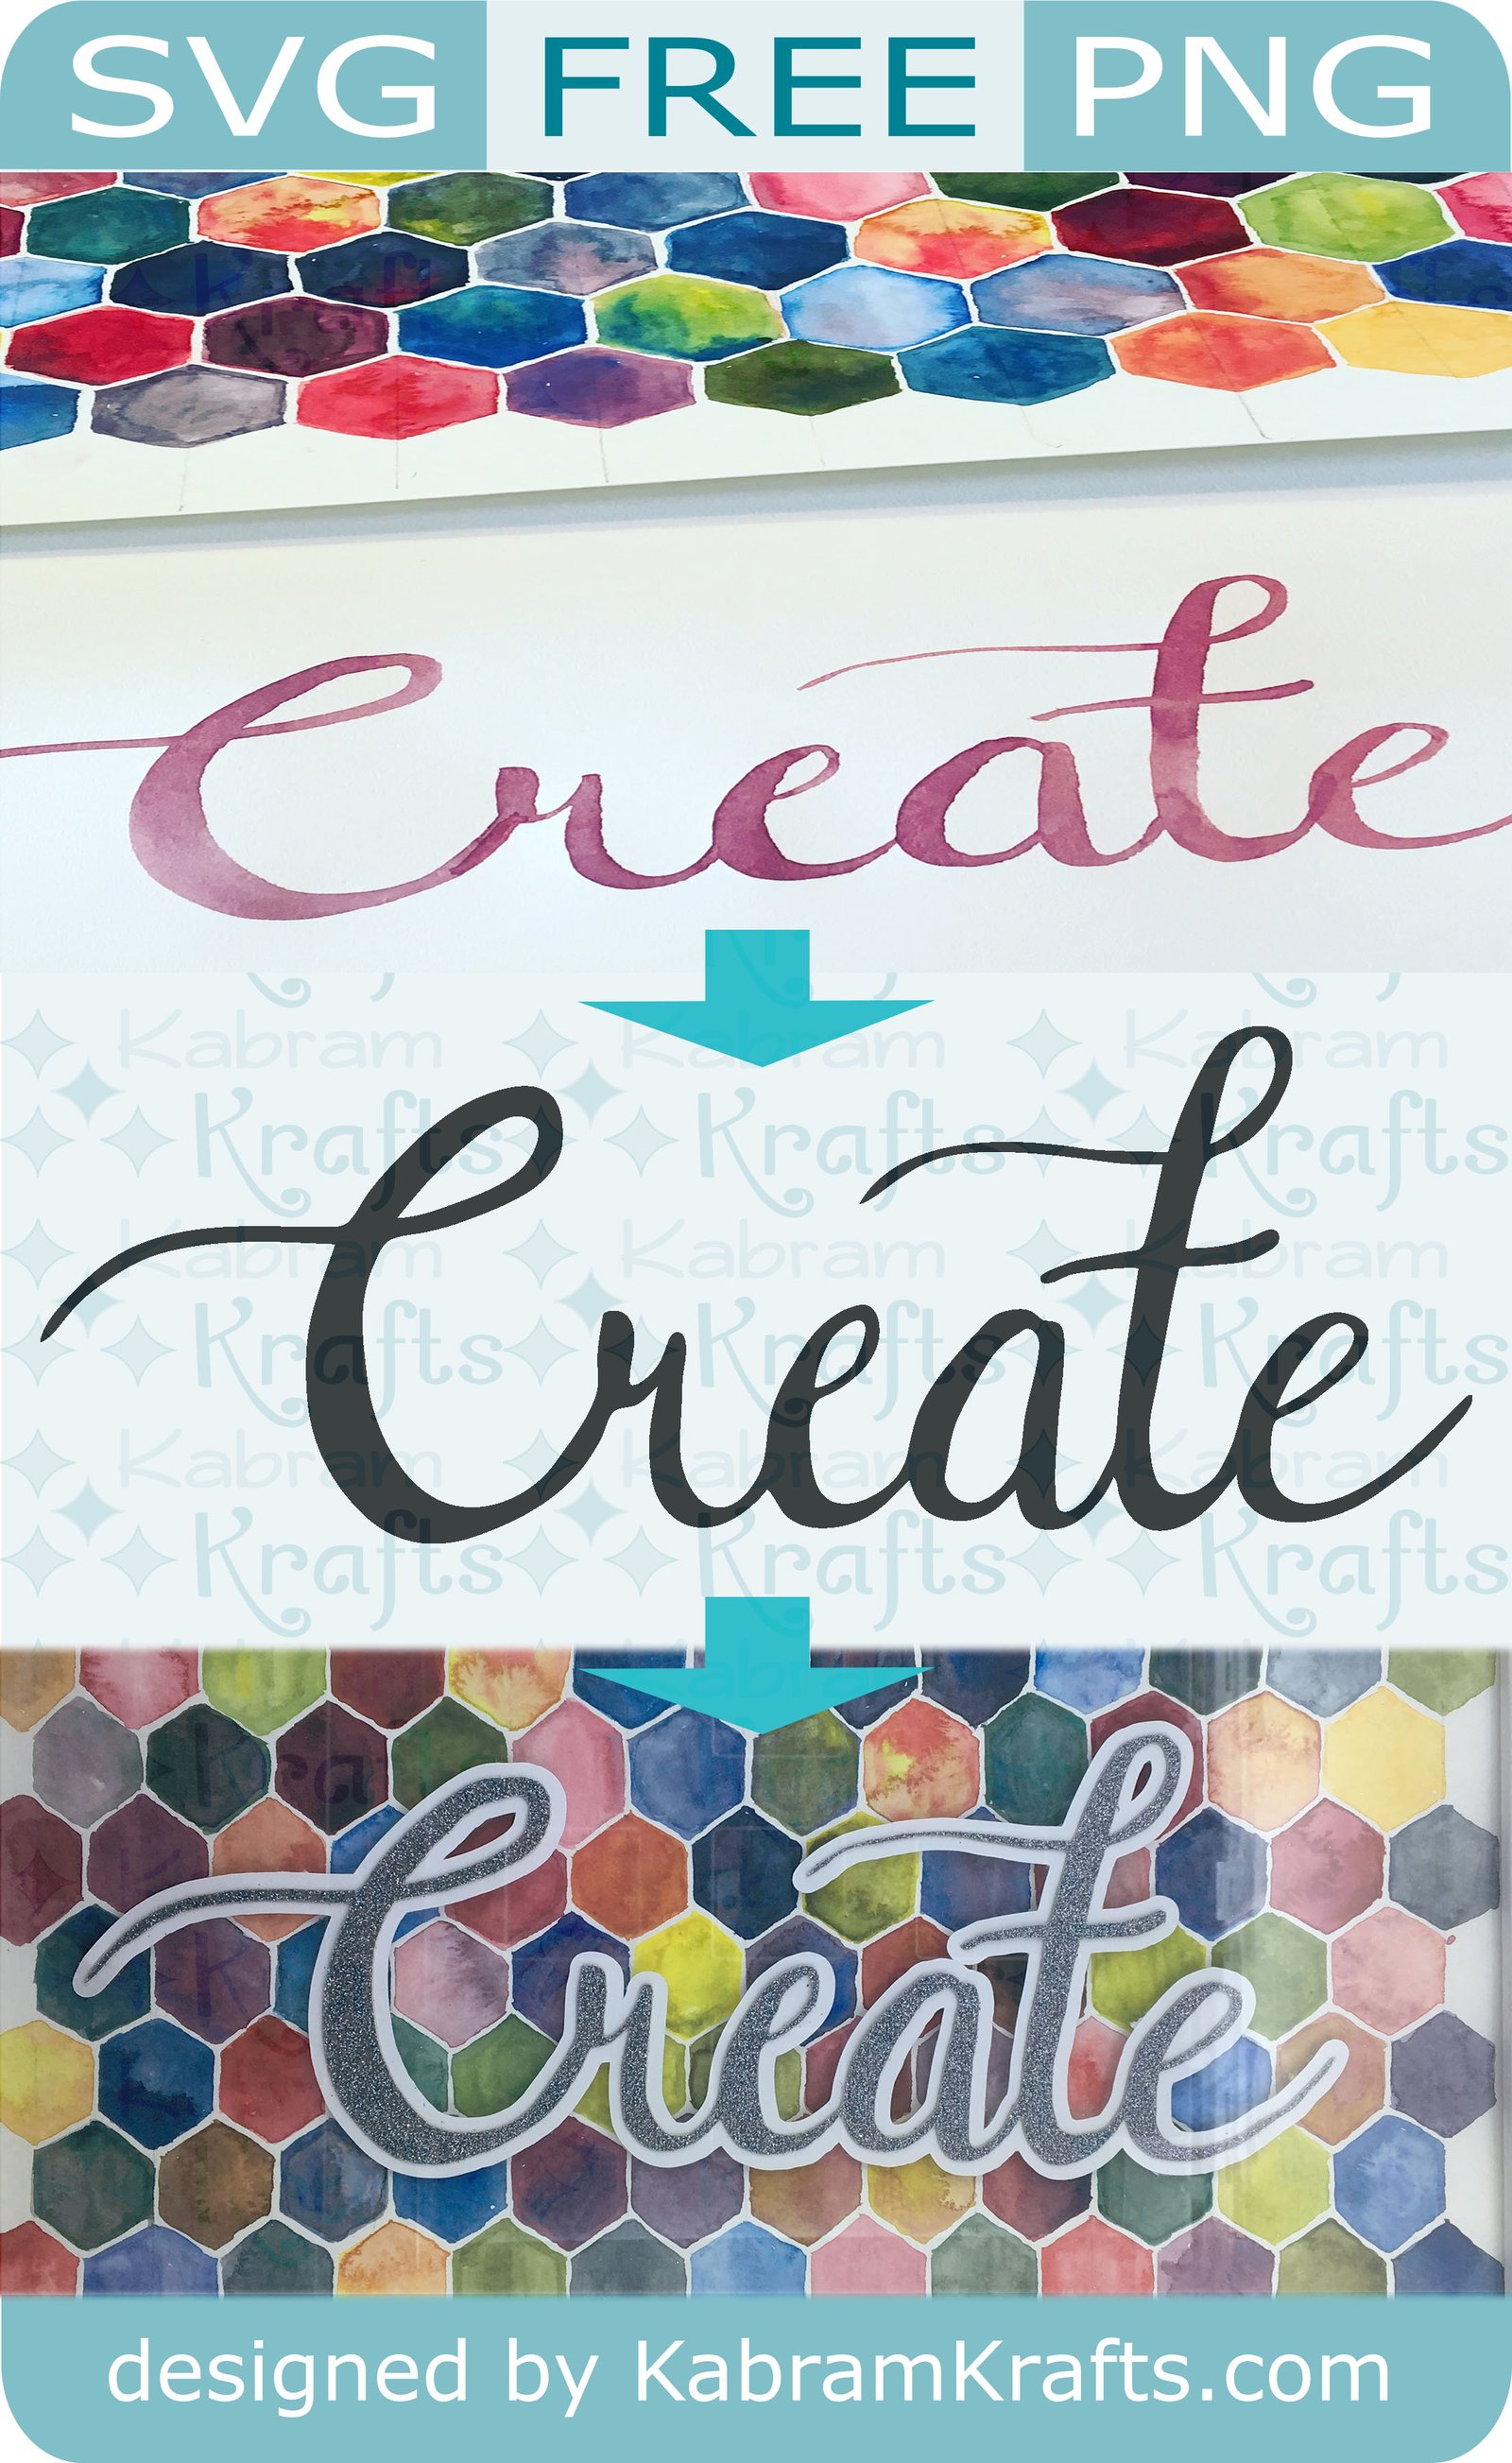
I don’t know if it is a craze right now or not, but hand lettering is highly addicting! For my piece of craft room artwork, I thought “Create” would be an apt word to add. I used my Pentel water brush again to letter this on another piece of watercolor paper with the plan to cut it out and put it on top of my hexagon masterpiece.
As a sidenote, I have also been playing with brush markers for hand lettering practice. Take a look at my Instagram feed if you want to see what I have been up to in my spare time. Here are the pens I have been playing with (there are many more that I want to try as well!):
Hand Lettering Tools I have been playing with lately
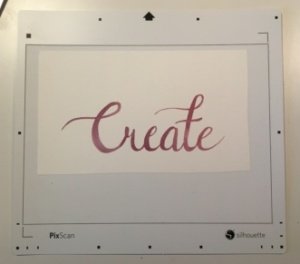
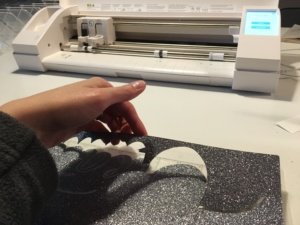
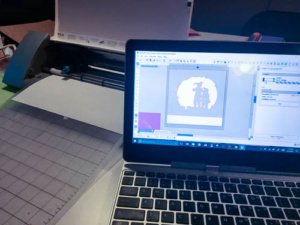
After it dried, I cut the watercolor paper down a bit and stuck it on my PixScan mat for my Silhouette Cameo to cut out.
After several tries, it finally registered and cut. While it went through and cut smoothly, it was off a bit. I took it off and played around with it a bit on top of the hexagons.
It would have been okay, but I didn’t really like the look of it on top of the hexagons anyhow. So, I scrapped it, and kept just the outline.
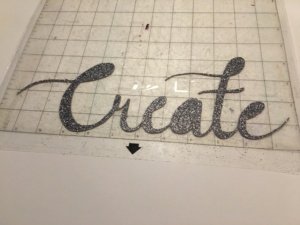
When in doubt, use Glitter!
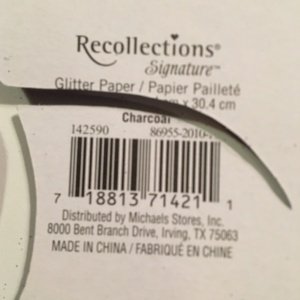
Glitter to the rescue! I found this lovely piece of VERY THICK glitter paper in a nice dark gray. It looked like it would go well, so I set about to cut out my lettering. Does anyone know if this particular glitter cardstock is thicker than normal?
I have not previously cut out glitter cardstock. Looking in the materials list on my silhouette, I found and choose the “glitter cardstock” settings. After running the file through the cutter, I pulled it out. Sadly, it was not cut all the way through.
So, I stuck it back in the Silhouette Cameo for another double-cut run through. Took it out, and it was still not cut through. This time I checked my blade to find it filled with glitter.
After cleaning it out, I upped the blade depth a bit and stuck it back in. Almost this time! Cleaned out the blade again. Fourth time was a charm and it looked great!
Persistence paid off and I was very thankful that it stayed aligned despite its many trips in and out of the machine. I then did a quick offset and cut a second one out of another piece of white cardstock. Isn’t it pretty?
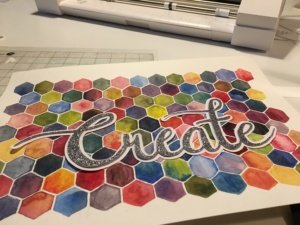
Look at how pretty it looks on top of the hexagons! I am thrilled that the 4 times through the Silhouette Cameo paid off. Just in case you didn’t put this together, that is 8 cutting passes since it was set to double cut!
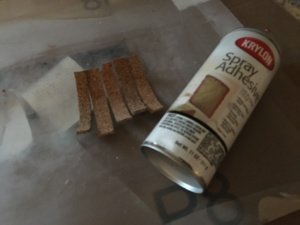
Now, it just needed a little extra depth. For this, I turn once again to my large supply of cork scraps. Use anything with a bit of thickness, I just have a lot of cork scraps lying around from making coasters!
In fact, if you need some coasters, please head over to my Etsy shop and take a look. I welcome custom orders if there is something in particular you are looking for!
Except, this time, I just sprayed the cork on both sides with spray adhesive. That seemed to do the trick nicely! Also, I didn’t get any photos of this, but I adhered the glitter cardstock to the offset white cardstock cut.
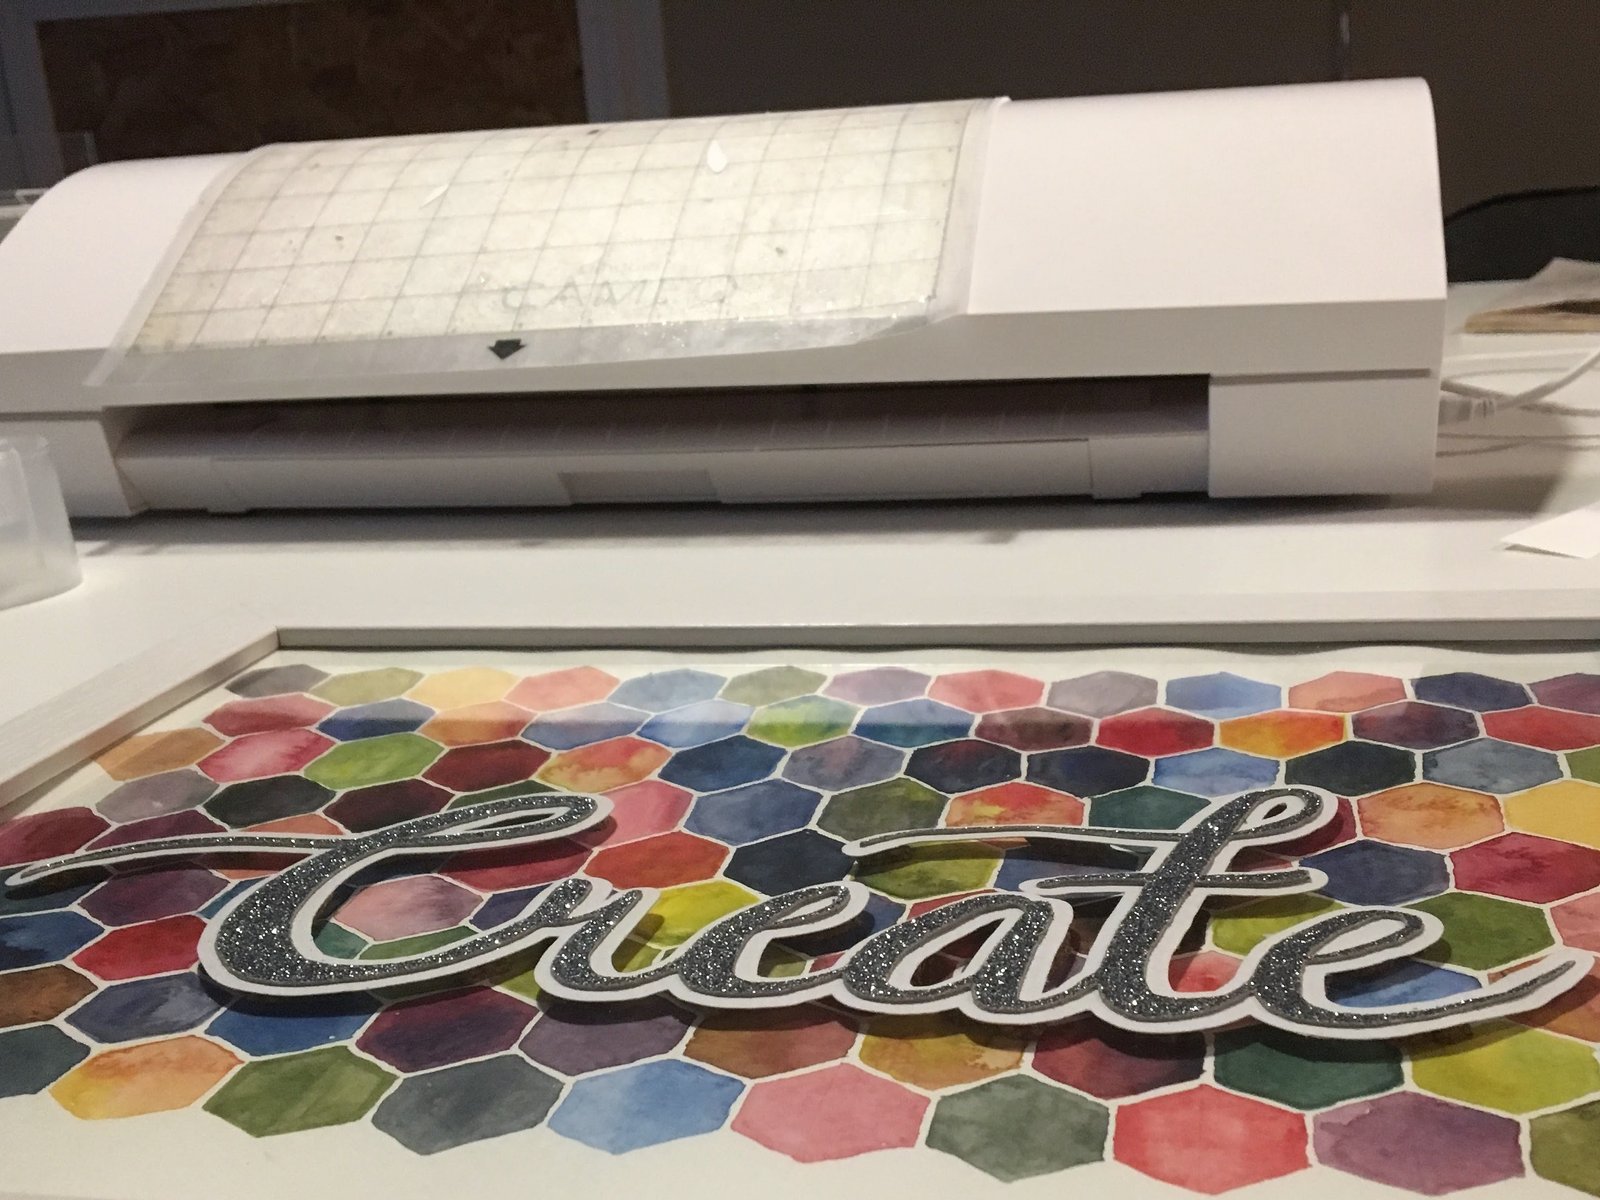
Almost Done! Now just position your lovely hand lettering on your lovely hand painted background
Beautiful! All set to frame.
A nice little glamour shot of my framed artwork next to my Silhouette Cameo.
And, if you were waiting for this, I’m sorry for the long post. Here is the FREE HAND LETTERED CUTTING FILE! Just click the link below and the free SVG file should download.
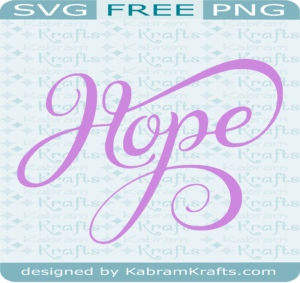
Hope is what I feel as though I need lately. Sometimes life is heavy whether you have good reasons or not. As Easter approaches, it reminds me that there is a lot to appreciate and a wonderful source for true joy and true hope. However, it can often be hard to internalize it!
While I was going to create a lovely lettering file to give you a very nice free svg file download, I found one lovelier than I could make already in existence!
Well, I HOPE you enjoy this free svg file download. It is a beautiful hand lettered expression and I would love to see it framed on my wall in the near future! Hoping all is well for you and yours, enjoy this free svg file download. Alright, I am done with the hope puns. For now.
And, while you are here, stop by and get this adorable free duckling svg file. This one also need a frame. It most definitely needs a frame.
For now, I have lots of travertine stone coasters stocked in my new etsy shop. However, I plan to add more items as soon as I can write them up. Please take a look and admire the wondrous beauty that is travertine tile! Lemonade, sadly, not included.
These coasters look nice sitting on the table, on the shelf, or in the kitchen. Simply take a look at my etsy store for all your coaster needs. Plus, they are made from natural travertine tile and will protect your furniture well.
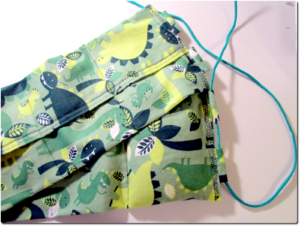
This DIY Pillowcase project was relatively simple and a great project for the licensed fabrics that we ended up with on our last outing to the craft store. Do you bring your husband along when you go to the craft store? Well, I end up bringing him because we are often out of town together when I have the opportunity to go.
Shopping with the whole Family
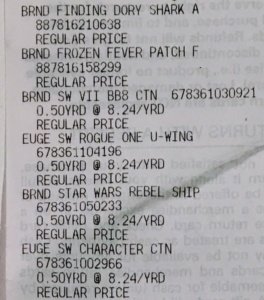
What happens when you bring your whole family to the craft store? This happens:
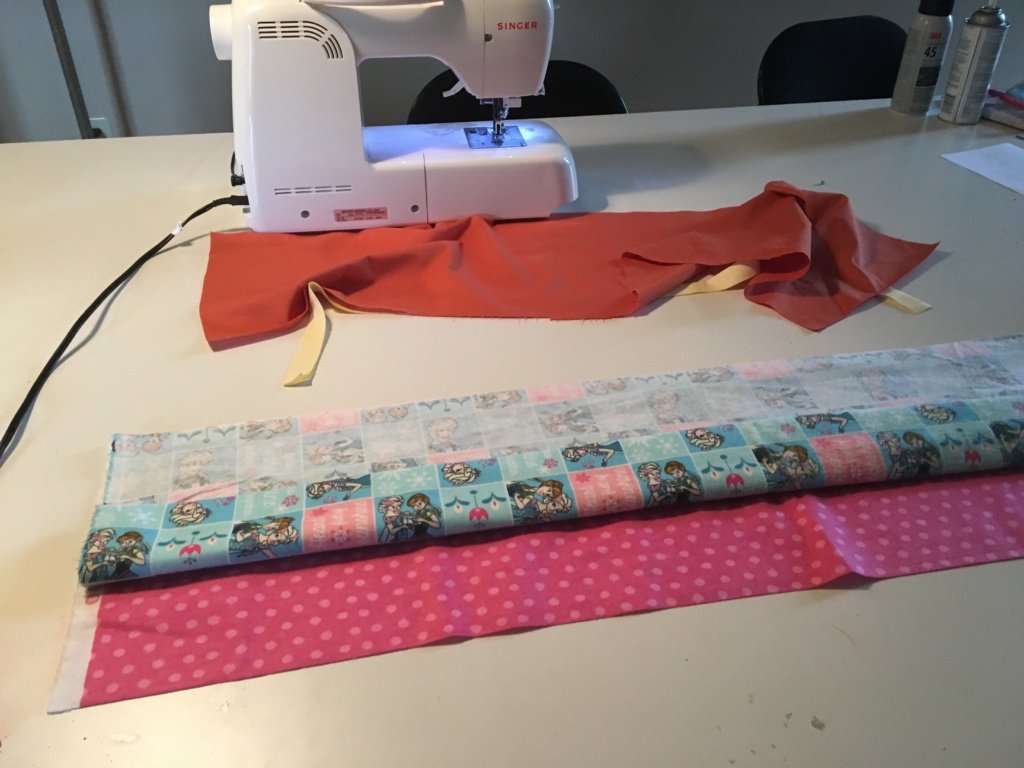
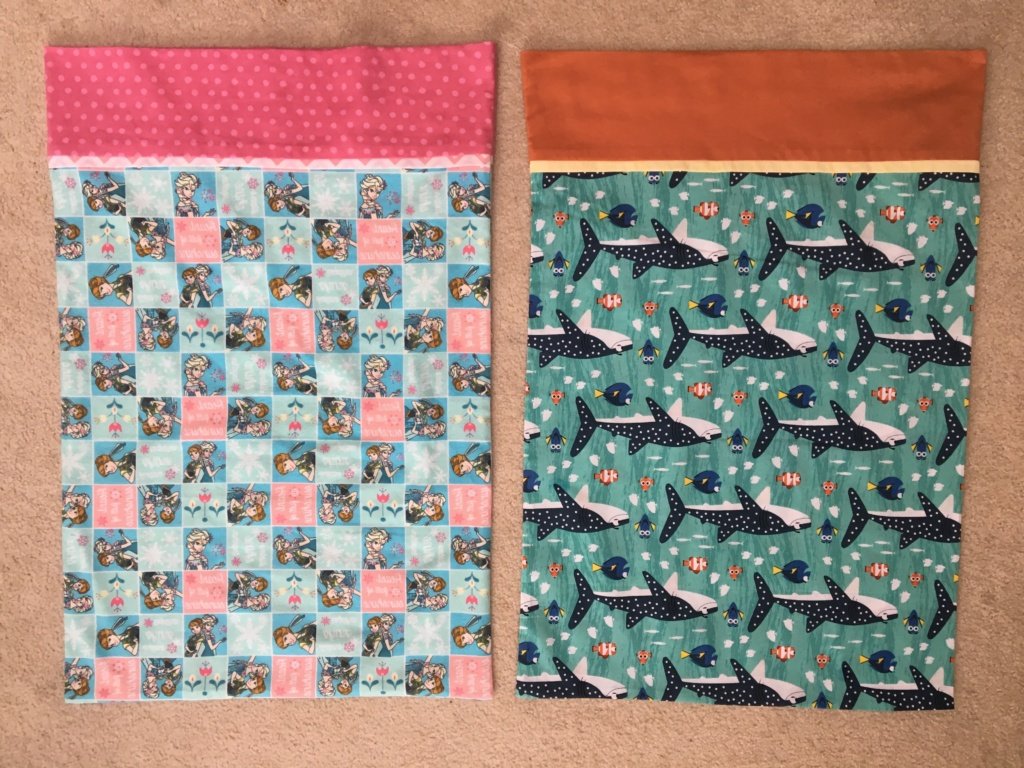
As you can see, we ended up with lot of licensed character fabrics. While the Star Wars fabric is still waiting to be made into pillows for the man cave, the girls’ Dory and Frozen fabrics made it into these cute DIY pillowcases. (Do you like my awesome table? It is a giant 4 foot by 8 foot piece of melamine board!)
Since I am a beginner at sewing, I followed this lovely tutorial on My Childhood Treasures Blog. While she said it only took her about 10 minutes for each pillow once the fabric was cut, mine took at least 30 minutes each. So, your timing may vary depending on your ability, but mine still came out quite adorable.
Tutorial at My Childhood Treasures
In this DIY pillowcase, the cuff is sewn on all at once while the body of the pillowcase is rolled up inside. Although envisioning how all the layers work is a little tricky, the sewing itself was straightforward. For my first ever pillow cases, I was very pleased with how they turned out.
Cutting the Fabric
Also, I used my new rotary cutting tools for this DIY pillowcase project. While I got them to cut squares from my rolls of cork, they made cutting the fabric out for this project super simple! If you give a girl several 60% off coupons, she will use them. So, while I recommend you get them with coupons from one of your local craft stores, here are the tools I used on Amazon. Actually, looking at the current prices on Amazon, I see that they really aren’t that much more than getting them 60% off at the craft store. While I love the craft stores, I do feel like they mark things up significantly!!
What do you think? Do you have different methods? How about customizing them with names or applique? For a long time now I have wanted to use the Silhouette Cameo for doing applique. However, I am intimidated by the sewing half!
My adorable girls enjoying the results. No hesitation here…
Story: “If you bring your family to the craft store, they will want to buy some fabric.”
Moral of the Story: “Don’t bring your family unless you are prepared to make pillows.”
Do you love a custom silhouette as much as I do? I recently made some artwork for my girls’ playroom and received a lot of questions on how I did it. This article won’t go into too much depth as the process varies remarkably depending on the photo that you start with.
DIY Custom Silhouette from Photo
A crisp, clean silhouetted photo with nothing in the background will be much easier to create a custom silhouette cutting file from than one that has a lot going on.
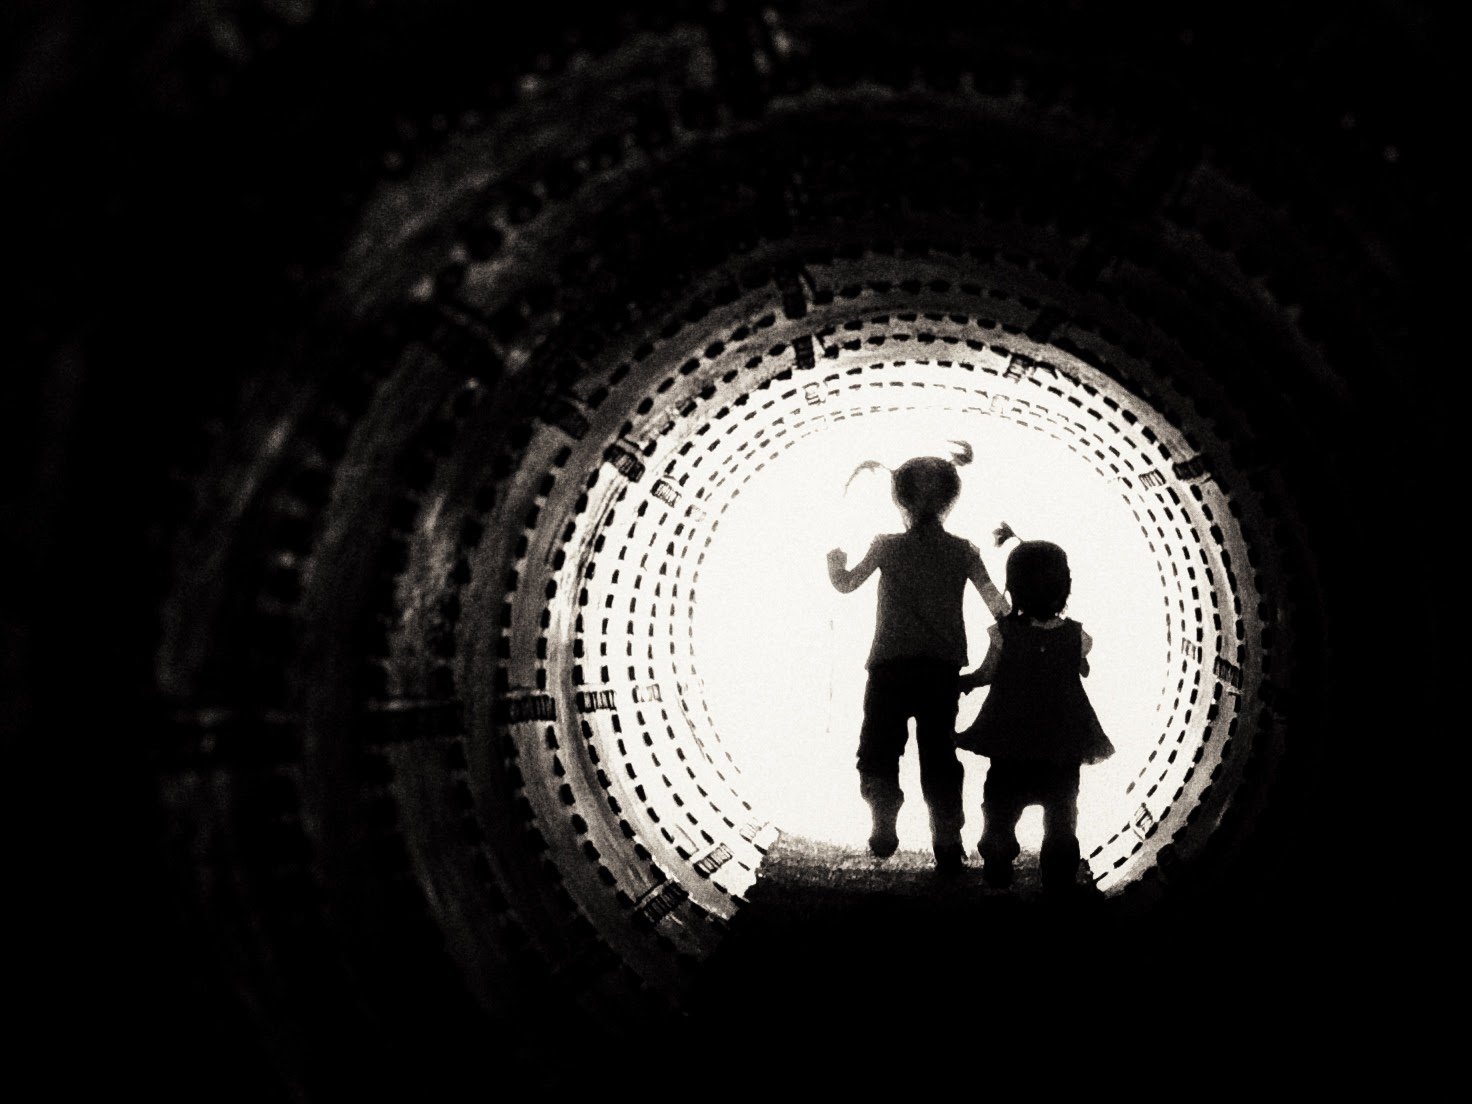
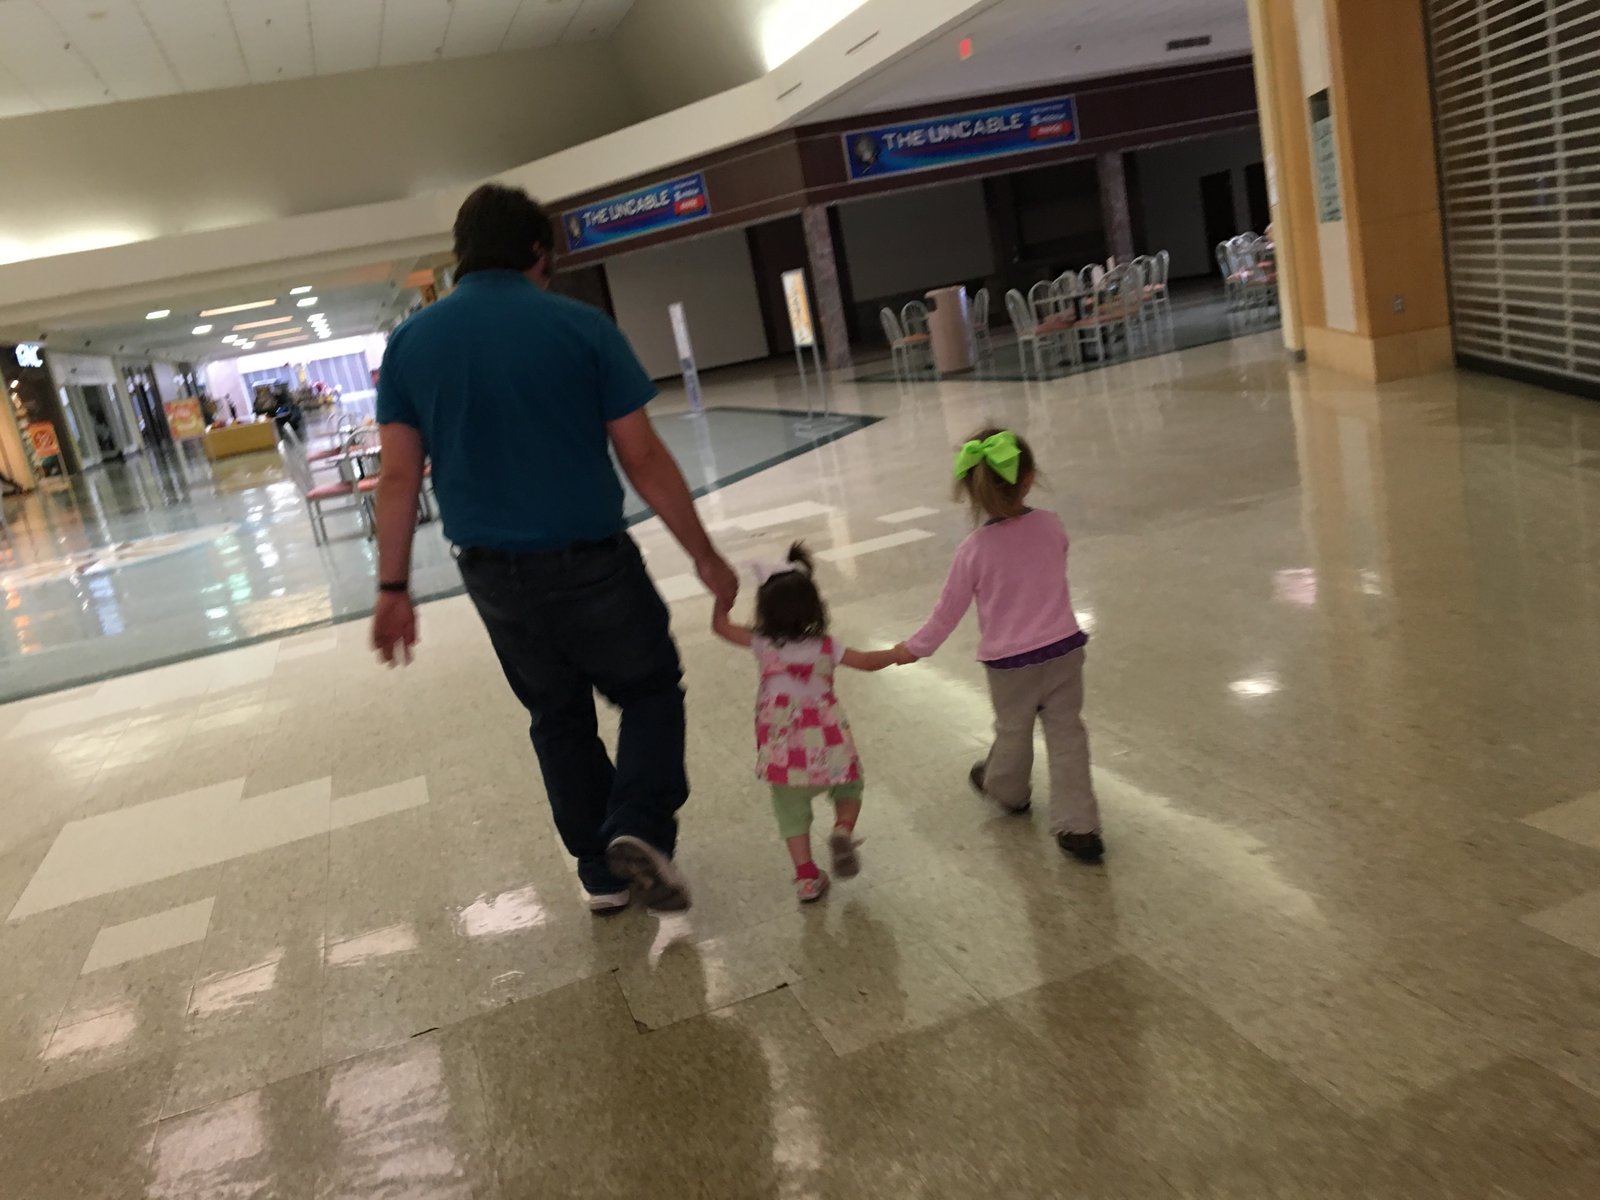
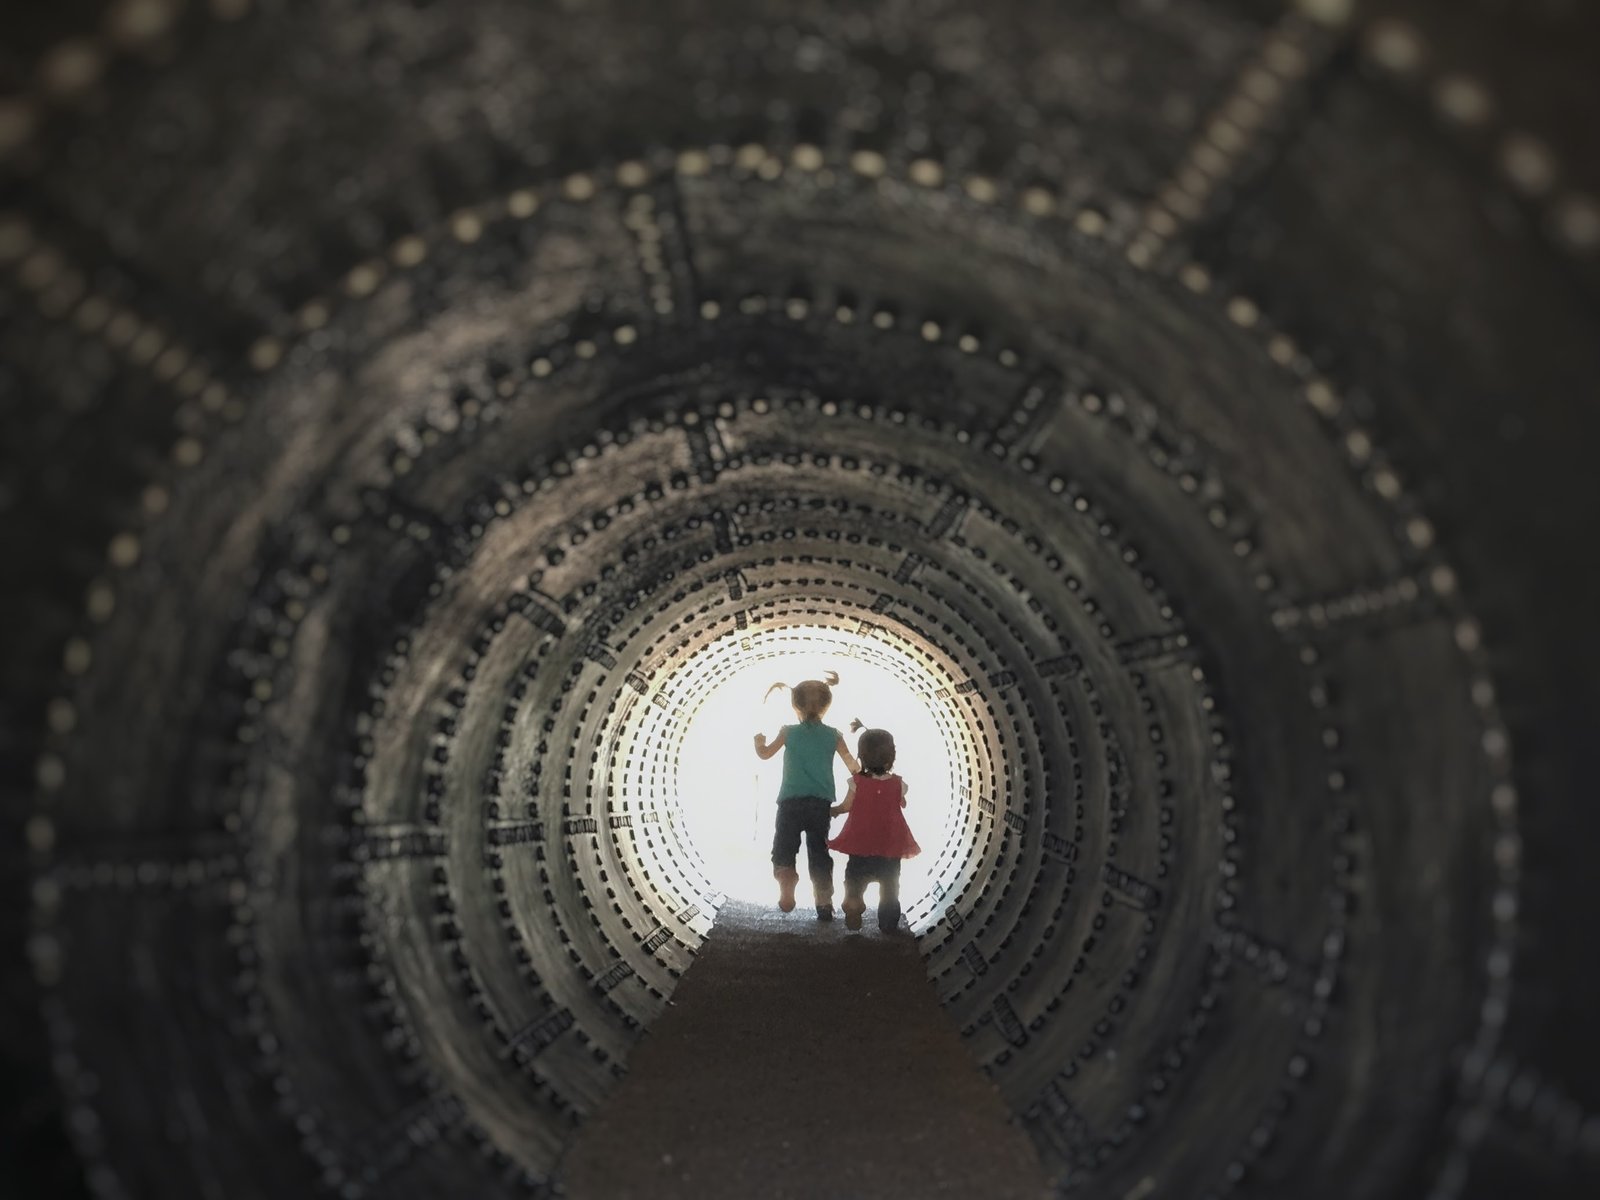
First, take a look at the two photographs that I started with. In the first one, I caught an adorable moment of my husband and daughters holding hands. In the other, I have a mostly silhouetted view of my girls running through a tunnel at a playground.
Can you guess which one was easier to convert into a custom silhouette svg cutting file? Yep, the one on the right. While the second image is already well on its way to being a silhouette in its own right, the image of the three holding hands has a lot going on in the background. When there is a lot in the background, you aren’t going to be able to trace the image to get a nice crisp outline. So, this is the first thing you need to resolve if you want to get a nice svg cutting file from your photo.
First Step: Edit your image in some variety of Photo Software
While I just signed up for a subscription to Adobe Creative Cloud and am having a great time with it, the cost may be prohibitive for some. If you don’t have a go to image editing software, I highly recommend GIMP. It is a free software and can do quite a lot – almost as much as Photoshop if you know how to work it.
As I mentioned before, it is hard to give explicit directions for this step as it can vary so much between images. However, the goal is always the same. You need to make your image into a black and white image with lots of contrast and you need to remove as much of the background noise and distraction as you can.
Here is what my images looked like after I had played around with them for a while and cleaned them up as best as I could. Because the one with my two girls in the tunnel was a cleaner image to start with, it was already starting to look like a cutting file. On the left, however, the image with the three holding hands still needed a lot of work.
Second Step: Trace the Image
There are several ways to approach this next step. You can use the built in trace function in Silhouette Studio, however I typically prefer to use Inkscape. Here is a demonstration of using the trace function in Silhouette Studio to produce your custom silhouette image. As you can see, the result is quite messy and would require quite a lot of processing to make it as nice as my final draft.
Now, here is a different way to generate your custom silhouette using Inkscape. Inkscape is a free software available for download and is quite versatile. Notice how the resulting custom silhouette trace is much cleaner. This means there will be a whole lot less cleaning up by hand to do and it will take a lot less time. Remember, your time is valuable! In addition, I have also found Inkscape to be much more responsive and kind to me when I edit cutting files node by node.
If you look closely in the GIF above, you will see that the “Trace Bitmap” function has lots of options. Take your time and play around with these features. For my image, the “Brightness Steps” option seemed to work the best. I then separated the layers it gave me and picked the best one. I didn’t take the time to go into detail regarding this feature, but there are lots of tutorials on it already if you poke around. Here is one that I found. And, another good site if you want to learn more about Inkscape.
Adobe Illustrator also works with SVG files and will probably be something I play around with more in the future. In the meantime, please enjoy these GIF images and feel free to ask me any more detailed questions you may have regarding the process.
Third Step: Clean it Up
While this step is the most tedious, it is also very crucial to getting a nice clean cut. Basically, you need to go into your traced cutting file and do a few things. Let me see if I can list them out.
Delete nodes that you don’t want (you can see there were a lot of cluttered points on my images above).
Connect the paths where the trace didn’t get it quite right. For me, I needed to reconnect the girls’ ponytails to their heads!
Alter any shapes that seem a bit off if you desire.
With some practice and a LOT of patience, you can end up with a file that looks something like this one:
Custom Silhouette of My Girls
Click to download FREE SVG file.
Fourth Step: Cut it Out
Finally, we get to the fun part! Now that you have your file all ready to go, open it up in Silhouette Studio. I have the designer edition and can open SVG files directly. If you do not, you can save your file as a DXF from Inkscape and import it from there. As a caution, I do warn that I have personally had struggles with this method and recommend you read my experience with it before you invest too much time into trying to cut out your files.
The file with the custom silhouette of my two girls that I show above I ended up separating into two cuts. My other file, with them holding hands, only took one cut.
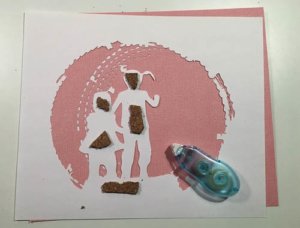
Since their playroom is all decked out in pink and green, I used a pretty pink 12″ x 12″ cardstock I had on hand. While this playroom has been a long time in process, it just keeps getting more exciting (in my humble opinion, of course). Feel free to check it out.
For the two layer cut, I cut the tunnel background into the pink layer and cut the girls out of the white cardstock. On the other cut I just used the pink as a solid background.
Once you get your images cut out to your liking, weed them and get them looking just right. Take a minute to sit back and admire them! If you made it this far, congratulations! I know this is a long tedious process, but you can get such fabulous custom silhouette results!
Fifth Step: Frame It!
Don’t let your beautiful silhouette just sit there on your craft table. Get it off the table and into a frame! I promise, this part is really no so hard. You will need:
Something to add dimension behind the cutout. I used scraps of Cork that I had on hand.
Adhesive I used a tape roller from the scrapbooking section of the craft store.
Decide where you want your background. Mine was slightly smaller than the frame, but larger than the mat. In order to ensure it wouldn’t slip around, I adhered it centered to the example insert they always have in the frame. Next, add your cork (or something with similar dimension) to the back of your custom silhouette cutout. Then, adhere it to the background. Center your art in the frame and close it up. It is really that simple.
Father and Daughters finally in their frame!
My sweet little girls all settled in their frame.
Well, I suppose that is all I have for today. Have you made any custom silhouette artwork? I would love to see it! Oh, and please excuse the quantity of social media images that follow, I really can’t put down my new CC apps!
Well, it has been a while since I made my first DIY bed buddy. You can take a look at that first attempt in this post. This time, I had already made a bunch of rectangular bean bags for my little girls. So, I already had the first step done. For the design, I kept it very similar to the one I originally came up with.
The only major change I made was how I made and attached the handles. Surveying my awesome dinosaur bed buddy, I decided that the handles were both overly complicated and a possible choke hazard! Take a look. See how long the handles are?
Change: New Straps
My mind can see some child deciding that this would make a good necklace and choking themselves. Hence, I keep this one put up and came up with a different method to use for the handles. First, I used a strap instead of a string. Second, I made it much shorter. Third, I didn’t make the extra little “strap holder” parts and sewed the handles directly into the seams.
DIY Bed Buddy – First Attempt
My girls love to have things that make them like Mommy or Papa. My daughter has been toting her new mini bed buddy all over and calling it her “buddy bean bag” instead of her bed buddy.
Microwave Your DIY Bed Buddy
Pop it in the microwave for 30 – 60 seconds and you or your children can cuddle up with it. For the large one, I like to microwave it for 2 and half minutes for my husband or a little longer for myself. It feels great on sore shoulders or a pounding head.
As a side note of sorts, I just last month got a subscription to the latest Adobe software. If you look at this tutorial that I made, you will see why I have been having so much fun with it! Mainly, I had wanted to be able to use Adobe Illustrator to work with SVG’s and thought Photoshop would be a nice bonus. However, it includes access to a large number of programs AND a large number of apps. Now, I can’t stop playing with images on my phone.
If you can manage to accumulate a large number of $1 no rush credits on Amazon and also happen to have academic status, you can get a year’s subscription without paying an arm and a leg. I really had no intention of plugging Adobe just now, but I really haven’t been able to stop playing with it since I signed up!
Well, that is certainly all I have for today. Please, share your projects with me if you make a version of this or something similar. I would love to see how your DIY Bed Buddy turns out!
Kabram Krafts is a participant in the Amazon Services LLC Associates Program, an affiliate advertising program designed to provide a means for sites to earn advertising fees by advertising and linking to amazon.com.


 As a caution, I do warn that I have personally had struggles with this method and recommend you
 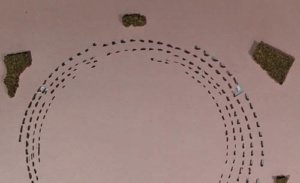 th them holding hands, only took one cut.
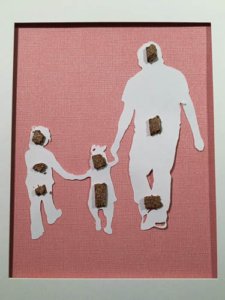


