Posted on 5 Comments

How to shape your SVG files with confidence.

Can I change an SVG? How!?

YOU definitely can manipulate an SVG shape. It may look complicated, but it doesn’t take long to get the hang of it. If you want an introduction to the SVG file format and why it is so fantastic, check out the first part of this series: SVG file format for Crafters.

When you first try to edit an SVG, it may seem like a very strange object. Unlike your typical image editor on the computer, the svg files are not all about pixels but about points and angles. Each point and the way it is connected to the other points is recorded in the definition of the file. Each of these points is called a node and each node has one or more handles.

What is a NODE?

So, what is a node? I am so glad you asked. I was just dying to explain it!

Wink, wink…

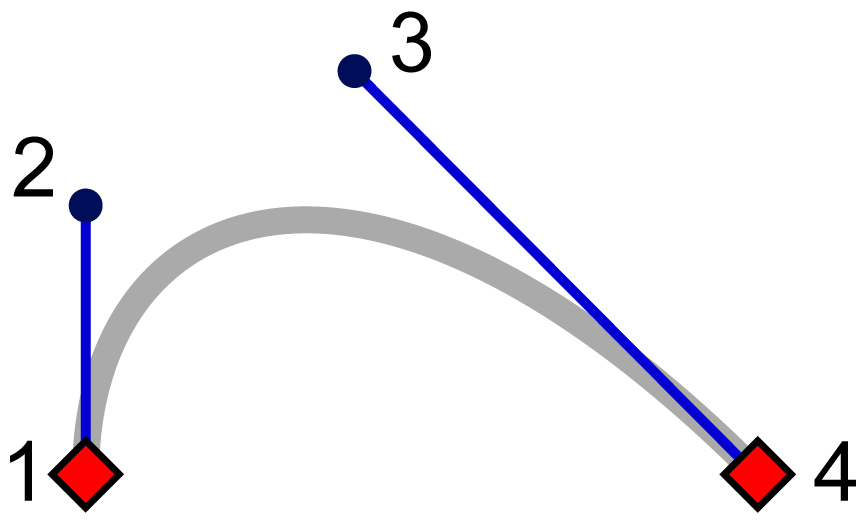
A node is a point on the plane that contains your SVG shape. Many nodes make up each shape. The way these nodes connect to each other defines the path that creates your SVG shape. Each node can have two “handles” on it extending to their own points in the plane. These handles define the slope of the curve of the path for the mathematical equation that generates the lines of the shapes.

This way, instead of storing the pixels of a line, the data is stored in a discrete number of points which your computer can use to compute the lines and structure of the shape.  We could go into more math here if you would like (I do have a mathematics degree after all) but I have a feeling the majority of my readers would prefer some practical information for editing the SVG files they have. But, if I am wrong just let me know, I would be happy to let my inner nerd shine out.

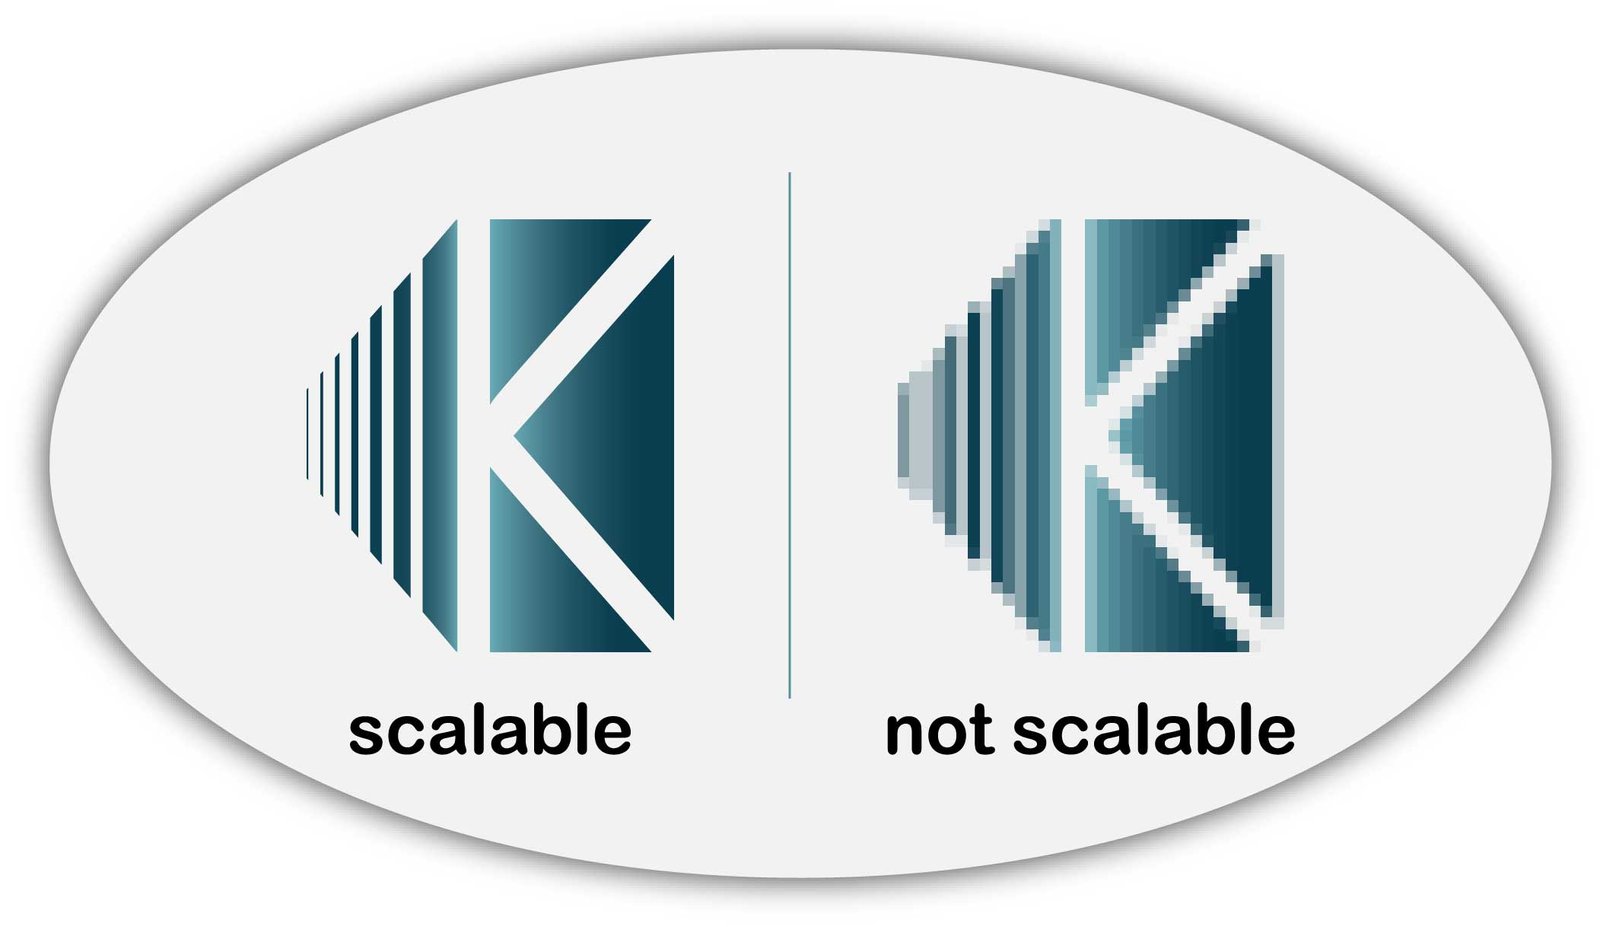
This manner of storing information is what makes the SVG file format stand out. It doesn’t matter how big you make it. It will always look sharp.

If you do like the math behind it, I found this little article here which delves into the math a bit. https://people.gnome.org/~federico/news-2016-11.html

Also, I borrowed his handy diagrams:

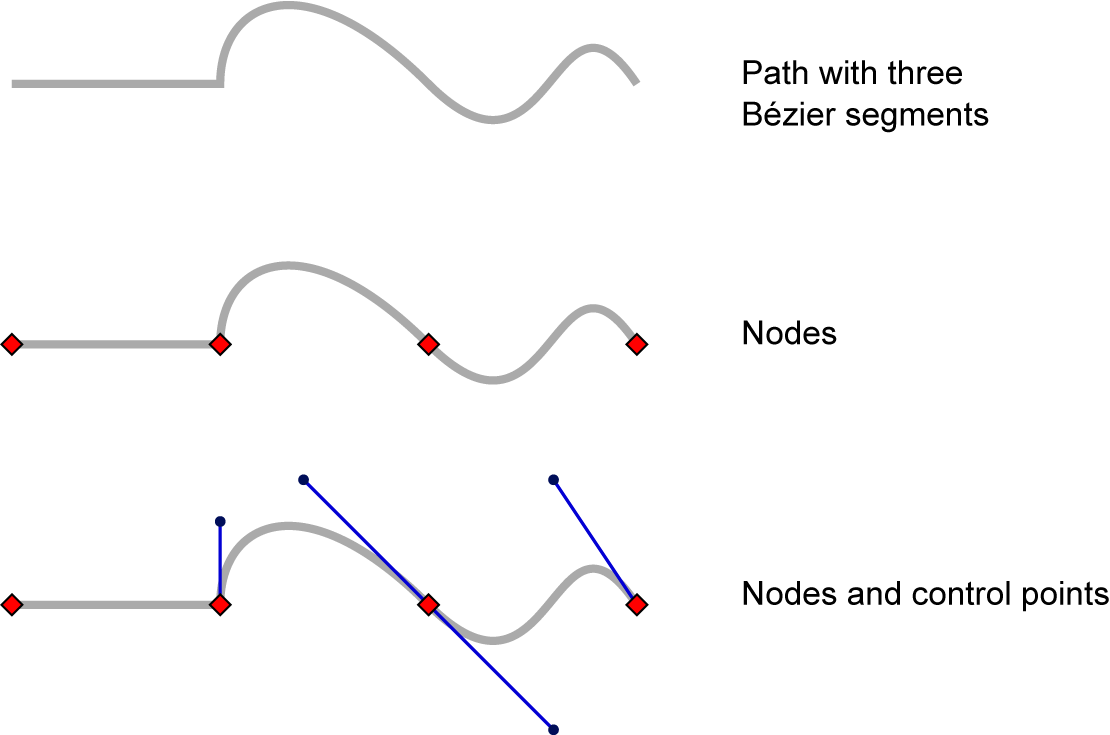
First, we see the SVG path without any markup. Second, if you go in to edit the SVG path, you will see the nodes. Lastly, if you click to edit the nodes, you should see little “handles” with “control points” on the end pop up. These will move the path without moving the nodes. If you like, you can think of the nodes as anchor points for the shape. Here is another illustration for you.

Well, I suppose that may be enough on the terminology of the SVG format.

You are probably asking me how can I actually DO anything to edit these SVG paths?

Shaping and Editing SVG shapes?

Would you like to edit a design? Do you have a path or a file that you got that just needs a little tweak? Would you like to make and edit your own shapes? You can do it!

Here are 7 operations you may need to use to accomplish your designing goals. Usually, I use Adobe Illustrator and then import my files into Silhouette Studio Designer Edition. I resisted the Designer Edition of Silhouette studio for a long time, but I finally did upgrade. Checkout why in this article:

Why I finally bought the Designer Edition of Silhouette Studio » Kabram Krafts

Why I finally bought the Designer Edition of Silhouette Studio » Kabram Krafts

However, if you would like to edit your SVGs in Silhouette Studio or in Inkscape (a free SVG editor) I have included little GIFs of what that looks like as well.

  1. Move an Individual Node (this looks the same in almost any program)
  2. Change the curve of the path between Nodes (this also looks the same in almost any program)
  3. Make a Node either a point or a curve
  4. Add a new Node
  5. Delete a Node
  6. Break a path at a Node
  7. Join a path at two Nodes

Apply it!

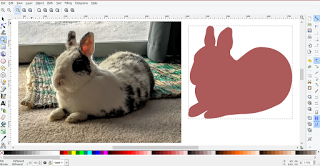
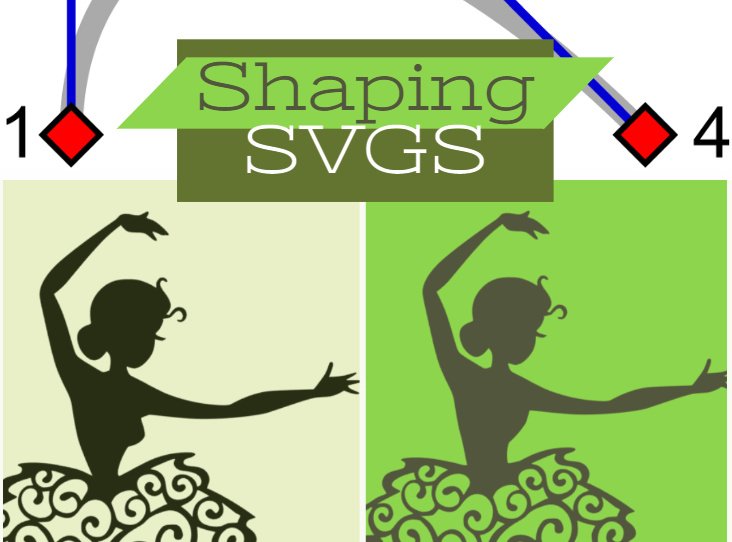
Now you know the basics. Congratulations. You can now edit your own files with confidence. Let’s look at an example.

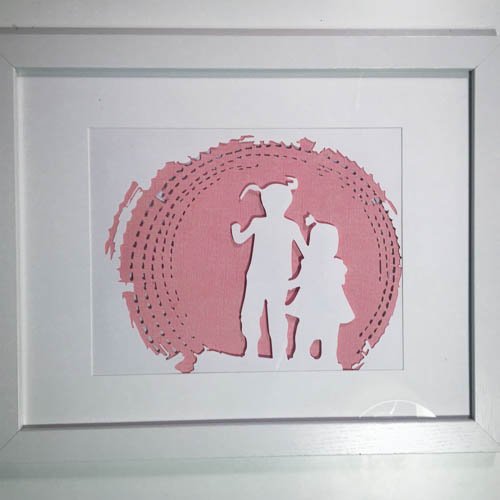
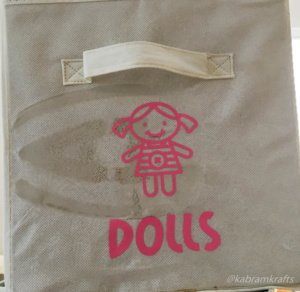
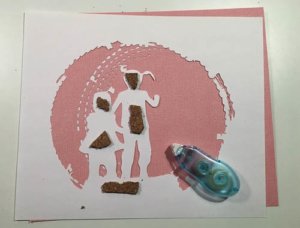
In this example, my 5 year old had choosen a ballerina she wanted for the shirts we were making with heat transfer vinyl. Well, in my humble opinion, the body shape of the ballerina wasn’t quite appropriate for my 5 year old daughter. A couple of node deletions and moves, and all was fixed. Everyone was happy and no unrealistic body images had been memorialized.

What SVG files have you tried to change? Is there a file you are thinking of right now? Go do it! I know you can. Show me the results!

Posted on 4 Comments

Pumpkin Stack SVG – Fall Freebie!

Pumpkin Stack SVG – Fall Freebie!

It is fall! It is mid-October and a pumpkin stack svg is just what you need. Halloween is coming quickly. What does your October typically look like? For me, Halloween is a chance for the kids to play dress up and have fun going trick-or-treating. I don’t get too into the ghoulish and ghastly side of the holiday. I do, however, enjoy the fall leaves, crisp air and fun fall traditions. So, pumpkins are always fun!

So, I present you with a stack of pumpkins. A cute, free svg pumpkin stack file. I think they would make a great little picture on the wall for the season. Or perhaps a little card or a temporary window decal! Whatever you use them for, I hope you enjoy.

Meanwhile, Life Goes On

By the way, I don’t know if anyone has missed me or noticed that my posts have been a bit on the few and far between side. If you have, I will tell you that life has been more hectic than normal for us. After just completing a move into a new house here in Denver in the Spring, my husband unexpectedly changed jobs.

The new job is great, the new area is great, but the timing was not! In fact, as I am writing this I am one day past my due date with our third child. We just got some moving containers delivered to our driveway. And, the furniture is being literally moved out from under me! On the bright side, we should hopefully be getting all settled into a nice new house in San Antonio in less than a month. God willing, we will be settling in to a nice new life with a brand new baby girl.

In the meantime, however, my posts are going to stay very few and far between and I have put my Etsy shop on vacation mode. While I wanted to keep it open, the fact that I will have a brand new baby and that my supplies are already packed up meant that reality trumped my desire to keep it open.

At any rate, I hope you enjoy this cutting file. I haven’t (perhaps obviously) had time to test it, but this mock up makes it look really cute.


If you happen to make something adorable with any of my files, I would love to see it!

Free Pumpkin Stack SVG Cutting File – A cute little pumpkin stack for you

Without further to do, here is the free pumpkin stack SVG file.


Check out my other SVG Files Too!

Free Pumpkin SVG File – Fall is Here!

Posted on 2 Comments

My First Day SVG Freebie File Download for Back to School Pictures

JPG - Color Example

My First Day SVG File Freebie – Just in time for back to school pictures!

Tomorrow is August. Yes, AUGUST! For many that means summer is almost gone and school is starting up. We just launched our first year of homeschooling with our oldest. It is Kindergarten time! So far, it has been a lot of fun. Still, it doesn’t seem like summer is over. Weather here has been very hot and then very stormy. This is strange weather for Colorado!


At any rate, Iam looking ahead to August. I love new school supplies. Did you know that the fat crayola markers make an excellent tool for hand-lettering? AND they don’t cost a fortune. Especially if you shop the school supply sales this coming month. The sale can be really good, so be sure to shop around. If you are like me, you may already have a good stockpile of supplies, but the sales are sooooo tempting, who can stay away?


The My First Day SVG freebie I am bringing you today is perfect for those first day of school pictures. I only went from 1st to 6th grade with the apples, because I can’t really imagine a junior high or high schooler cooperating for custom shirt school photos. However, if you have an exceptional child who will cooperate, the font is Segoe Print if you need to add other numbers or customize the text in any way.

If, like me, you would like a simplified project that mitigates the need for layering, I have you covered. Included with this download are the following welded apples with the numbers inside for a more silhouetted version. The key here is that you only need one layer of vinyl and should look adorable all the same!


So, will I do first day of Kindergarten photos? I want to, but that doesn’t mean I will. Life gets in the way. Hopefully, however, I will get on the ball with photos. We need some. Do you do professional photo shoots or just take your own? Either way, this “My First Day SVG” would be a great photo prop or t-shirt.

Free SVG Cutting File

Without further to do, here is the file. It includes each grade text and apples for you to swap in as needed. I think it would look great cut out in glitter heat transfer vinyl on a shirt. As you see above, it looks very cute on the shirt of this adorable girl I found searching for free stock photos. I wish you and your kids a happy August and hope they enjoy their first day of School!


Check out my other SVG Files Too!


Awesome Animal Alphabet Cutting File Download


Posted on 6 Comments

SVG file format for Crafters

What is an SVG?

The SVG file format stands for “Scalable Vector Graphic”. Let’s break that down.

First, “scalable” means that making the image larger or smaller does not change the image. Imagine you have a photo and would like to make it much larger. Chances are that your image will come out grainy and lose much of the detail you can see in the original. This is not the case for the SVG file. No matter how big or small you make it, an svg file will maintain its original detail. This is fantastic because we can take the same file and make it exactly the size we want for our crafting project and it won’t change how the image looks.


Second, the word “vector” indicates how this scalability is achieved. Allow me a moment of indulgence as I was a mathematics major. A vector is simply a term to indicate a line of a certain length and direction. A vector is usually situated within the Cartesian plane (you know, the grid with x and y). To achieve scalability, the SVG file is saved in terms of a bunch of vectors at certain points going certain directions at certain lengths. Therefore, if you want to make your SVG image bigger, the computer just has to multiply all of these vectors by the correct scale which is a simple task for the computer.

Lastly, the ‘G’ in SVG stands for “Graphic”. That is, the image or object in the SVG file. I don’t feel like this warrants much more elaboration.


Why should I care about the SVG file format?

the SVG file format for CRAFTERS by Kabram Krfats

Well, why do we care? You can probably be a wonderful crafter without ever delving deeply into this subject. However, if you ever have an image that would be better with a tweak or an extra spike, then knowing a little bit about the SVG file could come in very handy. The SVG file is a natural choice for the hobby and professional level cutting machines precisely because of its natural scalability.


What cutting machines use the SVG file format?

Silhouette Studio Designer Edition

As far as I know, all of the current generation of common hobby cutting machines can process the SVG file format. The only hiccup you may run into is that some companies will make you upgrade to their paid software in order to open the SVG file format rather than their own proprietary file format. For example, I upgraded to the Designer Edition of Silhouette Studio precisely for this reason. Check out my reasons in this post.

Other Programs for editing SVG files

In addition to Cricut design Space and the DE and up of Silhouette Studio, there are a few other programs that can open and edit the SVG file. My favorite of these programs is definitely Adobe Illustrator. Once I started Adobe’s subscription based Creative Cloud program, I loved it and don’t wish to go back. If you have the budget for it I would highly recommend looking into it. Not only do you get the ability to edit your SVG files in Adobe Illustrator, you also get access to Photoshop, Lightroom, and a slew of other top of the line programs. Seriously, it is super awesome and even comes with companion apps for your phone. The graphic above was made using one of Adobe’s apps. It is addicting and productive at the same time!

If you do decide it is right for you, make my day and purchase it through my affiliate link. 😉 I earn a small (pretty small sadly) commission for the referral at no cost to you.

If your budget is not up for the Adobe software package, have no fear. I used Inkscape for years and it is definitely a great option as well. Plus, it is freely available!

I found it useful to make, edit, and save SVG files though either AI or Inkscape rather than through the cutting machine’s software itself. First, the software that accompanies your machine often can’t save in the SVG file format even if it can open it. Second, I like having the ability to catalog and backup my files separately from the machine software itself in case I change machines or lose access to it for any other reason.


Are there other formats I can use?

There are other formats that are scalable. One that I have used is the DXF file format which stands for “Drawing Exchange Format”. It was developed for use with the AutoCAD program. I have used it in the past before I purchased the Designer Edition of Silhouette Studio as it is a format that can be read by the basic (free) edition of Silhouette Studio. However, it is not as widely used and it isn’t as reliable in my experience. If you want to read more about my experience with DXF, read my post on why I purchased the Designer Edition of the software.

Another format that is used is the EPS file format. This stands for “Encapsulated PostScript” and is also scalable and vector based. It is the standard format for vector images created by Adobe Illustrator. You probably will have no reason to use the EPS format.

What is next?

Learning more about the SVG file is important if you want to have more control over your designs.


Please be on the look out for the second article in this series. I plan to cover the details of actually editing an SVG file in various programs. Also, I will go over what a node is, what the handles are and how to add and delete nodes. These are very useful skills!

Posted on 16 Comments

From Photo to SVG

Turning your Photo to SVG file has satisfying results

From Photo to SVG: The topic of taking a photo and making an SVG is one I keep coming back to. Perhaps it is because custom images from your own photos are simply delightful. Also, it is a great way to get some adorable silhouettes just in general. Whatever your reason for wanting an SVG from your photograph, you can do it! It may take some patience and attention to detail, but it is totally worth it.

My first attempt at a silhouette was one of our bunny rabbit Geronimo. It came out nicely, but wasn’t a very hard shape. With this shape I basically made a bunch of little shapes and then combined them with the path merge tools.

from photo to svg Geronimo the bunny silhouette by kabram krafts
Geronimo the Bunny

Then, for my second attempt I created some custom artwork for my girls’ playroom. These images were definitely more complex and took a lot longer, but with spectacular results. I used a different approach for these images. First, I edited the original photos to make them as black and white as possible.

gif of silhouette studio trace function from photo to svg

Second, I traced the images using Inkscape (you can also use Adobe Illustrator or your cutting machine’s software). Lastly, and most tediously, I hand edited the nodes of the path until it was just the way I wanted it. At last, you have converted your photo to svg.

From Photo to SVG

While I am not going to go into detail in this post as it is not my first on this topic, I will hit a few important points.

Check out this post if you want the details!

First, you need to find the right photo – a crisp, clean silhouetted photo with nothing in the background will be much easier to create a custom silhouette cutting file from than one that has a lot going on.

Second, you want to use a photo editing software to get it as close to a silhouette as you can from the start so it will be easier to trace. Like the ones shown below.

image edited for contrast with father and daughters ready for converting photo to svg
image edited for contrast of girls in tunnel ready for converting photo to svg

Third, you trace the image using a Vector capable software to go from your photo to svg file. I have used Silhouette Studio, Inkscape, and Adobe Illustrator.

Lastly, unless you are really lucky, there will be some hand editing to do to get it just right. And sometimes, when the background of the image just won’t cooperate, you may just have to use the path tool and trace your image point by point!

From Photo to SVG: my latest results

While I haven’t cut these images out yet, I can’t wait to do so. From pictures of my daughters swinging, I arrived at these adorable cutting files. One was begging for extra detail and ended up not being a true silhouette. I tried my best to make it all one connected path, but couldn’t see a way to connect in the facial details without compromising on the cuteness!

example of detailed photo to svg project

For the second image, I went true silhouette all the way. There is enough detail in the overall shape that you can still tell what is going on in the image.

from photo to svg despite a cluttered background image

While they may not hold the same emotional signifigance for you as they do for me, I am posting my final SVG files here because they are simply so adorable. Feel free to use them for your own personal projects if you so desire or make your own silhouettes using some of these photo to svg methods!

My silhouette cameo is my go to for creating beautiful home decor from these files!

To download these files, just click the DOWNLOAD button below.

from photo to svg free svg images of girls on swings

Thanks for stopping by and have a wonderful April!

FROM PHOTO TO SVG
Posted on 8 Comments

Free SVG four leaf clover for St. Patrick’s Day!

UPDATED POST CLICK HERE!

Can you believe March is here? Well, here I have a free SVG file to remind you that St. Patrick’s Day is on its way. So, who likes four leaf clovers? Did you ever spend hours in a field trying to find one? I feel like I did as a kid, but I don’t remember ever finding one.

Do you celebrate St. Patrick’s Day? We didn’t do much for it growing up, except for wear some green to avoid being pinched! Occasionally we would go out for lunch or dinner to somewhere vaguely Irish. What are your traditions? Is it a Holiday you take note of or just skip over? I have never been a big drinker, so I imagine that those who enjoy that pastime may do more to celebrate than I do.

Free SVG Cutting File

At any rate, this is a really cute little four leaf clover cutting file. I think it would look great cut out in glitter heat transfer vinyl on a shirt. Maybe with a cute little saying of some sort underneath? Well, I hope you enjoy! And have a fabulous March!!

Here I present to you this St. Patrick’s Day SVG file freebie, the famed four leaf clover!

Check out my other SVG Files Too!

And, if you are already looking forward to Easter, check out these adorable little Easter Egg cutting files!

Posted on Leave a comment

Hearts for your Valentine! Free SVG download for your card making and crafting.

Are you making lots of handmade Valentine’s Day cards this year? These free SVG hearts should make a wonderful addition to your projects whether you are making a new shirt with HTV, a super special handmade card for your sweetheart, or a card for everyone. Please enjoy and also check out my past Valentine’s Day freebies!

Free SVG Hearts for Valentine’s Day

Happy Valentine’s Day – a bit early!


I think these hearts would look great on a t-shirt with sparkly HTV! Sorry, I haven’t had time to try it out yet, but here is a mock up for you all the same. Please pardon my Photoshop skills, they are still in progress!


Also check out my other Valentine’s Day cutting files:


Have a wonderful Day!

Posted on Leave a comment

Give Thanks SVG Hand Lettered Freebie!

Thanksgiving is coming! What better way to celebrate than to give thanks with a nice free hand lettered SVG file!? Thanksgiving is a wonderful holiday as gratitude can significantly improve your satisfaction and happiness levels! The more you appreciate what you have, the happier you will be. So, give thanks!

Personally, I have tons to be thankful for! Beautiful girls, wonderful husband, the opportunity to live in Colorado near my family again. I am sure it can be harder if you are going through a difficult time or situation in your life right now, but try to think of something, even something very small, to give thanks for. It could be the sun on your face, the warm cup of coffee, a smile on your child’s face, or even just a warm blanket. Give thanks.

So, without further ado, here is the freebie.


I think this file would look great on a sign, a plaque, or on a dishtowel! Sorry, I haven’t had time to try it out yet, but here is a mock up for you all the same:


And if you want to obey the command to “Give Thanks” directly, here is another free svg file you may want to check out. Make a nice thank you card and put it in the mail today. You will brighten someone’s day using these free svg files, I am sure of it!


Thank You Sentiment – Free Cutting File SVG Download


Posted on 2 Comments

Bin Labels HTV DIY – Organize your life!

Move Complete!

Have you moved lately? Well, we just moved from Michigan to Colorado! It is lots and lots of work. And requires a lot of good organization. All of which is made better by these adorable bin labels!


If you missed me, that is where I have been. Packing. Unpacking. Packing. Unpacking. Repeat.

Having grown up in Colorado, I am happy to be back and near family again.

Unfortunately, since Colorado is so awesome and everyone else wants to be here too, housing prices are much steeper here. Not just a little steeper. I’m talking 7 or 8 times steeper! For example, coming from our lovely 6 bedroom house on 4 acres in Michigan, we will have trouble finding a condo for the same price!


Getting Organized with Bin Labels

Downsizing was actually some amount of fun, until we got to our apartment and realized that getting rid of half our stuff wasn’t enough! So, that is what I have been doing the past month or so. Organizing. Getting rid of stuff. Organizing is the fun part though.

Knowing this, you can see where this project came from. It was born of necessity and the desire to have my children put their toys away so that I can preserve my sanity in our new 2 bedroom living space! Thus, the idea for our new bin labels was born. Well, it was actually in my head for quite a while. It was going to be one of my finishing touches on the playroom I was working on in Michigan. Take a look at how awesome it was!

Playroom in Michigan

Alas, it was time to move on. Hopefully someone else will move in and enjoy the fun colors and the animal alphabet that I left on the wall!

Do you also have seemingly hundreds of toys underfoot? Are you constantly frustrated with different types and sets of toys getting jumbled into one big mess? Do your kids need help knowing where everything ought to go? Then you need some of these bins and these adorable bin labels!

Take Stock of Your Items

First, you need to take stock of what you are trying to organize. For me, this meant categorizing the toys in my girls’ room and putting them in different bins. Undoubtedly, they have too many toys. However, once in bins and labeled with these cute bin labels, it looks much more manageable. Also, remember to try to match the number of categories to the number of bins you have available.

Here are the bin label categories I came up with for the toys we have:

  • DOCTOR
  • DRESS UP
  • CALICO CRITTERS
  • PLAYMOBIL
  • BOOKS ON TAPE
  • LEGO
  • MUSIC
  • CARS
  • DOLLS
  • BLOCKS
  • LITTLE PEOPLE
  • DISHES
  • FOOD
  • TOOLS

In addition, I added each of my daughter’s names so that they could have a bin of their own. Next, I looked for a simple, cute design for each category. The idea was to have a cohesive looking set of images that helped my not yet literate daughters identify each bin on their own.

Most of the images I found doing a quick google image search. Some I had to work more on to get what I wanted. The font I used is called “Mail Ray Stuff”. I really like how the images turned out. I am especially fond of the cute baby on the “LITTLE PEOPLE” bin.


Create your Bin Labels

Feel free to use my labels and images for your own personal use. However, I do not recommend using them for commercial uses as I am not positive on the copyrights of each one.


REMEMBER TO CUT THESE OUT IN REVERSE ON YOUR HTV!


REMEMBER TO CUT THESE OUT IN REVERSE ON YOUR HTV!


Quality Materials

Since this was my very first Heat Transfer Vinyl project, I wanted to use the good stuff. And, from what I hear, Siser Easy Weed is where it is at. I found a roll at my local Michaels and it was on a great sale to boot! All in all, I was very impressed by the stuff. Also, it is actually much easier to weed than Oracle vinyl that I am used to working with.

So, back to the project.

Decide how large you want things and cut it out! This is on you. Then cut out each label and weed out the extra. Your image is reversed, right?

Finally, the fun part – ironing the bin labels on and seeing the results. I followed the directions on the packaging of my HTV and used a grill mat to place over the images while ironing.

Results – Bin material matters too!

If you look at my results, you can see that some of my bins turned out spectacular. Unfortunately, some have nice imprints of the iron. This was largely due to the bins themselves. My nice large fabric IKEA ones look great. No iron imprints, just clean and crisp.


My cheap polyester bins which came from who knows where, did not hold up well. Since I didn’t want to buy new bins, I just went with it. They still work. Some are just much prettier than others!


Now, sit back and admire your work. Wait, scratch that. Go get to organizing!

Posted on 3 Comments

Hand Lettered Art on a Watercolor Background – Free Hand Lettered SVG file too!

DIY Hand Lettered Art Project

Welcome to my website and today’s journey through my hand lettered artwork project! Have you tried hand lettering? With all the amazing hand lettering on Pinterest and Instagram, I just couldn’t stay away. Such pretty lettering ought to be admired by imitation, in my opinion! 

Well, my hand lettering led to water brush pens and watercolors, which led in turn to watercolor doodles. Then, I saw this on Instagram. Watercolor hexagons! Perfect, I thought, I can usually make patterns and I love playing with the colors. Of course, I didn’t attempt the project free-handed, like the lady I saw as my inspiration. We’ll save that for a later date.

Instead, I drew nice little evenly spaced guidelines for myself. I used the materials listed below. These are Amazon affiliate links, but buy wherever you like! I generally buy new supplies at the craft stores with coupons. I love coupons.

Very, very relaxing, at least for me! Try to leave a little border between the hexagons. I found that it helped to put a dot where each corner ought to go and then connect the dots. You can also add a little extra color to the hexagon while it is still wet to get some fun variation!

Adding a Hand Lettered Word, Saying, or Sentiment

I don’t know if it is a craze right now or not, but hand lettering is highly addicting! For my piece of craft room artwork, I thought “Create” would be an apt word to add. I used my Pentel water brush again to letter this on another piece of watercolor paper with the plan to cut it out and put it on top of my hexagon masterpiece.

create watercolor

As a sidenote, I have also been playing with brush markers for hand lettering practice. Take a look at my Instagram feed if you want to see what I have been up to in my spare time.  Here are the pens I have been playing with (there are many more that I want to try as well!):

Hand Lettering Tools I have been playing with lately


After it dried, I cut the watercolor paper down a bit and stuck it on my PixScan mat for my Silhouette Cameo to cut out.

create watercolor on pixscan mat

After several tries, it finally registered and cut. While it went through and cut smoothly, it was off a bit. I took it off and played around with it a bit on top of the hexagons.

create watercolor

It would have been okay, but I didn’t really like the look of it on top of the hexagons anyhow. So, I scrapped it, and kept just the outline.

When in doubt, use Glitter!

Glitter to the rescue! I found this lovely piece of VERY THICK glitter paper in a nice dark gray. It looked like it would go well, so I set about to cut out my lettering. Does anyone know if this particular glitter cardstock is thicker than normal?


I have not previously cut out glitter cardstock. Looking in the materials list on my silhouette, I found and choose the “glitter cardstock” settings. After running the file through the cutter, I pulled it out. Sadly, it was not cut all the way through.glitter in my blade

So, I stuck it back in the Silhouette Cameo for another double-cut run through. Took it out, and it was still not cut through. This time I checked my blade to find it filled with glitter.

finally it cut through!

After cleaning it out, I upped the blade depth a bit and stuck it back in. Almost this time! Cleaned out the blade again. Fourth time was a charm and it looked great!

create cut in glitter cardstock

Persistence paid off and I was very thankful that it stayed aligned despite its many trips in and out of the machine. I then did a quick offset and cut a second one out of another piece of white cardstock. Isn’t it pretty?

Look at how pretty it looks on top of the hexagons! I am thrilled that the 4 times through the Silhouette Cameo paid off. Just in case you didn’t put this together, that is 8 cutting passes since it was set to double cut!

Now, it just needed a little extra depth. For this, I turn once again to my large supply of cork scraps. Use anything with a bit of thickness, I just have a lot of cork scraps lying around from making coasters!

In fact, if you need some coasters, please head over to my Etsy shop and take a look. I welcome custom orders if there is something in particular you are looking for!

[etsy-include=KabramKrafts;21231028]

Also, check out the other pictures I made for my playroom using this same technique.

Except, this time, I just sprayed the cork on both sides with spray adhesive. That seemed to do the trick nicely! Also, I didn’t get any photos of this, but I adhered the glitter cardstock to the offset white cardstock cut.

Almost Done! Now just position your lovely hand lettering on your lovely hand painted background

Beautiful! All set to frame.

A nice little glamour shot of my framed artwork next to my Silhouette Cameo.


And, if you were waiting for this, I’m sorry for the long post. Here is the FREE HAND LETTERED CUTTING FILE! Just click the link below and the free SVG file should download.