Did you know that it was National Tile Day? Neither did I, until I was browsing around for inspiration. Apparently, today is the very first annual celebration of this newly designated National Tile Day. Tiles! Well, I really love tiles. In fact, making tile coasters is something that I have been doing for a while. Using travertine tiles and some cork, they can really come out quite beautifully. Just recently, I made a set for each of the households in our family for Christmas using vinyl and my Silhouette Cameo. Take a look:
While you can order these in bulk or pick them up at the hardware store, here is an Amazon link to tiles similar to the ones I used.
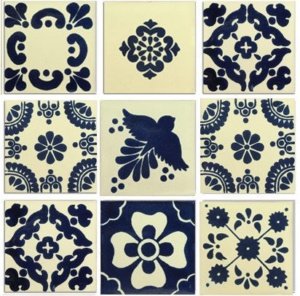
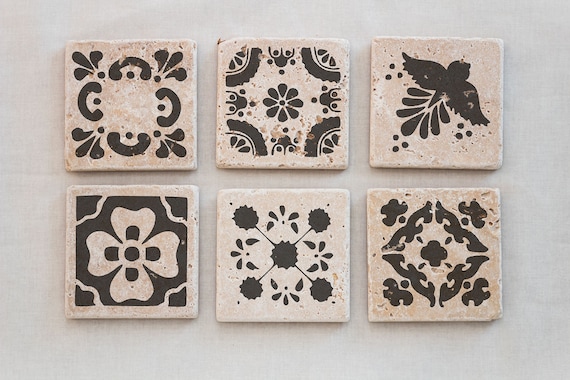
Anyhow, I thought I would find some beautiful images of tiles and make some new stencil svg cutting files. And so, I did just that. Here is the image I found for inspiration and tracing the free svg stencils.
Aren’t these tile gorgeous? While I have linked the picture to the photo’s origin, if you would like to instead use the free svg stencil files that I have made, just hang on. In due time, I will most definitely be making some new tile coasters with these designs. Color choice is going to be difficult though! Whenever I enact this fabulous plan, I will be sharing it here with you.
Here are the free SVG and PNG file downloads. Enjoy, and happy national tile day!
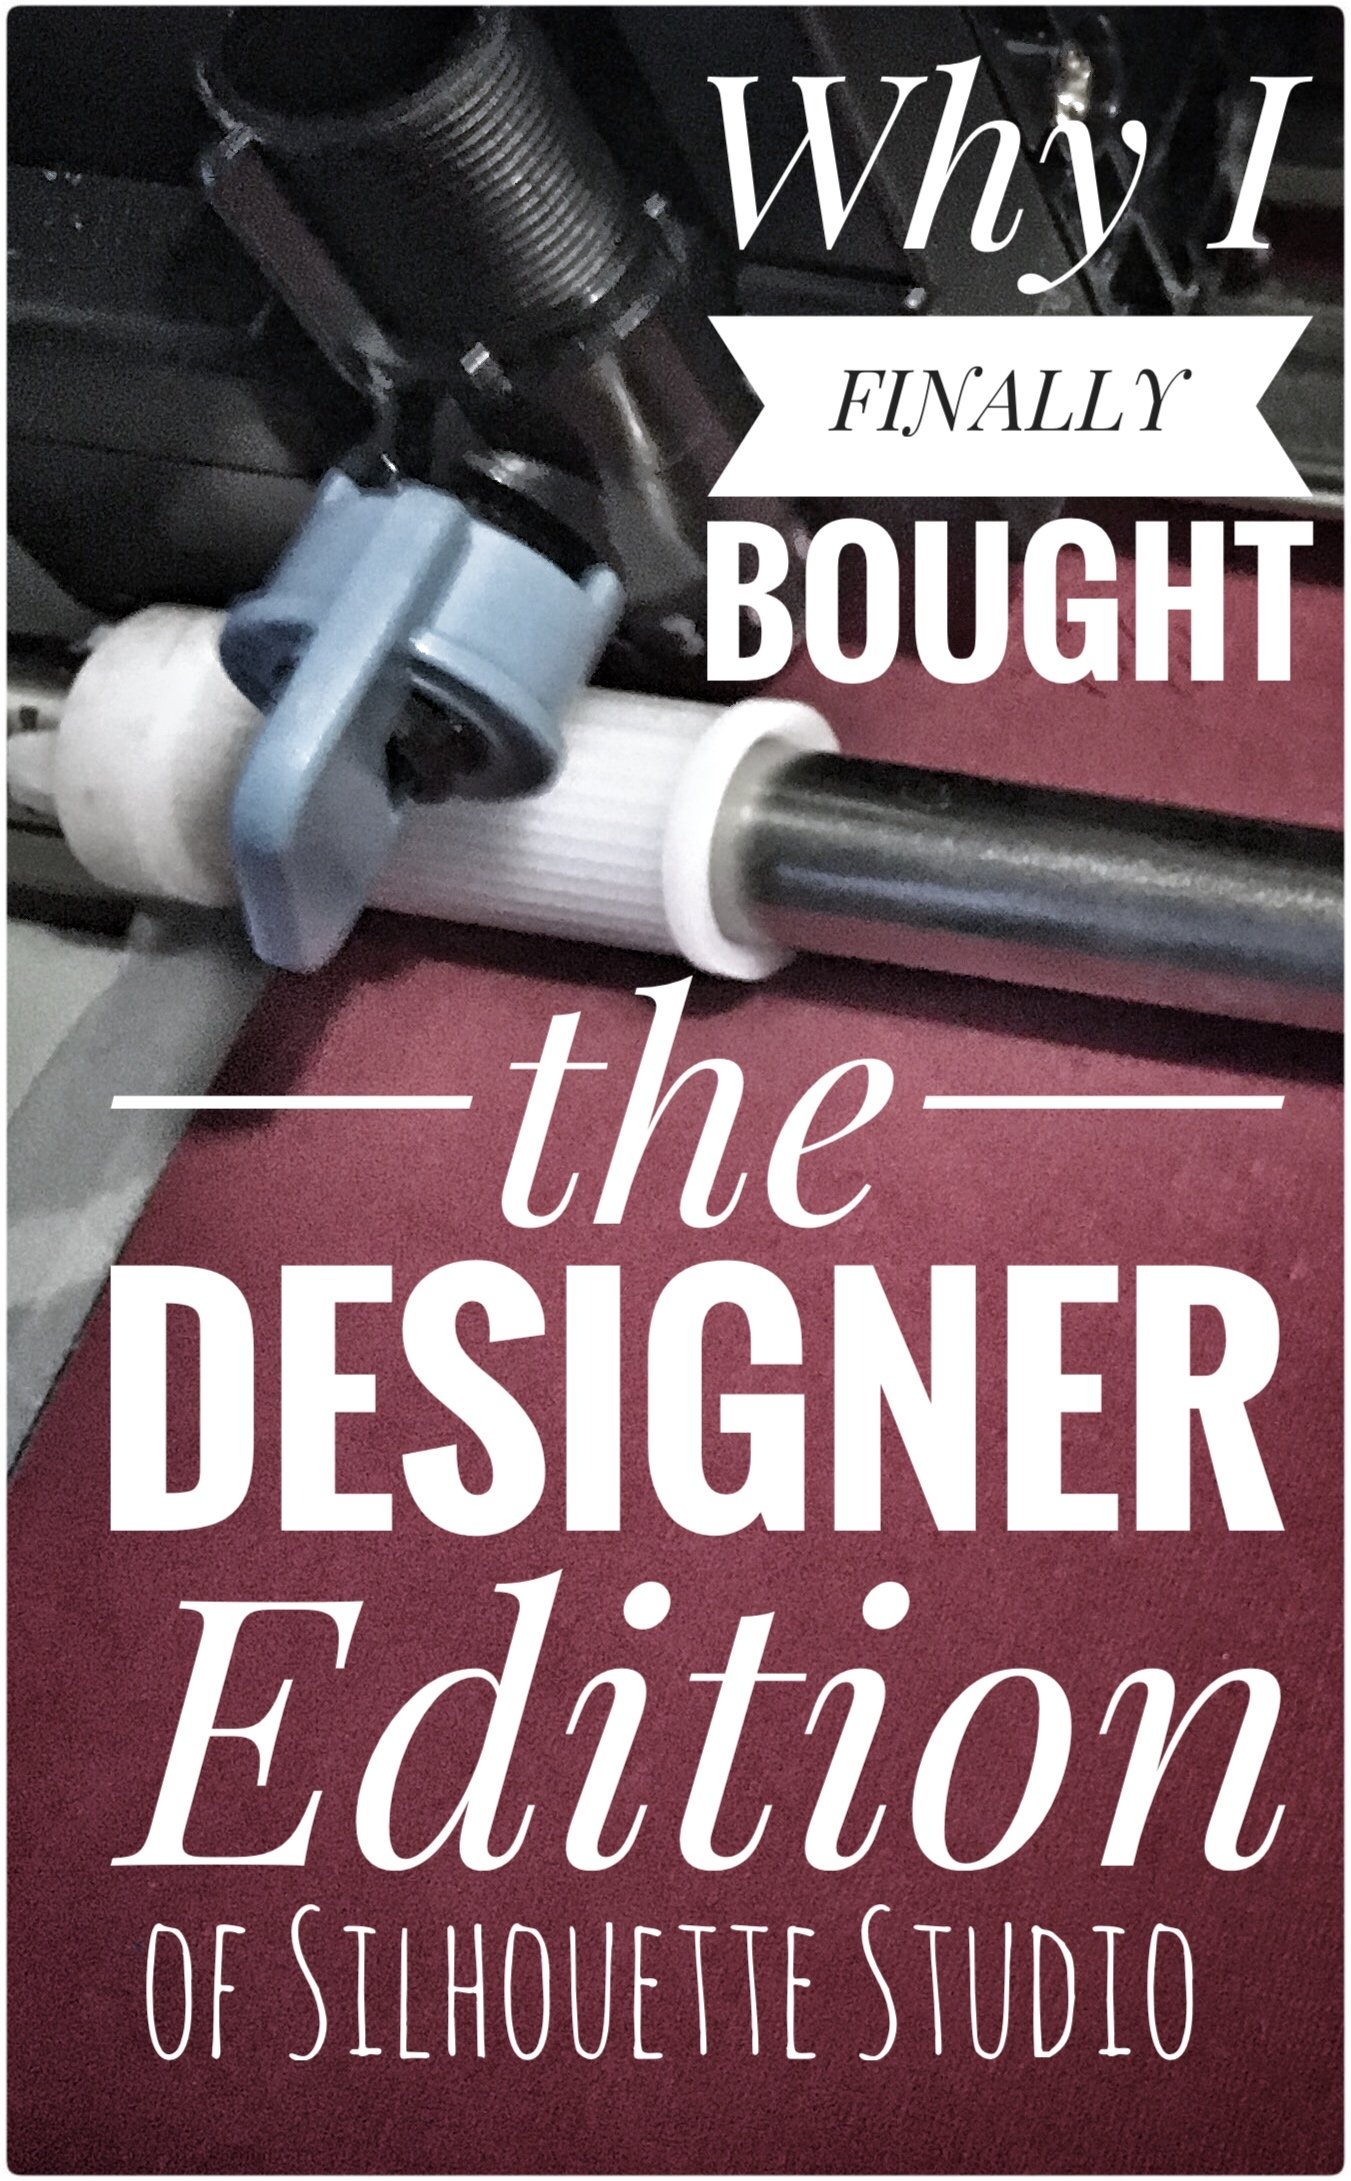
First, lets drive straight to the point. While the Silhouette Studio Designer Edition of the Silhouette software has lots of extra features, the feature that was most alluring to me was the support for the SVG file type.
The magic of the SVG file type.
What does SVG mean? Well, I can tell you! Scalable Vector Graphics, or SVG files are fabulous and awesome in so many ways. Basically, instead of recording pixels of a picture, this format saves points and directions. The combination of a point and a directions is called a vector (sorry for the technical jargon, but I was a mathematics major!). So, this format saves a bunch of vectors instead of pixels.
And, why would we care about this? Because it makes the files SCALABLE. That means that you can make them any size you like and every detail will be the same. Unlike a jpg file, which has a set resolution, SVG files do not lose anything when you make them gigantic. Click the image if you want to read more about these awesome files.
SVG Files and Silhouette Studio
Moving on, we now know that SVG files are awesome, but why do we care about Silhouette Studio Designer Edition and its ability to use them?
Firstly, we care because there are millions of free and cheap SVG files out there for us to use. Free files are awesome.
Secondly, we care because it is easy to make and save our own files in the SVG format. I use Inkscape, a free software, to create and edit files. Inkscape is free and has tons of features. While it can save in DXF and other formats, it defaults to saving in SVG format because this seems to be the predominant file type for vector graphics.
Thirdly, we care because the basic edition of Silhouette Studio is horrible at importing files! Having tried to get away with the free version for years, I can truly say that it is terrible when trying to import DXF files. It can do it, but the results are never pretty.
Why I chose not to buy Designer Edition for several years.
Considering all its fun features, why would I still refuse to purchase it? I went without it for at least 3 years with my Silhouette Cameo. Obviously, I didn’t want to shell out the $50 for it. Feeling as though my technical savvy should allow me a way out, I stubbornly refused to buy Silhouette Studio Designer Edition.
Can you avoid buying DE and still make your own files? Yes.
Can you avoid buying DE and still get a lot out of your machine? Yes.
Can you avoid buying DE and still be efficient? No, not really.
Workarounds exist for almost anything you would want to do which requires DE. The main task that I needed to achieve was using SVG files that I found online with my Silhouette Cameo. For this purpose, I learned how to use Inkscape to edit SVG files and export them as DXF files, a file type that the basic edition of Silhouette Studio IS able to import. This method worked for me. I felt as though I had gotten around buying the Silhouette Studio Designer Edition and didn’t have any need for it. Why bother getting it when I could simply open the files I needed in Inkscape and then save them as DXF? Well, now I know why.
My Tipping Point
What finally tipped me over the edge was working and struggling with a file I needed to cut out. Opening this particular file in Inkscape, it looked very nice. There weren’t very many points. It was a nice clean file. Now, all I needed was to cut it out. Saving it as a DXF file is easy in Inkscape. There are a few different options, but nothing too bad. I saved it and opened it in Silhouette Studio. The software cringed, and spun, and stuttered.
Finally, it opened and had my shape with what appeared to be millions of points. Trying to work with it, I told the software to simplify the shape. It obligingly rearranged the points for me. Still millions of points in the file. I thought I would just ignore this and cut it out. Wrong. However the DXF format or the Silhouette software had mangled my file cause it to be a gigantic file size that kept getting lost when I tried sending it to cut.
Frustrated, I started looking for deals on DE. Finding a pretty good deal, I took the plunge and got a code to upgrade. I upgraded the software – it didn’t even need to download anything. Those sneaky people, I thought, they include everything in the original download but it is sitting there locked away! Well, I tried it out anyway.
Returning to the saga of my cut file, I pulled the original SVG file open easily in my shiny new Silhouette Studio Designer Edition software. It looked just as simple and beautiful as it had in Inkscape. Crossing my fingers, I sent it to the machine and it cut it out within seconds. Clean, simple, easy. Everything I had wanted. Why, I thought, had I wasted so much time with my workarounds?
Silhouette Designer Edition Features
Features abound in the Silhouette Studio Designer Edition. Take a look at this article on the Silhouette School Blog if you want a more in depth look at some of these features.
Sketch Pen Options
Rhinestone Features
Shadows
Eraser Tool Options
Shear Tool
Select By Color or Line Color
Ruler and Grid Improvements
Nesting objects (for optimizing your materials)
Transfer Properties from one object to another
Easily fill shapes with photos
Import SVG files
These are the most notable changes you will see when you upgrade. One notable feature that is still missing from the software is the ability EXPORT SVG files. Having researched this a little, it seems that it was a feature in previous iterations of the Designer Edition software but has been removed. Presumably, they want people to keep their files in their own proprietary format. This is disappointing to me.
However, I am still glad that I purchased it. Once you have made an investment in the machine, it is worth the small percentage of that investment to also invest in the Designer Edition of the software. As of today, I am seeing it on Amazon for as low as $25 and I know there are other sales and deals on it from time to time as well.
Unexpected benefits of Design Edition
Unexpectedly, once I unlocked the Designer Edition, the whole software package seemed to run more quickly and smoothly. While I don’t know if this is intentional or just a byproduct of the way they designed the unlocking mechanism, it is a bonus. I truly feel like the Designer Edition is what should be included with the machine and since it isn’t, you should just chalk it up to part of the cost of the machine. Basically, I recommend pretending that it did come with the machine!
For me, the improvements to the program’s performance were most notable when editing the nodes of a path. Previously, when I tried to edit nodes in Silhouette Studio my machine churned and protested and it was incredibly, painfully slow. Now, it will comply with my desires. This alone has saved me a lot of time. In addition, the ability to import SVG files cleanly gives my files fewer nodes and the cut out swiftly.
Problems with DXF import
Additionally, I was never satisfied with using the DXF format for importing my files to Silhouette Studio. Inkscape is capable of outputting files in this format, and while it works, it doesn’t work well. Somehow, during the process of the conversion, seemingly millions of new points are added. Let me show you a comparison.
On the left, the relatively simple SVG import. On the right, the unnecessarily complicated DXF import.
Above is a file I designed in Inkscape. You can download it here if you are interested. While the image on the left may have a few unnecessary nodes, it has a manageable number of nodes. On the right is what Silhouette Studio gave me when I imported the DXF version. The number of nodes is so high you can’t even see them distinctly. When sending these files to cut out on your machine, each node is communicated to your machine. Now, you should be able to see why the SVG version is so superior. It will take a fraction of the time to send it over and cut it out. In terms of time savings, the benefits were immediately obvious.
Why I stopped providing free DXF files
As you can see, the DXF files were simply not doing the job. They were unwieldy and a time sink. Finally, I decided to give up on them. Not wanting others to lose time or have trouble with one of these files, I have also removed them from this site. In the unlikely case that you should want the DXF version of one of my files, please download the SVG and Inkscape. You can then open the SVG file and convert it in Inkscape. However, your results will likely be similar to mine.
Conclusion
After all these considerations, I am very glad I finally got the Silhouette Studio Designer Edition. Probably, I should have gotten it sooner. If you use free SVG files from online or create your own, it is well worth the time savings you will reap. Your time is valuable and don’t forget it!
Initially, I was very negative about Hello Kitty. I’m not sure why, but I think it has to do with my knee-jerk negative reaction toward anything popular. However, I have come to terms with the fact that my 1 and 3-year-old little girls are all about Hello Kitty. They love it. My one-year-old will say “kitty cat” repeatedly whenever she glimpses something with the Hello Kitty brand on it. Yep, branded characters work.
Well, enough of that. My girls love Hello Kitty, so we made a Hello Kitty dress together. I happened upon a very nice 4T dress at the thrift store. I love thrift stores. It is 100% cotton, long sleeved for winter, pink, and only $2. Oh, and it has pockets. Dresses with pockets are the best thing ever. It was a great deal, and it made the perfect base for this project. Since I knew the item didn’t cost me much, it allowed me to go forward without fear of ruining something valuable.
If you have a cutting machine like the Silhouette Cameo and you don’t have freezer paper, you are missing out on some great projects. I don’t have the latest version of the machine, but it is still going strong. You can buy freezer paper in most grocery stores. It should be near the other rolls of waxed paper, parchment paper, etc. It has a paper side, and a glossy plastic coated side. The reason it is so neat for crafting is that the plastic melts slightly when heated and makes a temporary bond with fabric. That is to say, you can use your iron to make your stencils stay put! If you can’t find it at your grocery store or prefer to buy online, Amazon sells it here.
Next, I searched for an appropriately simple little image for the dress. This is the one I found.
Once you find the image you want to use, open it up in Silhouette Studio or in Inkscape. I actually did this in both programs, because even with the Designer Edition of Silhouette Studio, it won’t let me export SVG files. Boo! But it does let you open them…
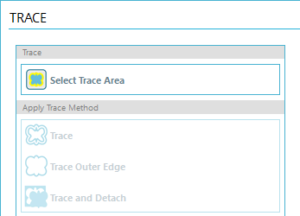
Anyhow, once you open the image, you need to trace it. Here are the two variations I use most often. There are tutorials on both of these if you search the web, but feel free to ask in the comments if you need help with this.
In Inkscape, use the “Trace Bitmap” dialogue to create an svg file from your image.
In Silhouette Studio, use the Trace function to select your image and create your cut file.
Once your image is traced, you should have a cutting file like the one above. It looks the same as the image, but it is made of lines that scale and is a file your machine can cut out.
And finally, how to actually use your stencil and create your image! These are roughly the steps I took.
Prepare your image for cutting (described above).
Cut a piece of freezer paper down to the size of your cutting mat. I placed mine with the coated side upward. If your mat is especially sticky, you may want to place it the opposite way. The important thing here is that your design will be right side up when the coated side of the paper is placed on the fabric. If your image has text (like mine) this is especially important. Hopefully you will not have to cut yours out twice like I did to get it right!
Cut out your design and carefully remove it from the mat.
Place the pieces of the design that you DON’T want painted onto your fabric. They will keep the paint off these spots and help form the design. Iron them in place with a medium hot iron, it only took a few seconds for me. Also, it may help to do one piece at a time. If you have text, don’t forget the insides of letters like ‘o’.
Once your design is in place, make sure all the edges that you don’t want painted are covered and place it in a good spot for painting. I used a big box and several plastic bags for this.
Paint! My knowledge of fabric paint is fairly limited. However, I spotted these fabric spray paints on sale at the craft store and thought I would try them out. They seem to have worked fairly well if you account for my impatience between coats. I knew I ought to follow the directions of using light coats and waiting 5 minutes between them. I knew it, but I didn’t follow it. I think this is the main culprit for the slight seepage of paint I got around Hello Kitty’s bow.
Once paint is dry (or at least mostly dry!), peel away the freezer paper and admire. The paint I used said it would be ready to use in 30 minutes, but not safe to wash for at least 72 hours.
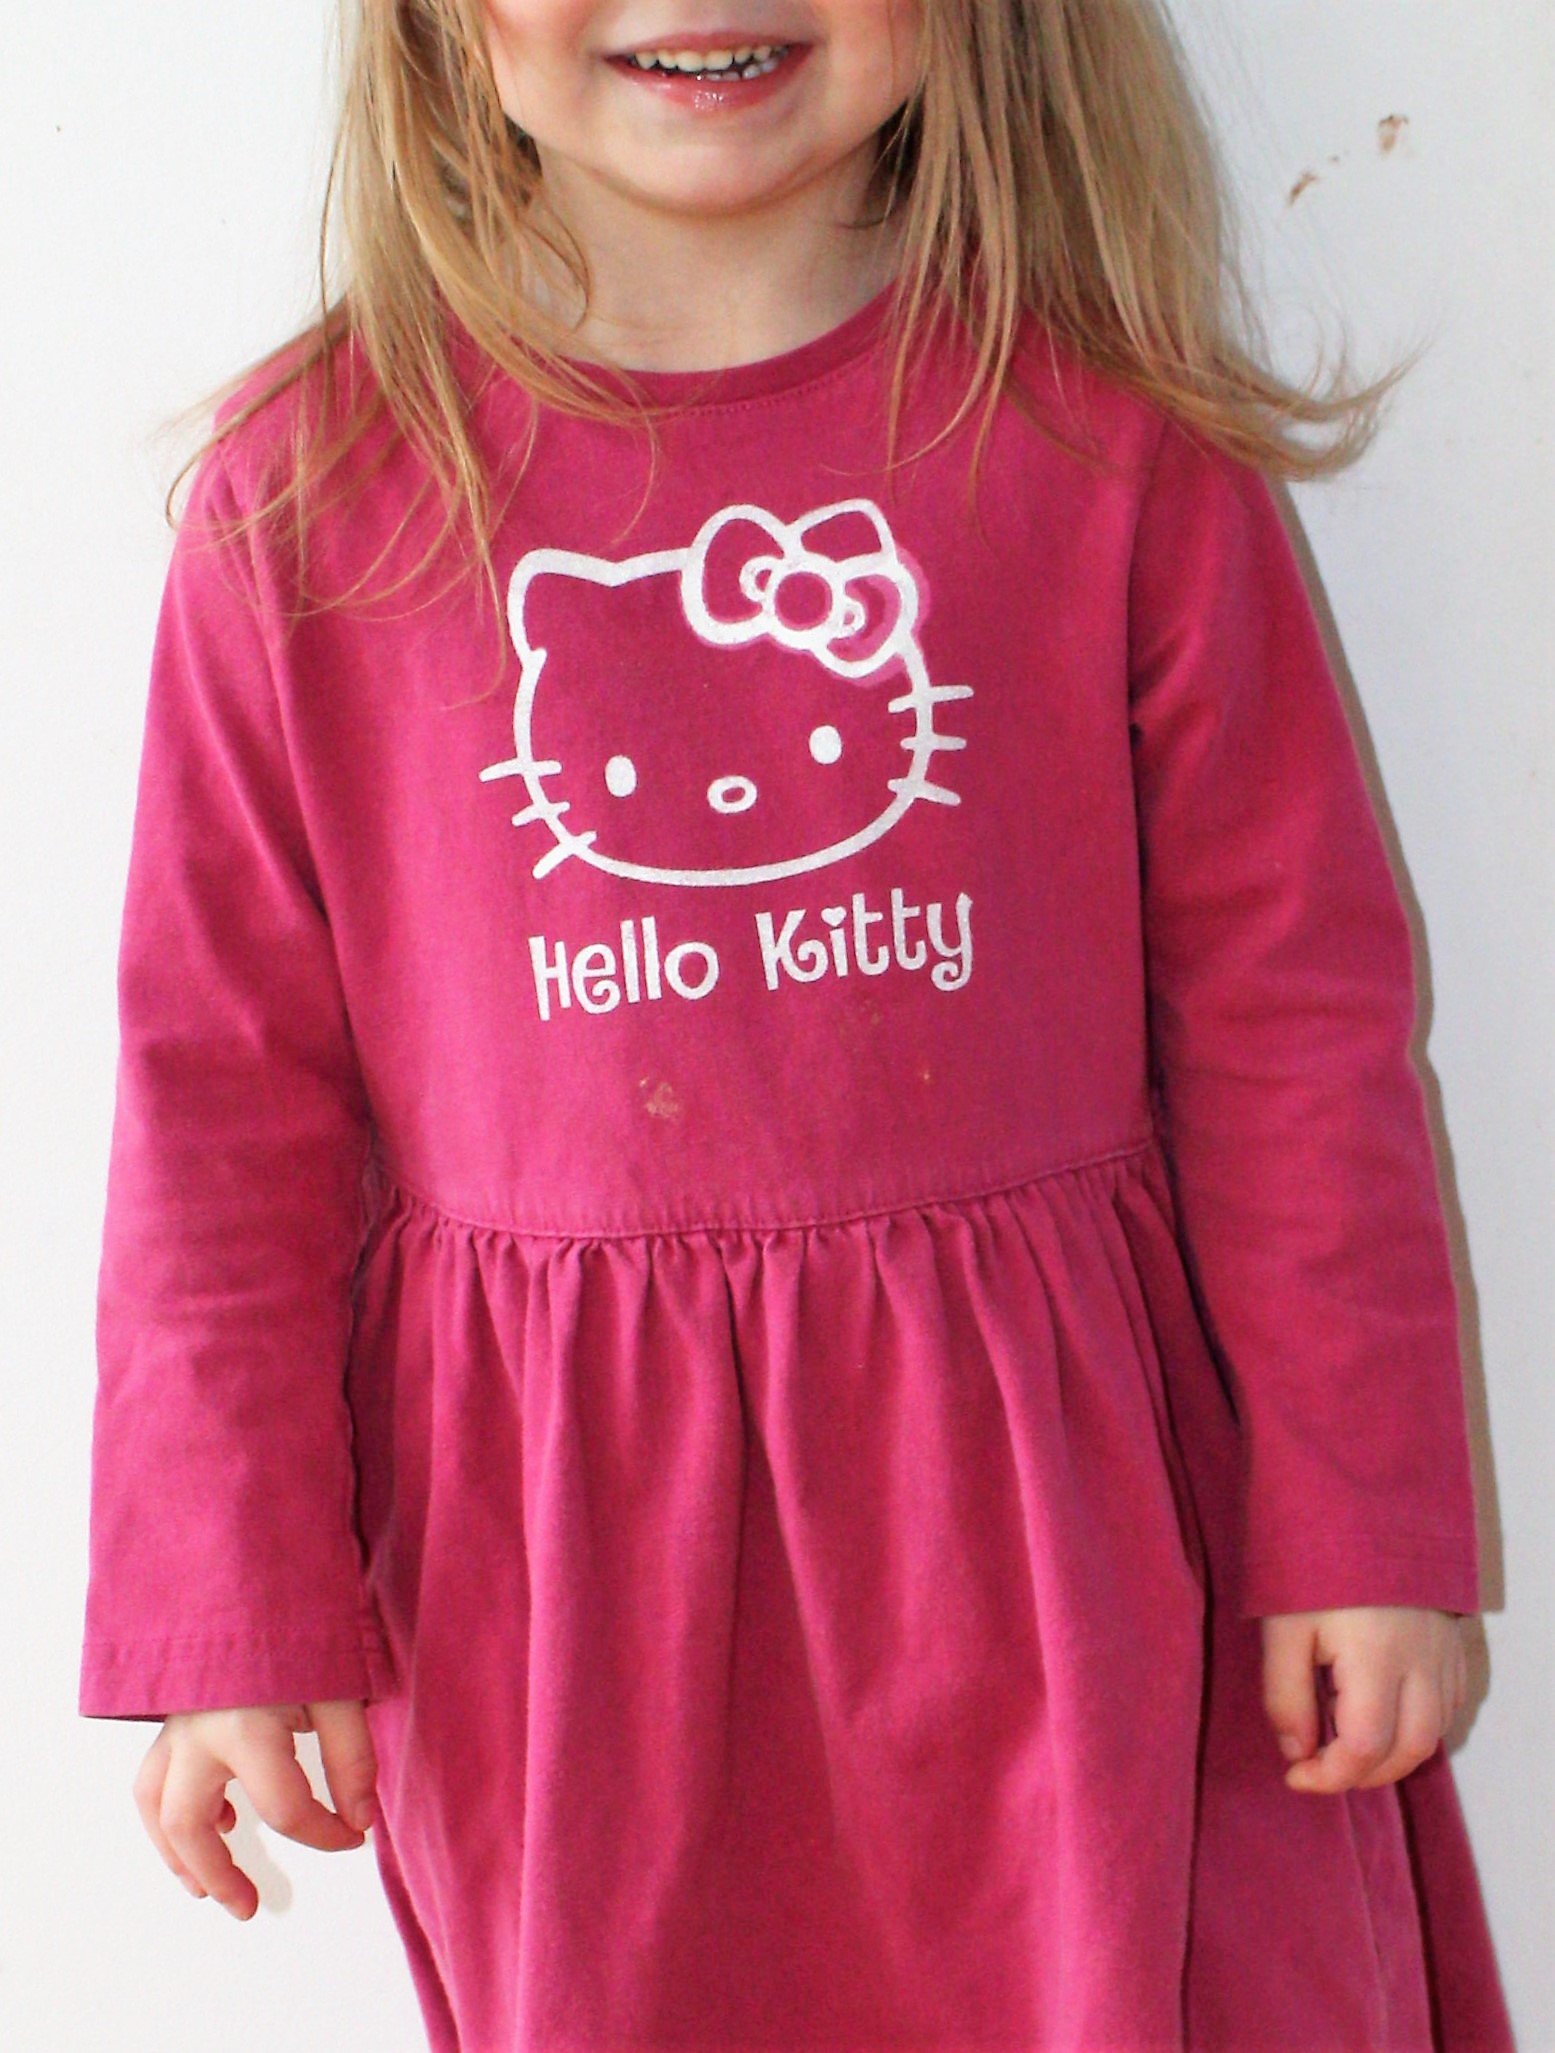
Here is the final result, and my cute little model. She loves it, of course.
Looking good, just a minor blur by the bow – my impatience is at fault.
All done.
Have fun making cute clothes! If you want to make a cute valentine’s item, check out some of my Valentine’s Day cutting files. I think they would probably make cute shirts!
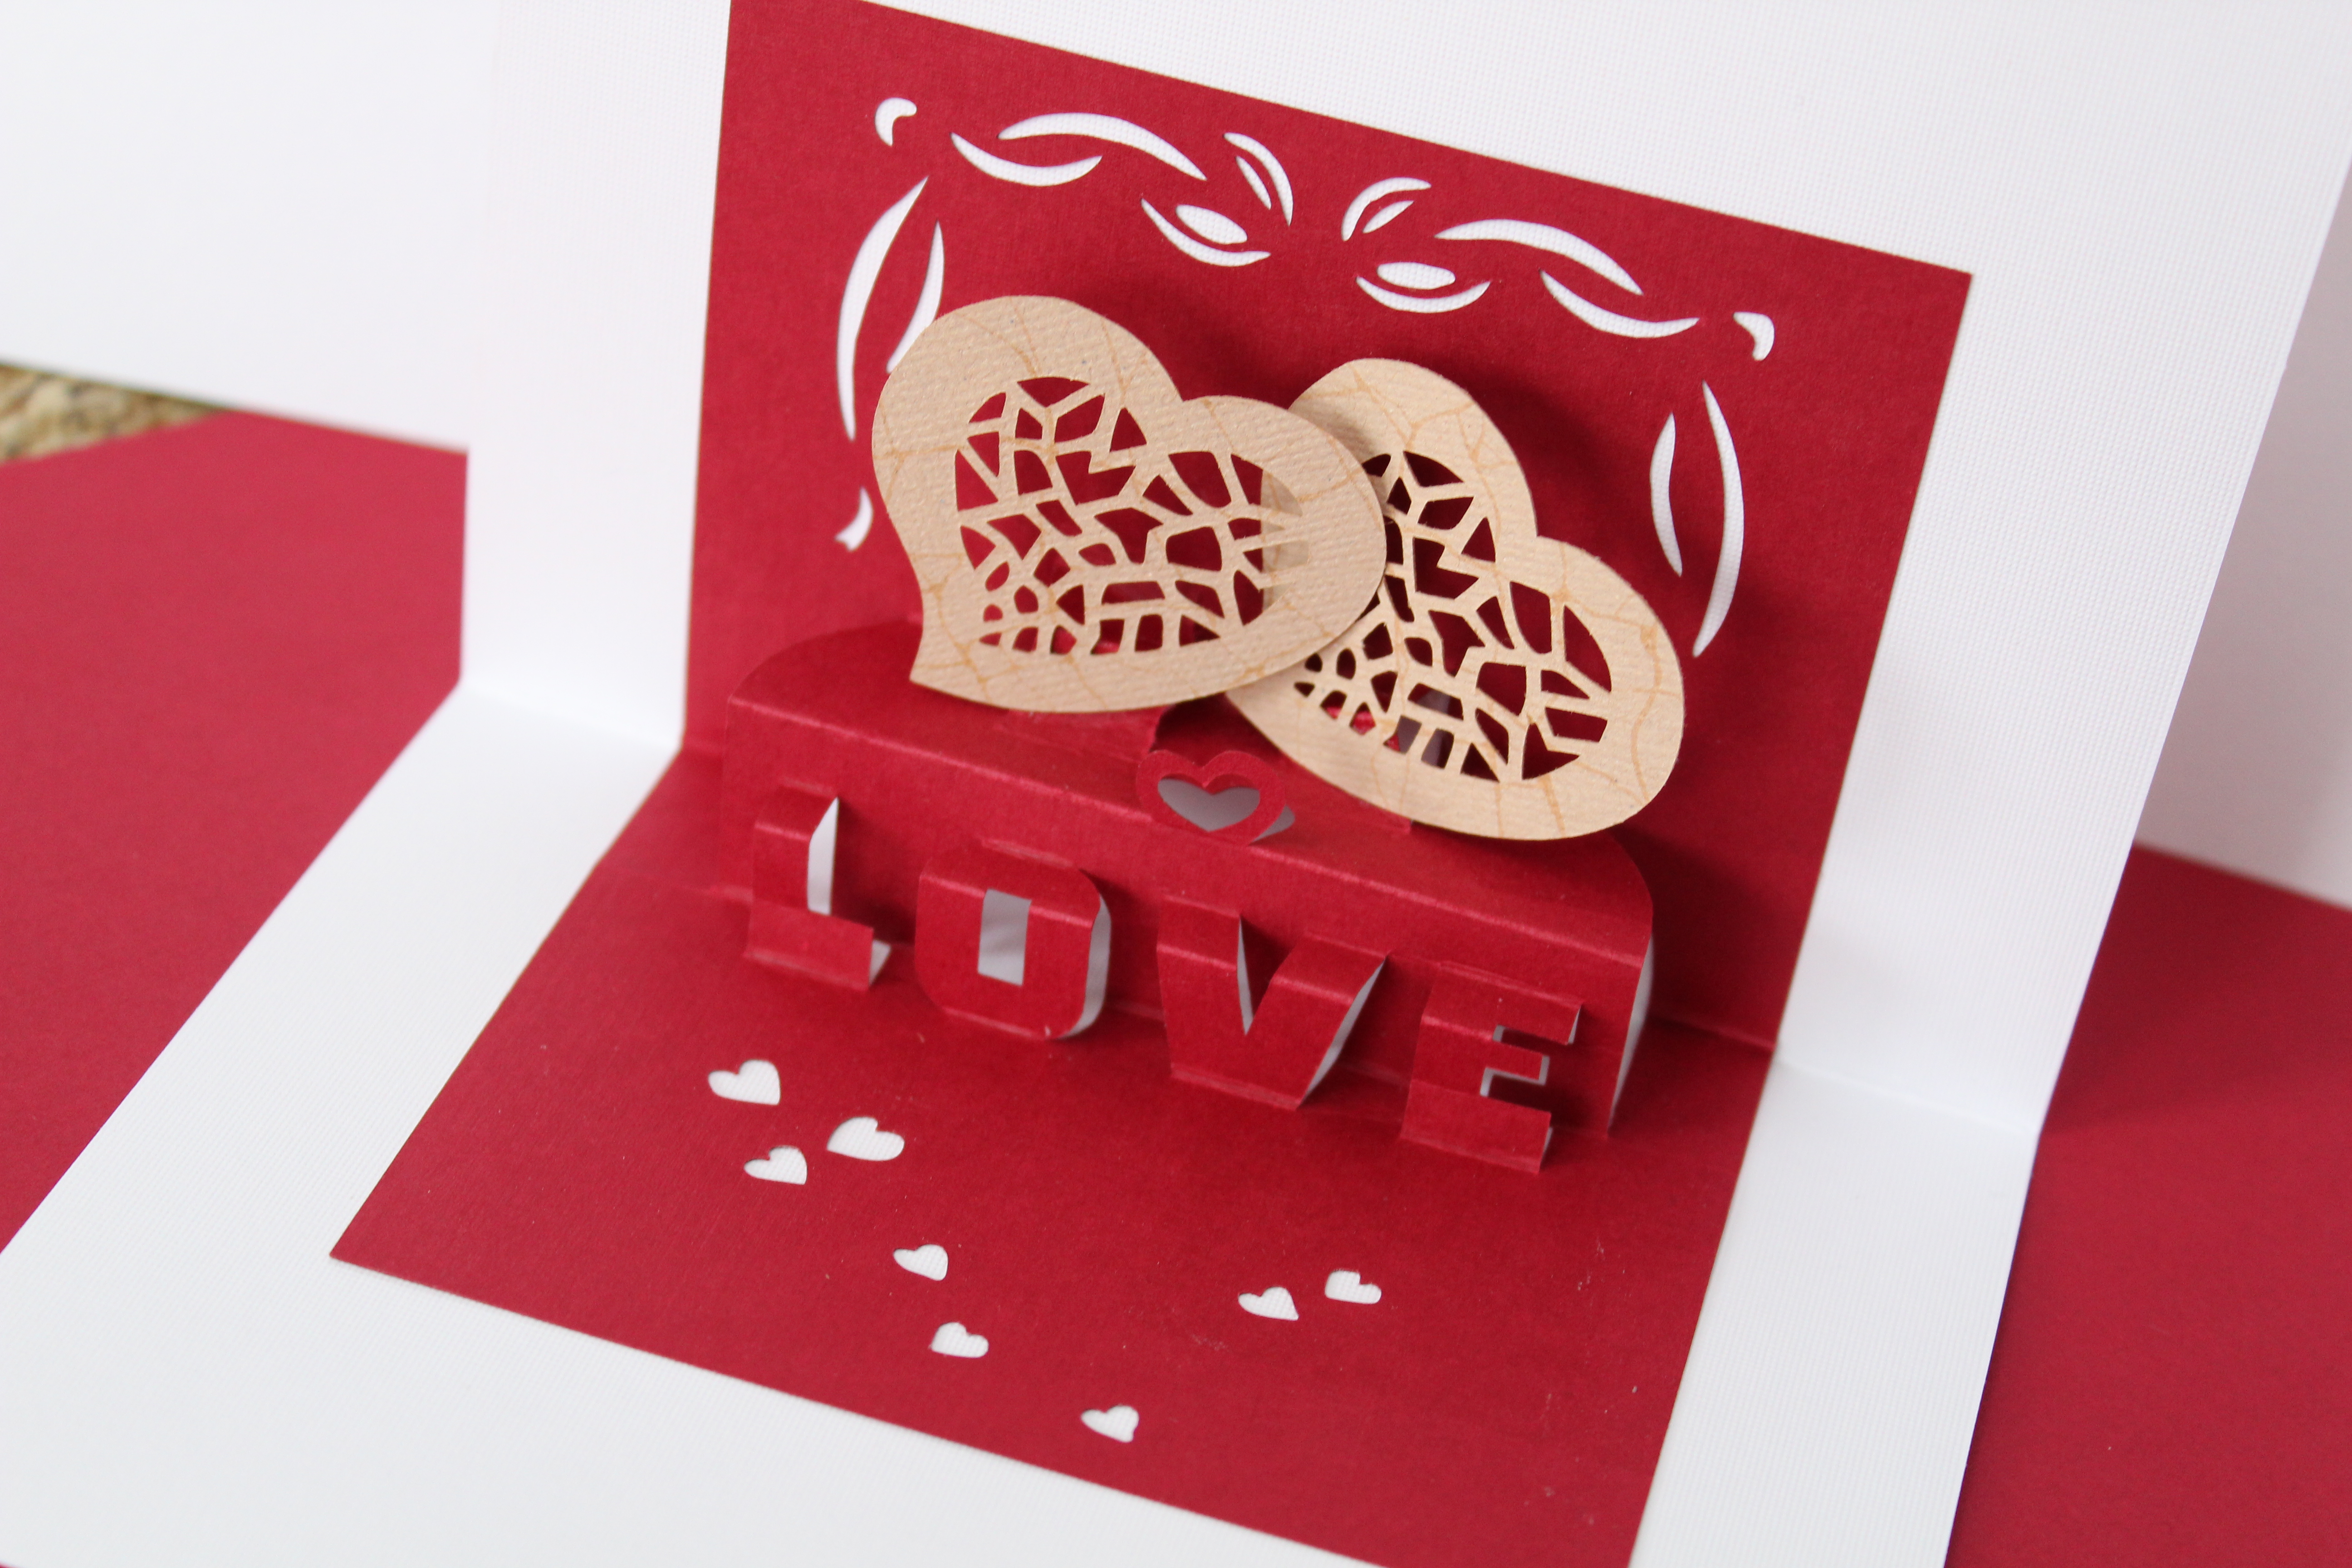
February is almost upon us. Looking through all the ideas I have found on cutting files to make, I stumbled upon this lovely little kirigami card. Now, I don’t know where it comes from originally, so it would be wise not to use it commercially. However, this is where I found the image that I based this file on.
EDIT (2/11/19): I have found the original author of this file, Maria Victoria Garrido, and she has kindly given me permission to keep this post up. Her site is full of very beautiful work and many files that can be adapted for cutting in SVG format. However, her files are for PERSONAL use only. Please be aware and don’t use them for commercial purposes.
I love how detailed the little hearts are. You could definitely use the heart cut outs for other applications, including your own pretty Valentine’s Day card. I cut out the file twice in two different colors so that I could mix and match them. They came out lovely in my opinion.
Tacky or not, I gave one to my husband and informed him that he could write a nice message on it for me for Valentine’s Day. How’s that for an over the top hint?
Assembly Tips
For assembly, you do have to be somewhat delicate so as not to break things as you bend them into place. I used a ruler and hard pointed tip to score the lines where it was supposed to bend. If you are so inclined, you could definitely add them to the cut file and score them with your machine. I don’t have the dual carriage Silhouette and didn’t feel like running it through twice.
You definitely DO want to score this before you attempt to fold it. It is a bit difficult to bend into place even if you score it. I found it useful to weave something small like a knitting needle back and forth through the letters to get them to bend in the correct direction.
And now, the file.
Here are the hearts that attach it. One note, if the paper you cut it out on has a front and a back, you will want to flip a copy of the heart so that you have one facing each direction. I didn’t do this, and have a card with two hearts facing the same way. Oops!
Also check out my other Valentine’s Day cutting files:
Fall is upon us. Of all the seasons, summer always feels like it disappears the most quickly. I think fall leaves and colors are one of my favorite things about the fall. Hence, I thought I would make some leaf file cutouts.
I haven’t yet tried these out, but think they will be pretty for a fall note-card or perhaps a leaf mobile. Hope you like them and enjoy this transitional time from summer to fall!
I frequently use the freely available program Inkscape to alter and create new cutting files. It can handle more than Silhouette Studio and can also output a DXF file, which is a file format that Silhouette Studio can open and use.
Before and After
You can download Inkscape HERE (as of April 2016).
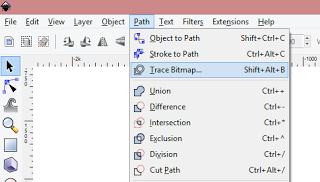
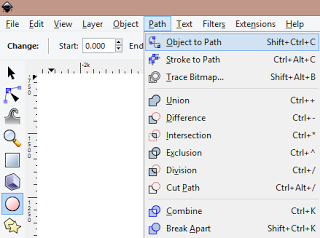
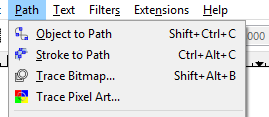
Normally, I would use Inkscape’s handy “Trace Bitmap” feature. This is located under Path->Trace Bitmap. It has lots of options which you can play around with for your image if you like, but I could tell that I wasn’t going to get what I wanted from this particular image.
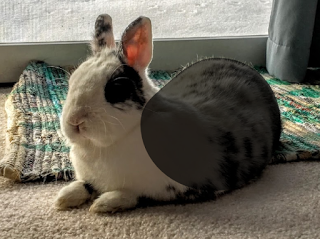
The Trace Bitmap Function Doesn’t work as well on images with busy backgrounds!
The problem was that my image has a lot going on in the background and is hard to separate out from the foreground.
I’m guessing that there are some Photoshop gurus out there who could probably separate the background and foreground of this image and then use Inkscape’s Trace function. However, I am not one of those gurus and I don’t own Photoshop! Sad, I know. Alternatively, I could have tried to mess around with the image in GIMP (a fairly nice free alternative to Photoshop) – but I wasn’t up for that seemingly overwhelming task. Sometimes the dumb but straight forward way can be quicker anyhow!
Covered in Paths
Now, this method takes some patience, but you can get exactly the image you want and don’t have to hassle with photo editing. The basic idea is to use several circular paths to bend and form into the shape we need. If you have not played around with path nodes before, this may look confusing, but once you start, it is not too difficult.
Now for the tutorial. Begin by opening your image up in Inkscape, then do the following:
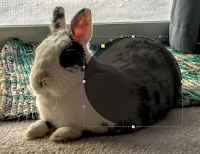
Draw a circle using the shape tool shown below and place it over part of your image.
Change to the arrow tool, click your circle, and select Path->Object to Path. This will ensure that your circle is a path and not just a shape.
Now, go ahead and copy this circle and paste it several times on your image. I needed about 7 blobs (which started as circles) to cover my image. You may need more or less depending on the size and shape of your image.
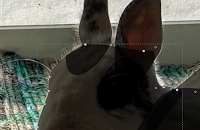
Now for the fun part! Click on the node tool (Arrow 1 in the image below). Then, click on your shape to start conforming it to your image. If you look closely at Arrow 2 in the image below, you will see a node highlighted in red. If you click a node, you can move it around.
Drag the nodes to spots along the edges of your image. Once the node is on the edge of your image, move the little round “whiskers” (I don’t know what these are really called). These bend the edges of your circle and allow you to match the contour of your image. There are also tools for change the node type from a rounded one to a pointy one (right above Arrow 1). Also, keep in mind you can remove nodes by selecting one and hitting delete and you can add nodes by double clicking where you want one.
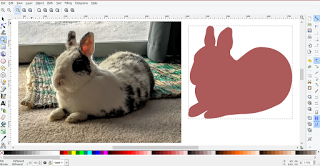
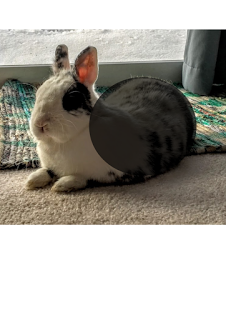
Once you have your image covered in OVERLAPING paths, select all the paths (but not the image itself) and click Path -> UNION. This will combine all of your shapes into one, and if you did a good job matching the contours and filling all the space, you should have the image you wanted! You can see our bunny Geronimo loved being turned into a cutting file.
Here is the resulting file that I created. Feel free to download it and use it for your own creations.
Valentine’s Day is almost here. I love to celebrate holidays and occasions, but honestly, I haven’t had much energy for preparing such things as of late. Still, I wanted to at least make a nice card for my husband with my Silhouette Cameo cutting machine. After all, I love designing files for it, so perhaps I should use them once in a while.
This card uses a couple of Valentine’s Day SVG cutting files I posted previously:
My card is fairly basic. I used a piece of white cardstock for the base and then added the heart overlay on the front, and the sentiment inside. I used a thin paper with red roses printed on it. There are, I’m sure, many of you ladies who would be able to make a much much more elegant card from these files, but this is what I was able to do while my two baby girls were running around!
Give it a whirl, it doesn’t take too long. Be sure to write a loving note and seal it with a kiss. Ha! I didn’t even put mine in an envelope. My husband probably won’t even notice anyhow. Hope you have a wonderful Valentine’s Day.
I love to see your creations – feel free to leave a photo or link so I can take a look at what you come up with too!
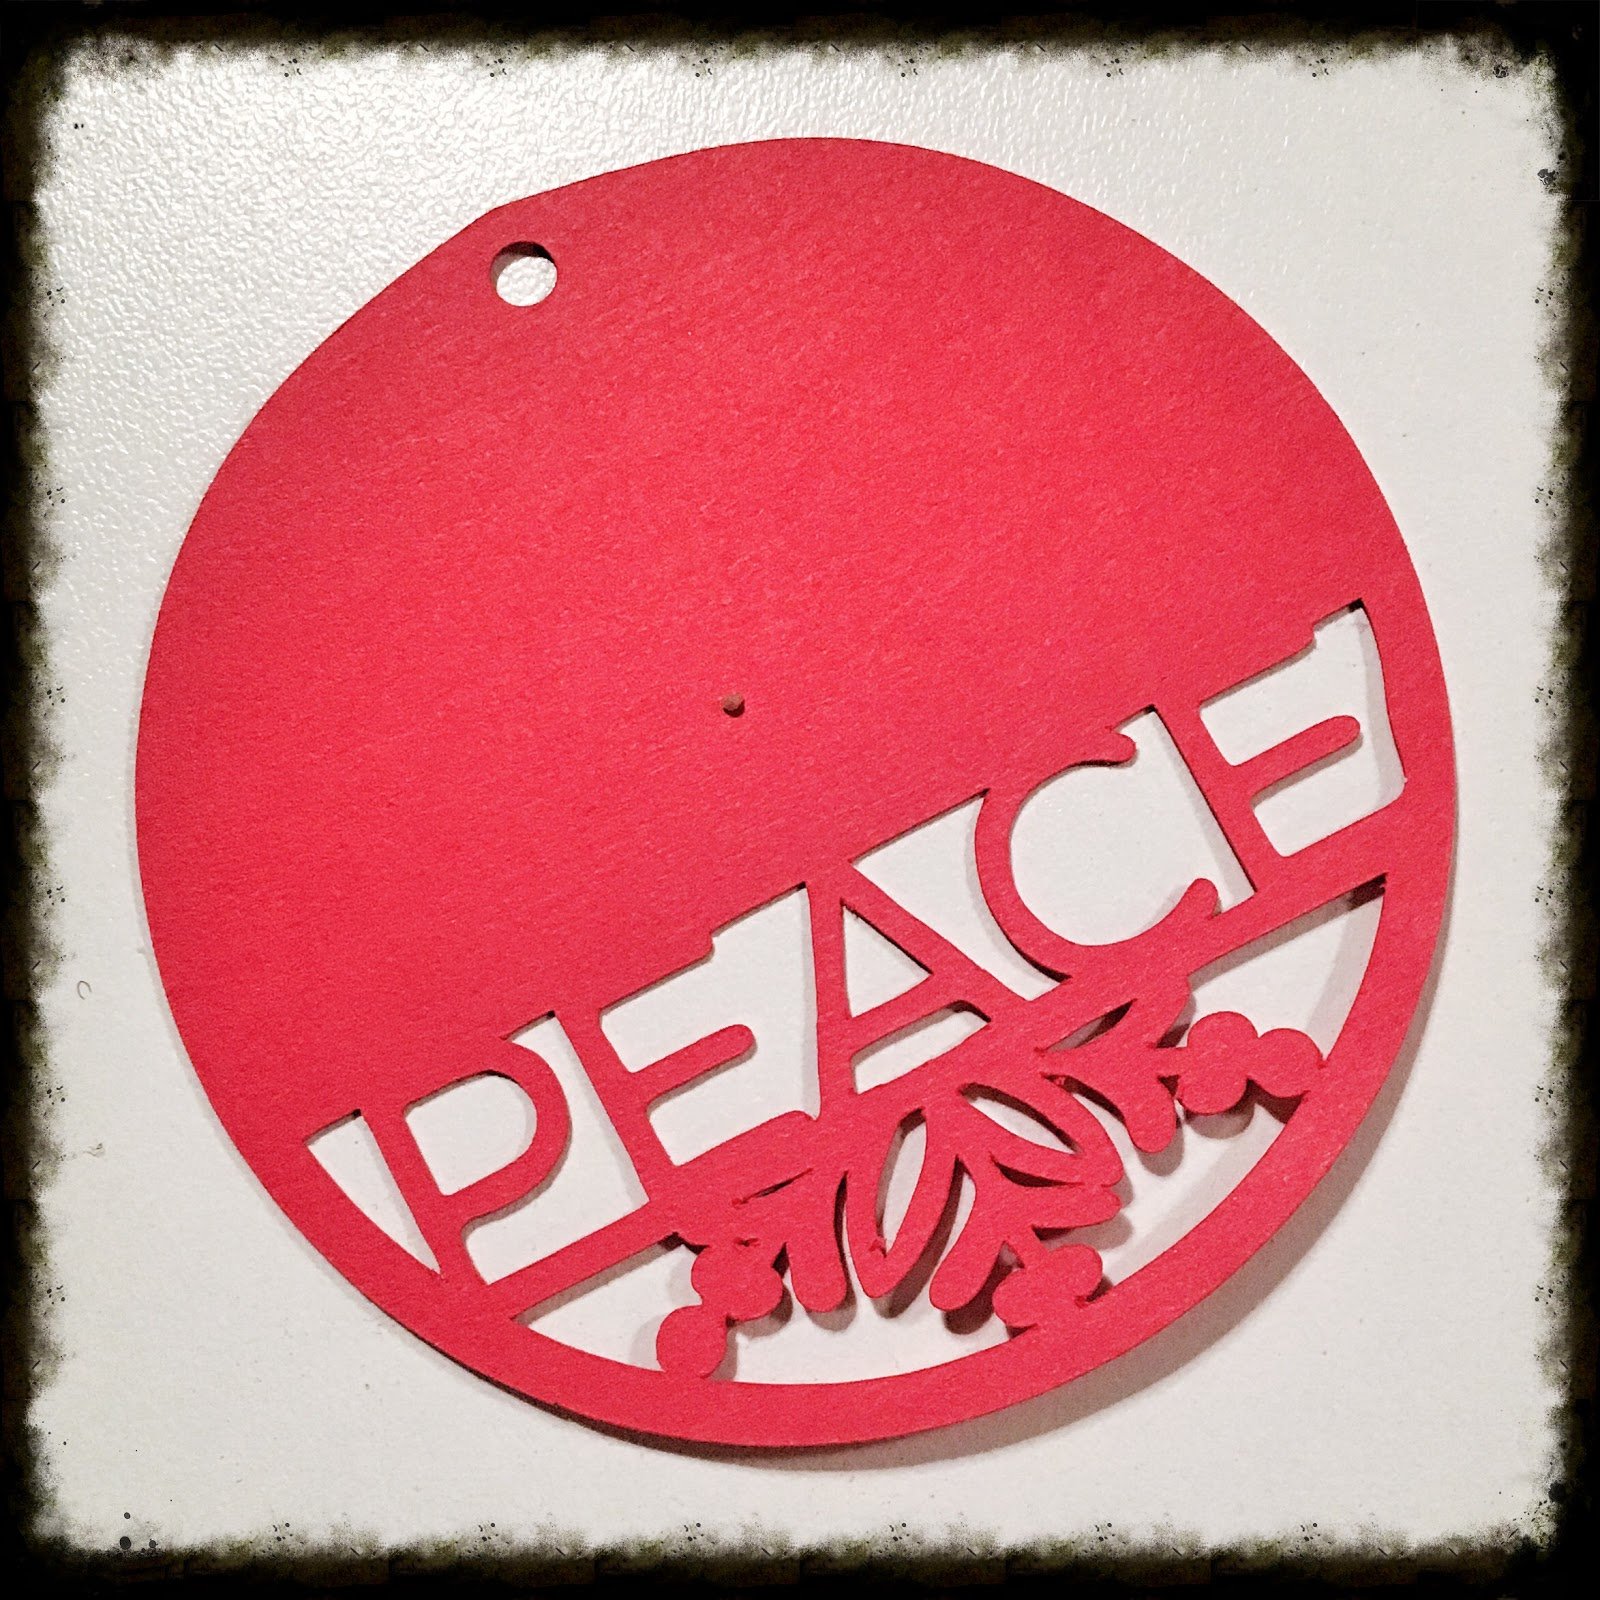
Finally! I got around to actually using one of the many wonderful files you can find out there. I found a delightful Christmas Present Tag cutting file and thought it would be nice to have a few on hand to label our gifts.
I found this lovely file over at the Lia Griffith Blog. She has it up for free in both PDF and SVG formats. I don’t have the Designer Edition of Silhouette Studio, so I opened it up in Inkscape and saved it as a DXF file. Then, I opened that file in Silhouette Studio and cut a couple sheets of them out. They did take a loooong time to cut, even after I set it to full speed, but I wasn’t in a hurry and I think it was worth it.
Here are the results. I am happy with the way they turned out, but I know I haven’t gotten my photography skills up to par enough to make them look as good as in the original post! I think the snowman I made the other day would look cute next to one of these little tags on a package too. Check him out if you haven’t!
Snow is coming, I can feel it! In my hometown in Colorado there was a snow day today, but we have been seeing quite the balmy weather here in Michigan. It has been in the 50’s in December! Awesome! Although, I do like a white Christmas, so I am torn.
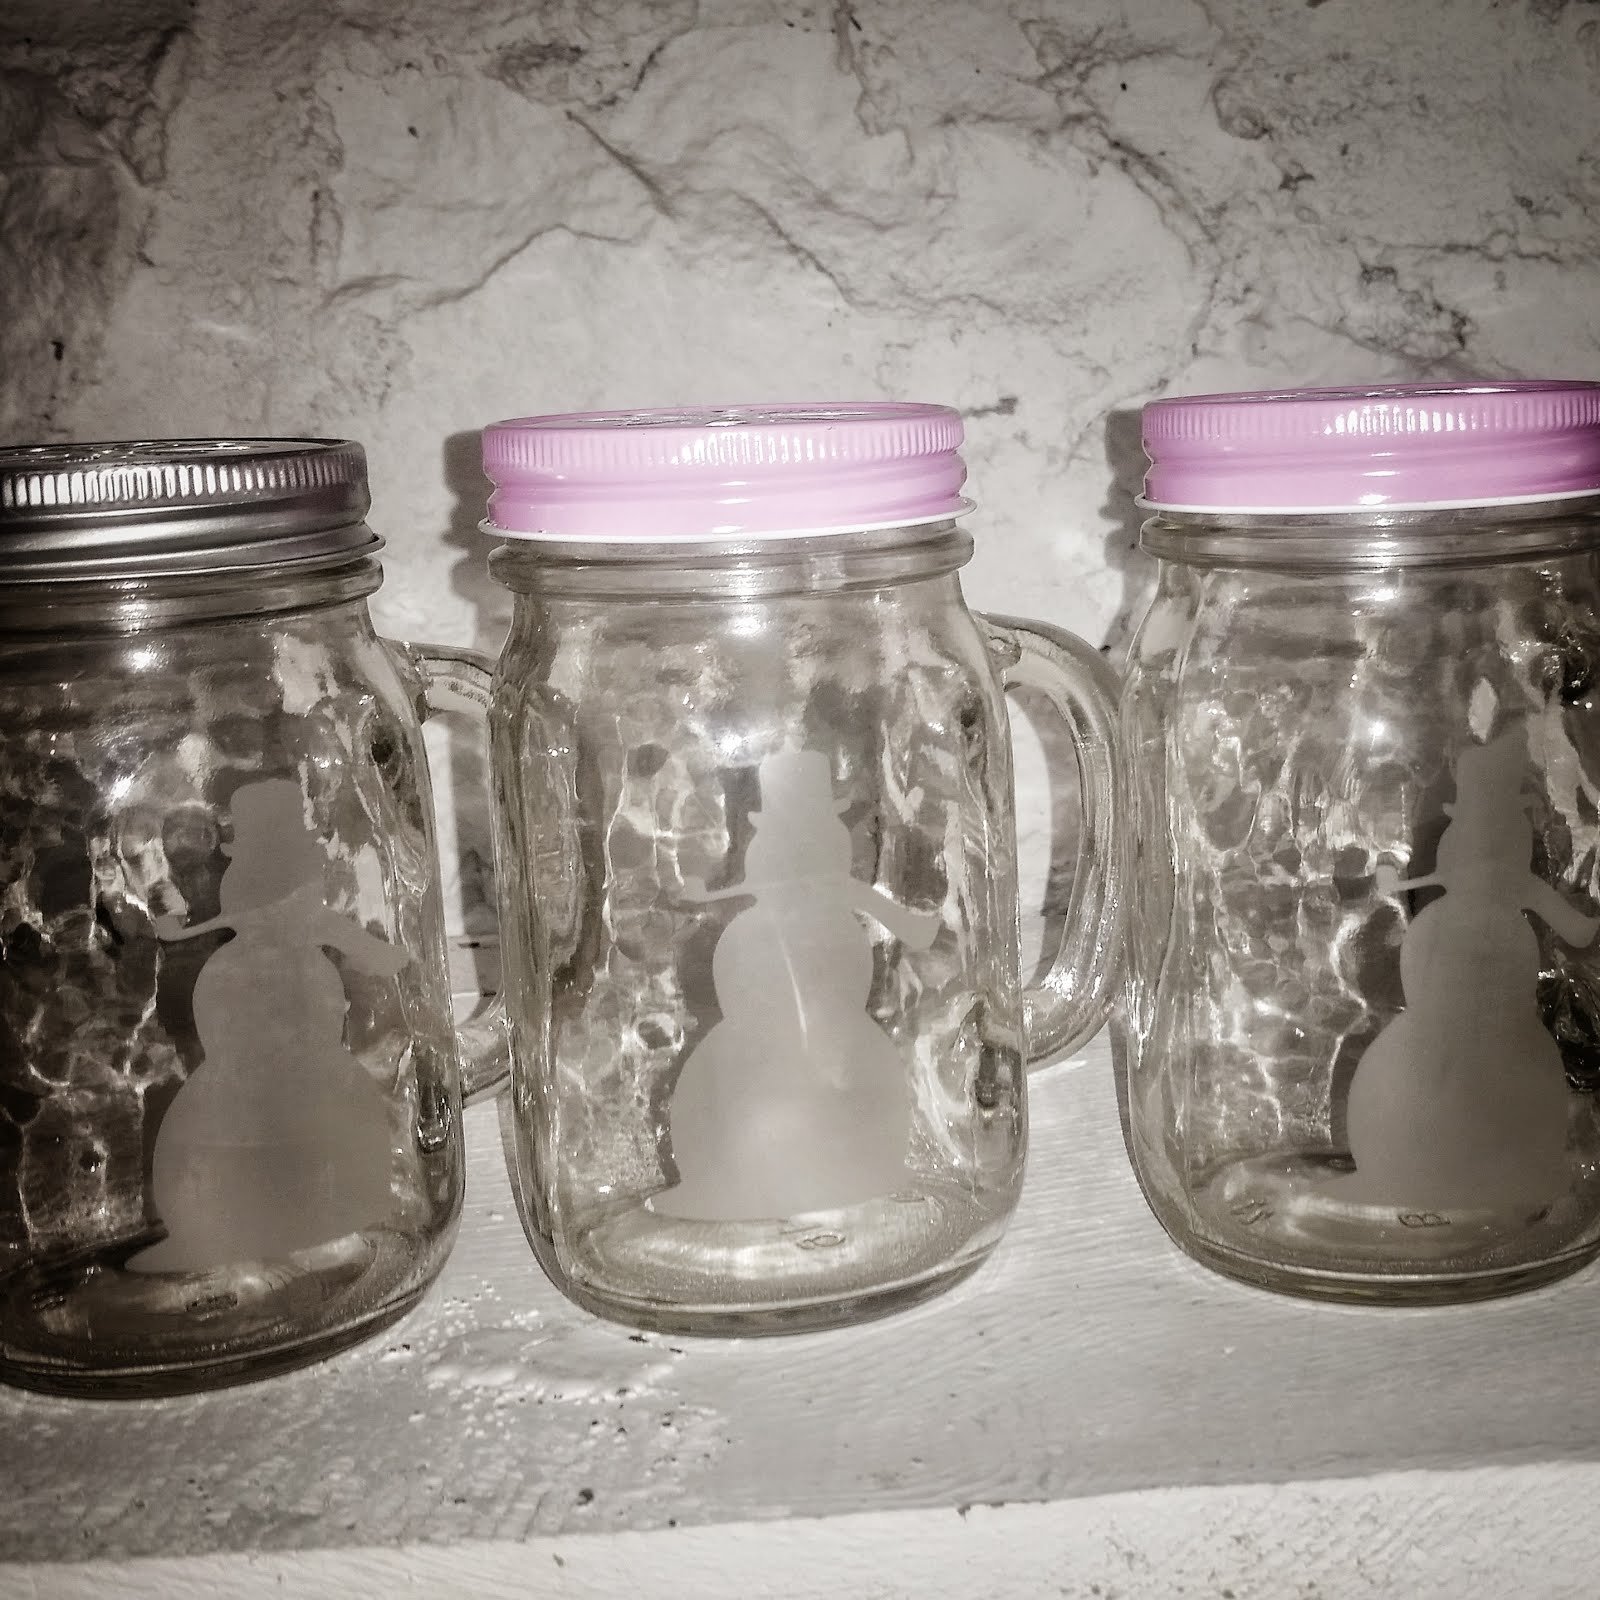
Etched Snowman Mugs
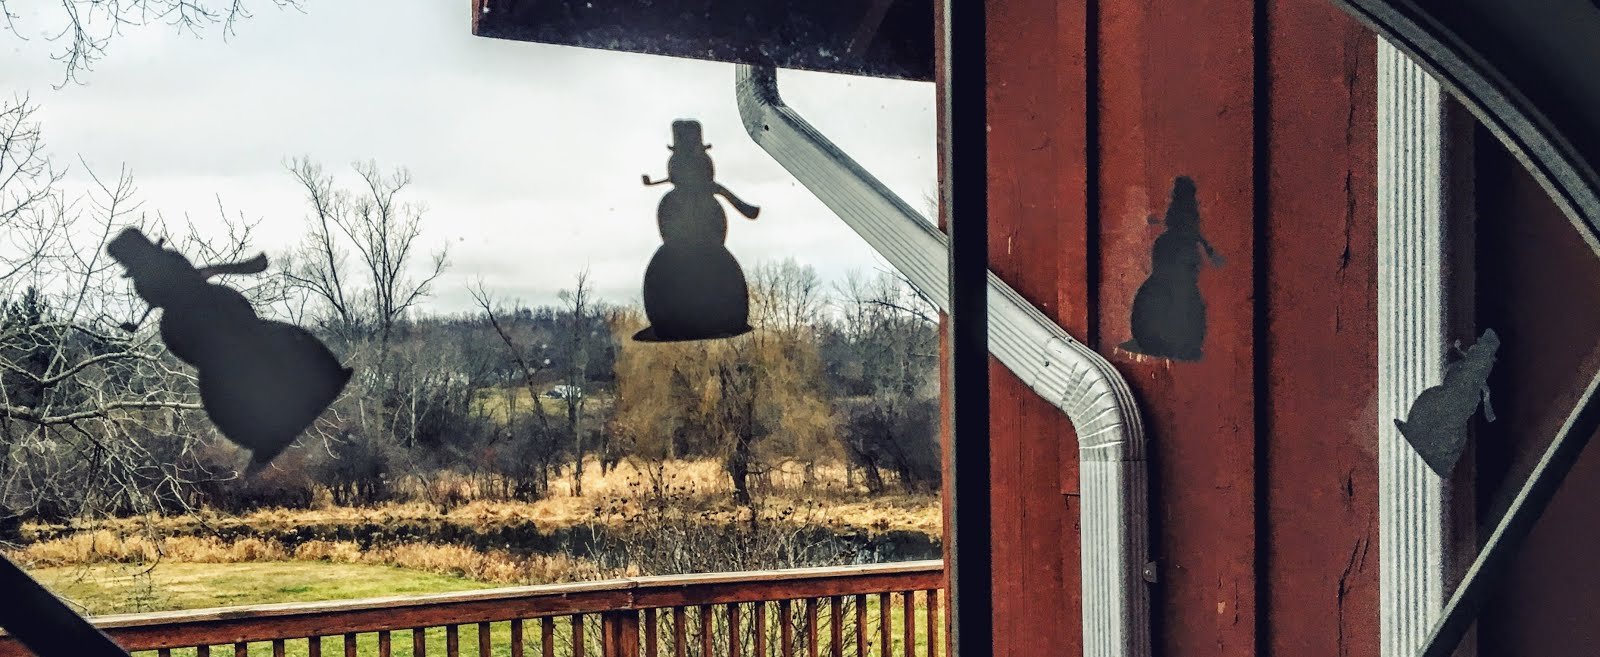
At any rate, this latest file is the product of a friend’s etched glass project. She wanted a set of etched glass mugs for a gift she was making and we thought this little snowman was just right for the job. I think her mugs came out very cute! And, as I hate wasting such nice little cuts, I stuck the leftover stencil insides on the window for a little seasonal cheer.
If you are curious about the etching, it is really fairly simple. You cut out a stencil on vinyl (or contact paper if you want to cheap out – it seems to work just fine for this). Apply your stencil to your glass object – in this case it was a rectangle with a snowman cut out of it. Leave the part you want etched blank, the stencil should cover what you DON’T want etched.
Apply a nice little layer of etching cream with a foam brush. Let it sit according to the directions on the bottle. Wipe off the excess (or put it back into your bottle), and rinse. Be careful not to wipe the cream onto other parts of the glass or wash it off where it hits the glass outside the stencil if at all possible. Remove your stencil and admire!
Hope everyone is enjoying the cooler weather and getting in some quality outdoor time before the weather turns colder. I have been having fun drawing new designs.
This is a design I drew by hand and then edited in inkscape. Part of its charm is that it is not perfectly symmetric. I envision it on a card or a wall, or perhaps on a background. Let me know what you make with it, I love seeing other people’s projects!
As always, these are free for personal use only. Thanks!
Kabram Krafts is a participant in the Amazon Services LLC Associates Program, an affiliate advertising program designed to provide a means for sites to earn advertising fees by advertising and linking to amazon.com.


")