Can you believe it is almost fall already? We saw some very warm temperatures this past week and it sure didn’t feel like September at all. The cooler temperatures will be nice, and it will be fun to rake up piles of leaves for my daughter to play in.
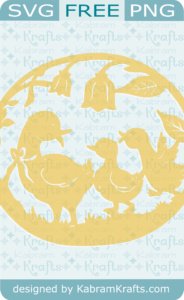
I have been thinking about pumpkins and had fun make this simple little pumpkin file. It is two pieces and would look very nice cut out in brown for the overlay and a nice fall orange for the pumpkin. I have visions of making more and maybe even some jack-o-lanterns, but we’ll see what happens.
[{"id":3005,"link":"https:\/\/kabramkrafts.com\/2025\/11\/%f0%9f%a6%83-mix-it-up-combining-svgs-with-traditional-crafting-for-beautiful-mixed-media-projects\/","name":"%f0%9f%a6%83-mix-it-up-combining-svgs-with-traditional-crafting-for-beautiful-mixed-media-projects","thumbnail":{"url":"https:\/\/kabramkrafts.com\/wp-content\/uploads\/2025\/11\/Whisk_e761f4504f42791a8cf498d91e798e30dr.jpeg","alt":""},"title":"\ud83e\udd83 Mix It Up! Combining SVGs with Traditional Crafting for Beautiful Mixed Media Projects","postMeta":[],"author":{"name":"kabram","link":"https:\/\/kabramkrafts.com\/author\/kabram\/"},"date":"Nov 7, 2025","dateGMT":"2025-11-07 02:34:58","modifiedDate":"2025-11-07 02:35:00","modifiedDateGMT":"2025-11-07 02:35:00","commentCount":"0","commentStatus":"open","categories":{"coma":"<a href=\"https:\/\/kabramkrafts.com\/category\/craft-room\/\" rel=\"category tag\">Craft Room<\/a>, <a href=\"https:\/\/kabramkrafts.com\/category\/decor\/\" rel=\"category tag\">Decor<\/a>, <a href=\"https:\/\/kabramkrafts.com\/category\/diy\/\" rel=\"category tag\">DIY<\/a>, <a href=\"https:\/\/kabramkrafts.com\/category\/fall\/\" rel=\"category tag\">Fall<\/a>, <a href=\"https:\/\/kabramkrafts.com\/category\/silhouette-cameo\/\" rel=\"category tag\">Silhouette Cameo<\/a>, <a href=\"https:\/\/kabramkrafts.com\/category\/svg\/\" rel=\"category tag\">SVG<\/a>, <a href=\"https:\/\/kabramkrafts.com\/category\/uncategorized\/\" rel=\"category tag\">Uncategorized<\/a>","space":"<a href=\"https:\/\/kabramkrafts.com\/category\/craft-room\/\" rel=\"category tag\">Craft Room<\/a> <a href=\"https:\/\/kabramkrafts.com\/category\/decor\/\" rel=\"category tag\">Decor<\/a> <a href=\"https:\/\/kabramkrafts.com\/category\/diy\/\" rel=\"category tag\">DIY<\/a> <a href=\"https:\/\/kabramkrafts.com\/category\/fall\/\" rel=\"category tag\">Fall<\/a> <a href=\"https:\/\/kabramkrafts.com\/category\/silhouette-cameo\/\" rel=\"category tag\">Silhouette Cameo<\/a> <a href=\"https:\/\/kabramkrafts.com\/category\/svg\/\" rel=\"category tag\">SVG<\/a> <a href=\"https:\/\/kabramkrafts.com\/category\/uncategorized\/\" rel=\"category tag\">Uncategorized<\/a>"},"taxonomies":{"post_tag":"<a href='https:\/\/kabramkrafts.com\/tag\/diy\/' rel='post_tag'>DIY<\/a><a href='https:\/\/kabramkrafts.com\/tag\/household\/' rel='post_tag'>Household<\/a><a href='https:\/\/kabramkrafts.com\/tag\/silhouette-cameo\/' rel='post_tag'>Silhouette Cameo<\/a><a href='https:\/\/kabramkrafts.com\/tag\/svg\/' rel='post_tag'>SVG<\/a>"},"readTime":{"min":2,"sec":58},"status":"publish","excerpt":""},{"id":2985,"link":"https:\/\/kabramkrafts.com\/2025\/10\/%f0%9f%8e%83-free-halloween-svg-bundle-witch-ghosts-tree-more\/","name":"%f0%9f%8e%83-free-halloween-svg-bundle-witch-ghosts-tree-more","thumbnail":{"url":"https:\/\/kabramkrafts.com\/wp-content\/uploads\/2025\/10\/Spooky-Kabram-Krafts-scaled.jpg","alt":""},"title":"\ud83c\udf83 Free Halloween SVG Bundle \u2014 Witch, Ghosts, Tree & More!","postMeta":[],"author":{"name":"kabram","link":"https:\/\/kabramkrafts.com\/author\/kabram\/"},"date":"Oct 14, 2025","dateGMT":"2025-10-14 02:48:06","modifiedDate":"2025-10-14 02:48:08","modifiedDateGMT":"2025-10-14 02:48:08","commentCount":"0","commentStatus":"open","categories":{"coma":"<a href=\"https:\/\/kabramkrafts.com\/category\/cards\/\" rel=\"category tag\">Cards<\/a>, <a href=\"https:\/\/kabramkrafts.com\/category\/cutting-file\/\" rel=\"category tag\">Cutting File<\/a>, <a href=\"https:\/\/kabramkrafts.com\/category\/decor\/\" rel=\"category tag\">Decor<\/a>, <a href=\"https:\/\/kabramkrafts.com\/category\/fall\/\" rel=\"category tag\">Fall<\/a>, <a href=\"https:\/\/kabramkrafts.com\/category\/featured\/\" rel=\"category tag\">featured<\/a>, <a href=\"https:\/\/kabramkrafts.com\/category\/halloween\/\" rel=\"category tag\">Halloween<\/a>, <a href=\"https:\/\/kabramkrafts.com\/category\/svg\/\" rel=\"category tag\">SVG<\/a>","space":"<a href=\"https:\/\/kabramkrafts.com\/category\/cards\/\" rel=\"category tag\">Cards<\/a> <a href=\"https:\/\/kabramkrafts.com\/category\/cutting-file\/\" rel=\"category tag\">Cutting File<\/a> <a href=\"https:\/\/kabramkrafts.com\/category\/decor\/\" rel=\"category tag\">Decor<\/a> <a href=\"https:\/\/kabramkrafts.com\/category\/fall\/\" rel=\"category tag\">Fall<\/a> <a href=\"https:\/\/kabramkrafts.com\/category\/featured\/\" rel=\"category tag\">featured<\/a> <a href=\"https:\/\/kabramkrafts.com\/category\/halloween\/\" rel=\"category tag\">Halloween<\/a> <a href=\"https:\/\/kabramkrafts.com\/category\/svg\/\" rel=\"category tag\">SVG<\/a>"},"taxonomies":{"post_tag":"<a href='https:\/\/kabramkrafts.com\/tag\/boo\/' rel='post_tag'>boo<\/a><a href='https:\/\/kabramkrafts.com\/tag\/cards\/' rel='post_tag'>Cards<\/a><a href='https:\/\/kabramkrafts.com\/tag\/craft\/' rel='post_tag'>Craft<\/a><a href='https:\/\/kabramkrafts.com\/tag\/cutting-file\/' rel='post_tag'>Cutting File<\/a><a href='https:\/\/kabramkrafts.com\/tag\/diy\/' rel='post_tag'>DIY<\/a><a href='https:\/\/kabramkrafts.com\/tag\/ghosts\/' rel='post_tag'>ghosts<\/a><a href='https:\/\/kabramkrafts.com\/tag\/halloween\/' rel='post_tag'>halloween<\/a><a href='https:\/\/kabramkrafts.com\/tag\/silhouette\/' rel='post_tag'>Silhouette<\/a><a href='https:\/\/kabramkrafts.com\/tag\/silhouette-cameo\/' rel='post_tag'>Silhouette Cameo<\/a><a href='https:\/\/kabramkrafts.com\/tag\/spider\/' rel='post_tag'>spider<\/a><a href='https:\/\/kabramkrafts.com\/tag\/svg\/' rel='post_tag'>SVG<\/a>"},"readTime":{"min":1,"sec":17},"status":"publish","excerpt":""},{"id":1647,"link":"https:\/\/kabramkrafts.com\/2018\/10\/pumpkin-stack-svg-fall-freebie\/","name":"pumpkin-stack-svg-fall-freebie","thumbnail":{"url":"https:\/\/kabramkrafts.com\/wp-content\/uploads\/2018\/10\/pumpkin-stack.png","alt":""},"title":"Pumpkin Stack SVG - Fall Freebie!","postMeta":[],"author":{"name":"kabram","link":"https:\/\/kabramkrafts.com\/author\/kabram\/"},"date":"Oct 19, 2018","dateGMT":"2018-10-19 22:52:41","modifiedDate":"2022-09-13 18:52:48","modifiedDateGMT":"2022-09-13 18:52:48","commentCount":"4","commentStatus":"open","categories":{"coma":"<a href=\"https:\/\/kabramkrafts.com\/category\/cards\/\" rel=\"category tag\">Cards<\/a>, <a href=\"https:\/\/kabramkrafts.com\/category\/cutting-file\/\" rel=\"category tag\">Cutting File<\/a>, <a href=\"https:\/\/kabramkrafts.com\/category\/diy\/\" rel=\"category tag\">DIY<\/a>, <a href=\"https:\/\/kabramkrafts.com\/category\/fall\/\" rel=\"category tag\">Fall<\/a>, <a href=\"https:\/\/kabramkrafts.com\/category\/featured\/\" rel=\"category tag\">featured<\/a>, <a href=\"https:\/\/kabramkrafts.com\/category\/silhouette-cameo\/\" rel=\"category tag\">Silhouette Cameo<\/a>, <a href=\"https:\/\/kabramkrafts.com\/category\/svg\/\" rel=\"category tag\">SVG<\/a>","space":"<a href=\"https:\/\/kabramkrafts.com\/category\/cards\/\" rel=\"category tag\">Cards<\/a> <a href=\"https:\/\/kabramkrafts.com\/category\/cutting-file\/\" rel=\"category tag\">Cutting File<\/a> <a href=\"https:\/\/kabramkrafts.com\/category\/diy\/\" rel=\"category tag\">DIY<\/a> <a href=\"https:\/\/kabramkrafts.com\/category\/fall\/\" rel=\"category tag\">Fall<\/a> <a href=\"https:\/\/kabramkrafts.com\/category\/featured\/\" rel=\"category tag\">featured<\/a> <a href=\"https:\/\/kabramkrafts.com\/category\/silhouette-cameo\/\" rel=\"category tag\">Silhouette Cameo<\/a> <a href=\"https:\/\/kabramkrafts.com\/category\/svg\/\" rel=\"category tag\">SVG<\/a>"},"taxonomies":{"post_tag":"<a href='https:\/\/kabramkrafts.com\/tag\/artwork\/' rel='post_tag'>Artwork<\/a><a href='https:\/\/kabramkrafts.com\/tag\/autumn\/' rel='post_tag'>autumn<\/a><a href='https:\/\/kabramkrafts.com\/tag\/cards\/' rel='post_tag'>Cards<\/a><a href='https:\/\/kabramkrafts.com\/tag\/cutting-file\/' rel='post_tag'>Cutting File<\/a><a href='https:\/\/kabramkrafts.com\/tag\/diy\/' rel='post_tag'>DIY<\/a><a href='https:\/\/kabramkrafts.com\/tag\/fall\/' rel='post_tag'>Fall<\/a><a href='https:\/\/kabramkrafts.com\/tag\/featured\/' rel='post_tag'>featured<\/a><a href='https:\/\/kabramkrafts.com\/tag\/freebie\/' rel='post_tag'>freebie<\/a><a href='https:\/\/kabramkrafts.com\/tag\/pumpkins\/' rel='post_tag'>pumpkins<\/a><a href='https:\/\/kabramkrafts.com\/tag\/silhouette\/' rel='post_tag'>Silhouette<\/a><a href='https:\/\/kabramkrafts.com\/tag\/silhouette-cameo\/' rel='post_tag'>Silhouette Cameo<\/a><a href='https:\/\/kabramkrafts.com\/tag\/svg\/' rel='post_tag'>SVG<\/a><a href='https:\/\/kabramkrafts.com\/tag\/vinyl\/' rel='post_tag'>vinyl<\/a>"},"readTime":{"min":2,"sec":12},"status":"publish","excerpt":""},{"id":1450,"link":"https:\/\/kabramkrafts.com\/2018\/01\/free-svg-hearts-download-valentine\/","name":"free-svg-hearts-download-valentine","thumbnail":{"url":"https:\/\/kabramkrafts.com\/wp-content\/uploads\/2018\/01\/1Hearts-For-Valentines-Day@0.5x-e1516137049356.png","alt":""},"title":"Hearts for your Valentine! Free SVG download for your card making and crafting.","postMeta":[],"author":{"name":"kabram","link":"https:\/\/kabramkrafts.com\/author\/kabram\/"},"date":"Jan 16, 2018","dateGMT":"2018-01-16 21:03:19","modifiedDate":"2018-01-16 21:21:54","modifiedDateGMT":"2018-01-16 21:21:54","commentCount":"0","commentStatus":"open","categories":{"coma":"<a href=\"https:\/\/kabramkrafts.com\/category\/cards\/\" rel=\"category tag\">Cards<\/a>, <a href=\"https:\/\/kabramkrafts.com\/category\/craft-room\/\" rel=\"category tag\">Craft Room<\/a>, <a href=\"https:\/\/kabramkrafts.com\/category\/cutting-file\/\" rel=\"category tag\">Cutting File<\/a>, <a href=\"https:\/\/kabramkrafts.com\/category\/diy\/\" rel=\"category tag\">DIY<\/a>, <a href=\"https:\/\/kabramkrafts.com\/category\/featured\/\" rel=\"category tag\">featured<\/a>, <a href=\"https:\/\/kabramkrafts.com\/category\/household\/\" rel=\"category tag\">Household<\/a>, <a href=\"https:\/\/kabramkrafts.com\/category\/silhouette-cameo\/\" rel=\"category tag\">Silhouette Cameo<\/a>, <a href=\"https:\/\/kabramkrafts.com\/category\/svg\/\" rel=\"category tag\">SVG<\/a>, <a href=\"https:\/\/kabramkrafts.com\/category\/thanksgiving\/\" rel=\"category tag\">Thanksgiving<\/a>","space":"<a href=\"https:\/\/kabramkrafts.com\/category\/cards\/\" rel=\"category tag\">Cards<\/a> <a href=\"https:\/\/kabramkrafts.com\/category\/craft-room\/\" rel=\"category tag\">Craft Room<\/a> <a href=\"https:\/\/kabramkrafts.com\/category\/cutting-file\/\" rel=\"category tag\">Cutting File<\/a> <a href=\"https:\/\/kabramkrafts.com\/category\/diy\/\" rel=\"category tag\">DIY<\/a> <a href=\"https:\/\/kabramkrafts.com\/category\/featured\/\" rel=\"category tag\">featured<\/a> <a href=\"https:\/\/kabramkrafts.com\/category\/household\/\" rel=\"category tag\">Household<\/a> <a href=\"https:\/\/kabramkrafts.com\/category\/silhouette-cameo\/\" rel=\"category tag\">Silhouette Cameo<\/a> <a href=\"https:\/\/kabramkrafts.com\/category\/svg\/\" rel=\"category tag\">SVG<\/a> <a href=\"https:\/\/kabramkrafts.com\/category\/thanksgiving\/\" rel=\"category tag\">Thanksgiving<\/a>"},"taxonomies":{"post_tag":"<a href='https:\/\/kabramkrafts.com\/tag\/cards\/' rel='post_tag'>Cards<\/a><a href='https:\/\/kabramkrafts.com\/tag\/craft-room\/' rel='post_tag'>craft room<\/a><a href='https:\/\/kabramkrafts.com\/tag\/cutting-file\/' rel='post_tag'>Cutting File<\/a><a href='https:\/\/kabramkrafts.com\/tag\/diy\/' rel='post_tag'>DIY<\/a><a href='https:\/\/kabramkrafts.com\/tag\/fall\/' rel='post_tag'>Fall<\/a><a href='https:\/\/kabramkrafts.com\/tag\/featured\/' rel='post_tag'>featured<\/a><a href='https:\/\/kabramkrafts.com\/tag\/hand-lettered\/' rel='post_tag'>hand lettered<\/a><a href='https:\/\/kabramkrafts.com\/tag\/silhouette\/' rel='post_tag'>Silhouette<\/a><a href='https:\/\/kabramkrafts.com\/tag\/silhouette-cameo\/' rel='post_tag'>Silhouette Cameo<\/a><a href='https:\/\/kabramkrafts.com\/tag\/special-occasion\/' rel='post_tag'>special occasion<\/a><a href='https:\/\/kabramkrafts.com\/tag\/svg\/' rel='post_tag'>SVG<\/a>"},"readTime":{"min":0,"sec":47},"status":"publish","excerpt":""},{"id":1344,"link":"https:\/\/kabramkrafts.com\/2017\/11\/give-thanks-svg-hand-lettered-freebie\/","name":"give-thanks-svg-hand-lettered-freebie","thumbnail":{"url":"https:\/\/kabramkrafts.com\/wp-content\/uploads\/2017\/11\/towel-example.png","alt":""},"title":"Give Thanks SVG Hand Lettered Freebie!","postMeta":[],"author":{"name":"kabram","link":"https:\/\/kabramkrafts.com\/author\/kabram\/"},"date":"Nov 6, 2017","dateGMT":"2017-11-06 08:30:58","modifiedDate":"2017-11-08 17:15:21","modifiedDateGMT":"2017-11-08 17:15:21","commentCount":"0","commentStatus":"open","categories":{"coma":"<a href=\"https:\/\/kabramkrafts.com\/category\/cards\/\" rel=\"category tag\">Cards<\/a>, <a href=\"https:\/\/kabramkrafts.com\/category\/craft-room\/\" rel=\"category tag\">Craft Room<\/a>, <a href=\"https:\/\/kabramkrafts.com\/category\/cutting-file\/\" rel=\"category tag\">Cutting File<\/a>, <a href=\"https:\/\/kabramkrafts.com\/category\/diy\/\" rel=\"category tag\">DIY<\/a>, <a href=\"https:\/\/kabramkrafts.com\/category\/featured\/\" rel=\"category tag\">featured<\/a>, <a href=\"https:\/\/kabramkrafts.com\/category\/household\/\" rel=\"category tag\">Household<\/a>, <a href=\"https:\/\/kabramkrafts.com\/category\/silhouette-cameo\/\" rel=\"category tag\">Silhouette Cameo<\/a>, <a href=\"https:\/\/kabramkrafts.com\/category\/svg\/\" rel=\"category tag\">SVG<\/a>, <a href=\"https:\/\/kabramkrafts.com\/category\/thanksgiving\/\" rel=\"category tag\">Thanksgiving<\/a>","space":"<a href=\"https:\/\/kabramkrafts.com\/category\/cards\/\" rel=\"category tag\">Cards<\/a> <a href=\"https:\/\/kabramkrafts.com\/category\/craft-room\/\" rel=\"category tag\">Craft Room<\/a> <a href=\"https:\/\/kabramkrafts.com\/category\/cutting-file\/\" rel=\"category tag\">Cutting File<\/a> <a href=\"https:\/\/kabramkrafts.com\/category\/diy\/\" rel=\"category tag\">DIY<\/a> <a href=\"https:\/\/kabramkrafts.com\/category\/featured\/\" rel=\"category tag\">featured<\/a> <a href=\"https:\/\/kabramkrafts.com\/category\/household\/\" rel=\"category tag\">Household<\/a> <a href=\"https:\/\/kabramkrafts.com\/category\/silhouette-cameo\/\" rel=\"category tag\">Silhouette Cameo<\/a> <a href=\"https:\/\/kabramkrafts.com\/category\/svg\/\" rel=\"category tag\">SVG<\/a> <a href=\"https:\/\/kabramkrafts.com\/category\/thanksgiving\/\" rel=\"category tag\">Thanksgiving<\/a>"},"taxonomies":{"post_tag":"<a href='https:\/\/kabramkrafts.com\/tag\/cards\/' rel='post_tag'>Cards<\/a><a href='https:\/\/kabramkrafts.com\/tag\/craft-room\/' rel='post_tag'>craft room<\/a><a href='https:\/\/kabramkrafts.com\/tag\/cutting-file\/' rel='post_tag'>Cutting File<\/a><a href='https:\/\/kabramkrafts.com\/tag\/diy\/' rel='post_tag'>DIY<\/a><a href='https:\/\/kabramkrafts.com\/tag\/fall\/' rel='post_tag'>Fall<\/a><a href='https:\/\/kabramkrafts.com\/tag\/featured\/' rel='post_tag'>featured<\/a><a href='https:\/\/kabramkrafts.com\/tag\/hand-lettered\/' rel='post_tag'>hand lettered<\/a><a href='https:\/\/kabramkrafts.com\/tag\/silhouette\/' rel='post_tag'>Silhouette<\/a><a href='https:\/\/kabramkrafts.com\/tag\/silhouette-cameo\/' rel='post_tag'>Silhouette Cameo<\/a><a href='https:\/\/kabramkrafts.com\/tag\/special-occasion\/' rel='post_tag'>special occasion<\/a><a href='https:\/\/kabramkrafts.com\/tag\/svg\/' rel='post_tag'>SVG<\/a>"},"readTime":{"min":1,"sec":11},"status":"publish","excerpt":""},{"id":147,"link":"https:\/\/kabramkrafts.com\/2016\/09\/fall-leaves-free-cutting-files-svg-dxf\/","name":"fall-leaves-free-cutting-files-svg-dxf","thumbnail":{"url":"https:\/\/kabramkrafts.com\/wp-content\/uploads\/2016\/09\/Leaves-5.png","alt":""},"title":"Fall Leaves - Free Cutting Files SVG","postMeta":[],"author":{"name":"kabram","link":"https:\/\/kabramkrafts.com\/author\/kabram\/"},"date":"Sep 10, 2016","dateGMT":"2016-09-10 18:46:00","modifiedDate":"2022-08-26 17:43:31","modifiedDateGMT":"2022-08-26 17:43:31","commentCount":"0","commentStatus":"open","categories":{"coma":"<a href=\"https:\/\/kabramkrafts.com\/category\/cards\/\" rel=\"category tag\">Cards<\/a>, <a href=\"https:\/\/kabramkrafts.com\/category\/fall\/\" rel=\"category tag\">Fall<\/a>, <a href=\"https:\/\/kabramkrafts.com\/category\/svg\/\" rel=\"category tag\">SVG<\/a>","space":"<a href=\"https:\/\/kabramkrafts.com\/category\/cards\/\" rel=\"category tag\">Cards<\/a> <a href=\"https:\/\/kabramkrafts.com\/category\/fall\/\" rel=\"category tag\">Fall<\/a> <a href=\"https:\/\/kabramkrafts.com\/category\/svg\/\" rel=\"category tag\">SVG<\/a>"},"taxonomies":{"post_tag":"<a href='https:\/\/kabramkrafts.com\/tag\/cutting-file\/' rel='post_tag'>Cutting File<\/a><a href='https:\/\/kabramkrafts.com\/tag\/featured\/' rel='post_tag'>featured<\/a><a href='https:\/\/kabramkrafts.com\/tag\/silhouette-cameo\/' rel='post_tag'>Silhouette Cameo<\/a><a href='https:\/\/kabramkrafts.com\/tag\/svg\/' rel='post_tag'>SVG<\/a>"},"readTime":{"min":0,"sec":33},"status":"publish","excerpt":""},{"id":166,"link":"https:\/\/kabramkrafts.com\/2014\/09\/free-pumpkin-svg-file-fall-is-here\/","name":"free-pumpkin-svg-file-fall-is-here","thumbnail":{"url":"https:\/\/kabramkrafts.com\/wp-content\/uploads\/2014\/09\/Pumpkin-1.png","alt":"Pumpkin "},"title":"Free Pumpkin SVG File - Fall is Here!","postMeta":[],"author":{"name":"kabram","link":"https:\/\/kabramkrafts.com\/author\/kabram\/"},"date":"Sep 9, 2014","dateGMT":"2014-09-09 19:04:00","modifiedDate":"2022-08-26 16:35:25","modifiedDateGMT":"2022-08-26 16:35:25","commentCount":"8","commentStatus":"open","categories":{"coma":"<a href=\"https:\/\/kabramkrafts.com\/category\/cutting-file\/\" rel=\"category tag\">Cutting File<\/a>, <a href=\"https:\/\/kabramkrafts.com\/category\/fall\/\" rel=\"category tag\">Fall<\/a>, <a href=\"https:\/\/kabramkrafts.com\/category\/silhouette-cameo\/\" rel=\"category tag\">Silhouette Cameo<\/a>, <a href=\"https:\/\/kabramkrafts.com\/category\/svg\/\" rel=\"category tag\">SVG<\/a>, <a href=\"https:\/\/kabramkrafts.com\/category\/thanksgiving\/\" rel=\"category tag\">Thanksgiving<\/a>","space":"<a href=\"https:\/\/kabramkrafts.com\/category\/cutting-file\/\" rel=\"category tag\">Cutting File<\/a> <a href=\"https:\/\/kabramkrafts.com\/category\/fall\/\" rel=\"category tag\">Fall<\/a> <a href=\"https:\/\/kabramkrafts.com\/category\/silhouette-cameo\/\" rel=\"category tag\">Silhouette Cameo<\/a> <a href=\"https:\/\/kabramkrafts.com\/category\/svg\/\" rel=\"category tag\">SVG<\/a> <a href=\"https:\/\/kabramkrafts.com\/category\/thanksgiving\/\" rel=\"category tag\">Thanksgiving<\/a>"},"taxonomies":{"post_tag":"<a href='https:\/\/kabramkrafts.com\/tag\/cutting-file\/' rel='post_tag'>Cutting File<\/a><a href='https:\/\/kabramkrafts.com\/tag\/diy\/' rel='post_tag'>DIY<\/a><a href='https:\/\/kabramkrafts.com\/tag\/fall\/' rel='post_tag'>Fall<\/a><a href='https:\/\/kabramkrafts.com\/tag\/silhouette-cameo\/' rel='post_tag'>Silhouette Cameo<\/a><a href='https:\/\/kabramkrafts.com\/tag\/svg\/' rel='post_tag'>SVG<\/a>"},"readTime":{"min":0,"sec":33},"status":"publish","excerpt":""}]


