Can you believe it is almost fall already? We saw some very warm temperatures this past week and it sure didn’t feel like September at all. The cooler temperatures will be nice, and it will be fun to rake up piles of leaves for my daughter to play in.
I have been thinking about pumpkins and had fun make this simple little pumpkin file. It is two pieces and would look very nice cut out in brown for the overlay and a nice fall orange for the pumpkin. I have visions of making more and maybe even some jack-o-lanterns, but we’ll see what happens.
[{"id":3005,"link":"https:\/\/kabramkrafts.com\/2025\/11\/%f0%9f%a6%83-mix-it-up-combining-svgs-with-traditional-crafting-for-beautiful-mixed-media-projects\/","name":"%f0%9f%a6%83-mix-it-up-combining-svgs-with-traditional-crafting-for-beautiful-mixed-media-projects","thumbnail":{"url":"https:\/\/kabramkrafts.com\/wp-content\/uploads\/2025\/11\/Whisk_e761f4504f42791a8cf498d91e798e30dr.jpeg","alt":""},"title":"\ud83e\udd83 Mix It Up! Combining SVGs with Traditional Crafting for Beautiful Mixed Media Projects","postMeta":[],"author":{"name":"kabram","link":"https:\/\/kabramkrafts.com\/author\/kabram\/"},"date":"Nov 7, 2025","dateGMT":"2025-11-07 02:34:58","modifiedDate":"2025-11-07 02:35:00","modifiedDateGMT":"2025-11-07 02:35:00","commentCount":"0","commentStatus":"open","categories":{"coma":"<a href=\"https:\/\/kabramkrafts.com\/category\/craft-room\/\" rel=\"category tag\">Craft Room<\/a>, <a href=\"https:\/\/kabramkrafts.com\/category\/decor\/\" rel=\"category tag\">Decor<\/a>, <a href=\"https:\/\/kabramkrafts.com\/category\/diy\/\" rel=\"category tag\">DIY<\/a>, <a href=\"https:\/\/kabramkrafts.com\/category\/fall\/\" rel=\"category tag\">Fall<\/a>, <a href=\"https:\/\/kabramkrafts.com\/category\/silhouette-cameo\/\" rel=\"category tag\">Silhouette Cameo<\/a>, <a href=\"https:\/\/kabramkrafts.com\/category\/svg\/\" rel=\"category tag\">SVG<\/a>, <a href=\"https:\/\/kabramkrafts.com\/category\/uncategorized\/\" rel=\"category tag\">Uncategorized<\/a>","space":"<a href=\"https:\/\/kabramkrafts.com\/category\/craft-room\/\" rel=\"category tag\">Craft Room<\/a> <a href=\"https:\/\/kabramkrafts.com\/category\/decor\/\" rel=\"category tag\">Decor<\/a> <a href=\"https:\/\/kabramkrafts.com\/category\/diy\/\" rel=\"category tag\">DIY<\/a> <a href=\"https:\/\/kabramkrafts.com\/category\/fall\/\" rel=\"category tag\">Fall<\/a> <a href=\"https:\/\/kabramkrafts.com\/category\/silhouette-cameo\/\" rel=\"category tag\">Silhouette Cameo<\/a> <a href=\"https:\/\/kabramkrafts.com\/category\/svg\/\" rel=\"category tag\">SVG<\/a> <a href=\"https:\/\/kabramkrafts.com\/category\/uncategorized\/\" rel=\"category tag\">Uncategorized<\/a>"},"taxonomies":{"post_tag":"<a href='https:\/\/kabramkrafts.com\/tag\/diy\/' rel='post_tag'>DIY<\/a><a href='https:\/\/kabramkrafts.com\/tag\/household\/' rel='post_tag'>Household<\/a><a href='https:\/\/kabramkrafts.com\/tag\/silhouette-cameo\/' rel='post_tag'>Silhouette Cameo<\/a><a href='https:\/\/kabramkrafts.com\/tag\/svg\/' rel='post_tag'>SVG<\/a>"},"readTime":{"min":2,"sec":58},"status":"publish","excerpt":""},{"id":2985,"link":"https:\/\/kabramkrafts.com\/2025\/10\/%f0%9f%8e%83-free-halloween-svg-bundle-witch-ghosts-tree-more\/","name":"%f0%9f%8e%83-free-halloween-svg-bundle-witch-ghosts-tree-more","thumbnail":{"url":"https:\/\/kabramkrafts.com\/wp-content\/uploads\/2025\/10\/Spooky-Kabram-Krafts-scaled.jpg","alt":""},"title":"\ud83c\udf83 Free Halloween SVG Bundle \u2014 Witch, Ghosts, Tree & More!","postMeta":[],"author":{"name":"kabram","link":"https:\/\/kabramkrafts.com\/author\/kabram\/"},"date":"Oct 14, 2025","dateGMT":"2025-10-14 02:48:06","modifiedDate":"2025-10-14 02:48:08","modifiedDateGMT":"2025-10-14 02:48:08","commentCount":"0","commentStatus":"open","categories":{"coma":"<a href=\"https:\/\/kabramkrafts.com\/category\/cards\/\" rel=\"category tag\">Cards<\/a>, <a href=\"https:\/\/kabramkrafts.com\/category\/cutting-file\/\" rel=\"category tag\">Cutting File<\/a>, <a href=\"https:\/\/kabramkrafts.com\/category\/decor\/\" rel=\"category tag\">Decor<\/a>, <a href=\"https:\/\/kabramkrafts.com\/category\/fall\/\" rel=\"category tag\">Fall<\/a>, <a href=\"https:\/\/kabramkrafts.com\/category\/featured\/\" rel=\"category tag\">featured<\/a>, <a href=\"https:\/\/kabramkrafts.com\/category\/halloween\/\" rel=\"category tag\">Halloween<\/a>, <a href=\"https:\/\/kabramkrafts.com\/category\/svg\/\" rel=\"category tag\">SVG<\/a>","space":"<a href=\"https:\/\/kabramkrafts.com\/category\/cards\/\" rel=\"category tag\">Cards<\/a> <a href=\"https:\/\/kabramkrafts.com\/category\/cutting-file\/\" rel=\"category tag\">Cutting File<\/a> <a href=\"https:\/\/kabramkrafts.com\/category\/decor\/\" rel=\"category tag\">Decor<\/a> <a href=\"https:\/\/kabramkrafts.com\/category\/fall\/\" rel=\"category tag\">Fall<\/a> <a href=\"https:\/\/kabramkrafts.com\/category\/featured\/\" rel=\"category tag\">featured<\/a> <a href=\"https:\/\/kabramkrafts.com\/category\/halloween\/\" rel=\"category tag\">Halloween<\/a> <a href=\"https:\/\/kabramkrafts.com\/category\/svg\/\" rel=\"category tag\">SVG<\/a>"},"taxonomies":{"post_tag":"<a href='https:\/\/kabramkrafts.com\/tag\/boo\/' rel='post_tag'>boo<\/a><a href='https:\/\/kabramkrafts.com\/tag\/cards\/' rel='post_tag'>Cards<\/a><a href='https:\/\/kabramkrafts.com\/tag\/craft\/' rel='post_tag'>Craft<\/a><a href='https:\/\/kabramkrafts.com\/tag\/cutting-file\/' rel='post_tag'>Cutting File<\/a><a href='https:\/\/kabramkrafts.com\/tag\/diy\/' rel='post_tag'>DIY<\/a><a href='https:\/\/kabramkrafts.com\/tag\/ghosts\/' rel='post_tag'>ghosts<\/a><a href='https:\/\/kabramkrafts.com\/tag\/halloween\/' rel='post_tag'>halloween<\/a><a href='https:\/\/kabramkrafts.com\/tag\/silhouette\/' rel='post_tag'>Silhouette<\/a><a href='https:\/\/kabramkrafts.com\/tag\/silhouette-cameo\/' rel='post_tag'>Silhouette Cameo<\/a><a href='https:\/\/kabramkrafts.com\/tag\/spider\/' rel='post_tag'>spider<\/a><a href='https:\/\/kabramkrafts.com\/tag\/svg\/' rel='post_tag'>SVG<\/a>"},"readTime":{"min":1,"sec":17},"status":"publish","excerpt":""},{"id":1647,"link":"https:\/\/kabramkrafts.com\/2018\/10\/pumpkin-stack-svg-fall-freebie\/","name":"pumpkin-stack-svg-fall-freebie","thumbnail":{"url":"https:\/\/kabramkrafts.com\/wp-content\/uploads\/2018\/10\/pumpkin-stack.png","alt":""},"title":"Pumpkin Stack SVG - Fall Freebie!","postMeta":[],"author":{"name":"kabram","link":"https:\/\/kabramkrafts.com\/author\/kabram\/"},"date":"Oct 19, 2018","dateGMT":"2018-10-19 22:52:41","modifiedDate":"2022-09-13 18:52:48","modifiedDateGMT":"2022-09-13 18:52:48","commentCount":"4","commentStatus":"open","categories":{"coma":"<a href=\"https:\/\/kabramkrafts.com\/category\/cards\/\" rel=\"category tag\">Cards<\/a>, <a href=\"https:\/\/kabramkrafts.com\/category\/cutting-file\/\" rel=\"category tag\">Cutting File<\/a>, <a href=\"https:\/\/kabramkrafts.com\/category\/diy\/\" rel=\"category tag\">DIY<\/a>, <a href=\"https:\/\/kabramkrafts.com\/category\/fall\/\" rel=\"category tag\">Fall<\/a>, <a href=\"https:\/\/kabramkrafts.com\/category\/featured\/\" rel=\"category tag\">featured<\/a>, <a href=\"https:\/\/kabramkrafts.com\/category\/silhouette-cameo\/\" rel=\"category tag\">Silhouette Cameo<\/a>, <a href=\"https:\/\/kabramkrafts.com\/category\/svg\/\" rel=\"category tag\">SVG<\/a>","space":"<a href=\"https:\/\/kabramkrafts.com\/category\/cards\/\" rel=\"category tag\">Cards<\/a> <a href=\"https:\/\/kabramkrafts.com\/category\/cutting-file\/\" rel=\"category tag\">Cutting File<\/a> <a href=\"https:\/\/kabramkrafts.com\/category\/diy\/\" rel=\"category tag\">DIY<\/a> <a href=\"https:\/\/kabramkrafts.com\/category\/fall\/\" rel=\"category tag\">Fall<\/a> <a href=\"https:\/\/kabramkrafts.com\/category\/featured\/\" rel=\"category tag\">featured<\/a> <a href=\"https:\/\/kabramkrafts.com\/category\/silhouette-cameo\/\" rel=\"category tag\">Silhouette Cameo<\/a> <a href=\"https:\/\/kabramkrafts.com\/category\/svg\/\" rel=\"category tag\">SVG<\/a>"},"taxonomies":{"post_tag":"<a href='https:\/\/kabramkrafts.com\/tag\/artwork\/' rel='post_tag'>Artwork<\/a><a href='https:\/\/kabramkrafts.com\/tag\/autumn\/' rel='post_tag'>autumn<\/a><a href='https:\/\/kabramkrafts.com\/tag\/cards\/' rel='post_tag'>Cards<\/a><a href='https:\/\/kabramkrafts.com\/tag\/cutting-file\/' rel='post_tag'>Cutting File<\/a><a href='https:\/\/kabramkrafts.com\/tag\/diy\/' rel='post_tag'>DIY<\/a><a href='https:\/\/kabramkrafts.com\/tag\/fall\/' rel='post_tag'>Fall<\/a><a href='https:\/\/kabramkrafts.com\/tag\/featured\/' rel='post_tag'>featured<\/a><a href='https:\/\/kabramkrafts.com\/tag\/freebie\/' rel='post_tag'>freebie<\/a><a href='https:\/\/kabramkrafts.com\/tag\/pumpkins\/' rel='post_tag'>pumpkins<\/a><a href='https:\/\/kabramkrafts.com\/tag\/silhouette\/' rel='post_tag'>Silhouette<\/a><a href='https:\/\/kabramkrafts.com\/tag\/silhouette-cameo\/' rel='post_tag'>Silhouette Cameo<\/a><a href='https:\/\/kabramkrafts.com\/tag\/svg\/' rel='post_tag'>SVG<\/a><a href='https:\/\/kabramkrafts.com\/tag\/vinyl\/' rel='post_tag'>vinyl<\/a>"},"readTime":{"min":2,"sec":12},"status":"publish","excerpt":""},{"id":1450,"link":"https:\/\/kabramkrafts.com\/2018\/01\/free-svg-hearts-download-valentine\/","name":"free-svg-hearts-download-valentine","thumbnail":{"url":"https:\/\/kabramkrafts.com\/wp-content\/uploads\/2018\/01\/1Hearts-For-Valentines-Day@0.5x-e1516137049356.png","alt":""},"title":"Hearts for your Valentine! Free SVG download for your card making and crafting.","postMeta":[],"author":{"name":"kabram","link":"https:\/\/kabramkrafts.com\/author\/kabram\/"},"date":"Jan 16, 2018","dateGMT":"2018-01-16 21:03:19","modifiedDate":"2018-01-16 21:21:54","modifiedDateGMT":"2018-01-16 21:21:54","commentCount":"0","commentStatus":"open","categories":{"coma":"<a href=\"https:\/\/kabramkrafts.com\/category\/cards\/\" rel=\"category tag\">Cards<\/a>, <a href=\"https:\/\/kabramkrafts.com\/category\/craft-room\/\" rel=\"category tag\">Craft Room<\/a>, <a href=\"https:\/\/kabramkrafts.com\/category\/cutting-file\/\" rel=\"category tag\">Cutting File<\/a>, <a href=\"https:\/\/kabramkrafts.com\/category\/diy\/\" rel=\"category tag\">DIY<\/a>, <a href=\"https:\/\/kabramkrafts.com\/category\/featured\/\" rel=\"category tag\">featured<\/a>, <a href=\"https:\/\/kabramkrafts.com\/category\/household\/\" rel=\"category tag\">Household<\/a>, <a href=\"https:\/\/kabramkrafts.com\/category\/silhouette-cameo\/\" rel=\"category tag\">Silhouette Cameo<\/a>, <a href=\"https:\/\/kabramkrafts.com\/category\/svg\/\" rel=\"category tag\">SVG<\/a>, <a href=\"https:\/\/kabramkrafts.com\/category\/thanksgiving\/\" rel=\"category tag\">Thanksgiving<\/a>","space":"<a href=\"https:\/\/kabramkrafts.com\/category\/cards\/\" rel=\"category tag\">Cards<\/a> <a href=\"https:\/\/kabramkrafts.com\/category\/craft-room\/\" rel=\"category tag\">Craft Room<\/a> <a href=\"https:\/\/kabramkrafts.com\/category\/cutting-file\/\" rel=\"category tag\">Cutting File<\/a> <a href=\"https:\/\/kabramkrafts.com\/category\/diy\/\" rel=\"category tag\">DIY<\/a> <a href=\"https:\/\/kabramkrafts.com\/category\/featured\/\" rel=\"category tag\">featured<\/a> <a href=\"https:\/\/kabramkrafts.com\/category\/household\/\" rel=\"category tag\">Household<\/a> <a href=\"https:\/\/kabramkrafts.com\/category\/silhouette-cameo\/\" rel=\"category tag\">Silhouette Cameo<\/a> <a href=\"https:\/\/kabramkrafts.com\/category\/svg\/\" rel=\"category tag\">SVG<\/a> <a href=\"https:\/\/kabramkrafts.com\/category\/thanksgiving\/\" rel=\"category tag\">Thanksgiving<\/a>"},"taxonomies":{"post_tag":"<a href='https:\/\/kabramkrafts.com\/tag\/cards\/' rel='post_tag'>Cards<\/a><a href='https:\/\/kabramkrafts.com\/tag\/craft-room\/' rel='post_tag'>craft room<\/a><a href='https:\/\/kabramkrafts.com\/tag\/cutting-file\/' rel='post_tag'>Cutting File<\/a><a href='https:\/\/kabramkrafts.com\/tag\/diy\/' rel='post_tag'>DIY<\/a><a href='https:\/\/kabramkrafts.com\/tag\/fall\/' rel='post_tag'>Fall<\/a><a href='https:\/\/kabramkrafts.com\/tag\/featured\/' rel='post_tag'>featured<\/a><a href='https:\/\/kabramkrafts.com\/tag\/hand-lettered\/' rel='post_tag'>hand lettered<\/a><a href='https:\/\/kabramkrafts.com\/tag\/silhouette\/' rel='post_tag'>Silhouette<\/a><a href='https:\/\/kabramkrafts.com\/tag\/silhouette-cameo\/' rel='post_tag'>Silhouette Cameo<\/a><a href='https:\/\/kabramkrafts.com\/tag\/special-occasion\/' rel='post_tag'>special occasion<\/a><a href='https:\/\/kabramkrafts.com\/tag\/svg\/' rel='post_tag'>SVG<\/a>"},"readTime":{"min":0,"sec":47},"status":"publish","excerpt":""},{"id":1344,"link":"https:\/\/kabramkrafts.com\/2017\/11\/give-thanks-svg-hand-lettered-freebie\/","name":"give-thanks-svg-hand-lettered-freebie","thumbnail":{"url":"https:\/\/kabramkrafts.com\/wp-content\/uploads\/2017\/11\/towel-example.png","alt":""},"title":"Give Thanks SVG Hand Lettered Freebie!","postMeta":[],"author":{"name":"kabram","link":"https:\/\/kabramkrafts.com\/author\/kabram\/"},"date":"Nov 6, 2017","dateGMT":"2017-11-06 08:30:58","modifiedDate":"2017-11-08 17:15:21","modifiedDateGMT":"2017-11-08 17:15:21","commentCount":"0","commentStatus":"open","categories":{"coma":"<a href=\"https:\/\/kabramkrafts.com\/category\/cards\/\" rel=\"category tag\">Cards<\/a>, <a href=\"https:\/\/kabramkrafts.com\/category\/craft-room\/\" rel=\"category tag\">Craft Room<\/a>, <a href=\"https:\/\/kabramkrafts.com\/category\/cutting-file\/\" rel=\"category tag\">Cutting File<\/a>, <a href=\"https:\/\/kabramkrafts.com\/category\/diy\/\" rel=\"category tag\">DIY<\/a>, <a href=\"https:\/\/kabramkrafts.com\/category\/featured\/\" rel=\"category tag\">featured<\/a>, <a href=\"https:\/\/kabramkrafts.com\/category\/household\/\" rel=\"category tag\">Household<\/a>, <a href=\"https:\/\/kabramkrafts.com\/category\/silhouette-cameo\/\" rel=\"category tag\">Silhouette Cameo<\/a>, <a href=\"https:\/\/kabramkrafts.com\/category\/svg\/\" rel=\"category tag\">SVG<\/a>, <a href=\"https:\/\/kabramkrafts.com\/category\/thanksgiving\/\" rel=\"category tag\">Thanksgiving<\/a>","space":"<a href=\"https:\/\/kabramkrafts.com\/category\/cards\/\" rel=\"category tag\">Cards<\/a> <a href=\"https:\/\/kabramkrafts.com\/category\/craft-room\/\" rel=\"category tag\">Craft Room<\/a> <a href=\"https:\/\/kabramkrafts.com\/category\/cutting-file\/\" rel=\"category tag\">Cutting File<\/a> <a href=\"https:\/\/kabramkrafts.com\/category\/diy\/\" rel=\"category tag\">DIY<\/a> <a href=\"https:\/\/kabramkrafts.com\/category\/featured\/\" rel=\"category tag\">featured<\/a> <a href=\"https:\/\/kabramkrafts.com\/category\/household\/\" rel=\"category tag\">Household<\/a> <a href=\"https:\/\/kabramkrafts.com\/category\/silhouette-cameo\/\" rel=\"category tag\">Silhouette Cameo<\/a> <a href=\"https:\/\/kabramkrafts.com\/category\/svg\/\" rel=\"category tag\">SVG<\/a> <a href=\"https:\/\/kabramkrafts.com\/category\/thanksgiving\/\" rel=\"category tag\">Thanksgiving<\/a>"},"taxonomies":{"post_tag":"<a href='https:\/\/kabramkrafts.com\/tag\/cards\/' rel='post_tag'>Cards<\/a><a href='https:\/\/kabramkrafts.com\/tag\/craft-room\/' rel='post_tag'>craft room<\/a><a href='https:\/\/kabramkrafts.com\/tag\/cutting-file\/' rel='post_tag'>Cutting File<\/a><a href='https:\/\/kabramkrafts.com\/tag\/diy\/' rel='post_tag'>DIY<\/a><a href='https:\/\/kabramkrafts.com\/tag\/fall\/' rel='post_tag'>Fall<\/a><a href='https:\/\/kabramkrafts.com\/tag\/featured\/' rel='post_tag'>featured<\/a><a href='https:\/\/kabramkrafts.com\/tag\/hand-lettered\/' rel='post_tag'>hand lettered<\/a><a href='https:\/\/kabramkrafts.com\/tag\/silhouette\/' rel='post_tag'>Silhouette<\/a><a href='https:\/\/kabramkrafts.com\/tag\/silhouette-cameo\/' rel='post_tag'>Silhouette Cameo<\/a><a href='https:\/\/kabramkrafts.com\/tag\/special-occasion\/' rel='post_tag'>special occasion<\/a><a href='https:\/\/kabramkrafts.com\/tag\/svg\/' rel='post_tag'>SVG<\/a>"},"readTime":{"min":1,"sec":11},"status":"publish","excerpt":""},{"id":147,"link":"https:\/\/kabramkrafts.com\/2016\/09\/fall-leaves-free-cutting-files-svg-dxf\/","name":"fall-leaves-free-cutting-files-svg-dxf","thumbnail":{"url":"https:\/\/kabramkrafts.com\/wp-content\/uploads\/2016\/09\/Leaves-5.png","alt":""},"title":"Fall Leaves - Free Cutting Files SVG","postMeta":[],"author":{"name":"kabram","link":"https:\/\/kabramkrafts.com\/author\/kabram\/"},"date":"Sep 10, 2016","dateGMT":"2016-09-10 18:46:00","modifiedDate":"2022-08-26 17:43:31","modifiedDateGMT":"2022-08-26 17:43:31","commentCount":"0","commentStatus":"open","categories":{"coma":"<a href=\"https:\/\/kabramkrafts.com\/category\/cards\/\" rel=\"category tag\">Cards<\/a>, <a href=\"https:\/\/kabramkrafts.com\/category\/fall\/\" rel=\"category tag\">Fall<\/a>, <a href=\"https:\/\/kabramkrafts.com\/category\/svg\/\" rel=\"category tag\">SVG<\/a>","space":"<a href=\"https:\/\/kabramkrafts.com\/category\/cards\/\" rel=\"category tag\">Cards<\/a> <a href=\"https:\/\/kabramkrafts.com\/category\/fall\/\" rel=\"category tag\">Fall<\/a> <a href=\"https:\/\/kabramkrafts.com\/category\/svg\/\" rel=\"category tag\">SVG<\/a>"},"taxonomies":{"post_tag":"<a href='https:\/\/kabramkrafts.com\/tag\/cutting-file\/' rel='post_tag'>Cutting File<\/a><a href='https:\/\/kabramkrafts.com\/tag\/featured\/' rel='post_tag'>featured<\/a><a href='https:\/\/kabramkrafts.com\/tag\/silhouette-cameo\/' rel='post_tag'>Silhouette Cameo<\/a><a href='https:\/\/kabramkrafts.com\/tag\/svg\/' rel='post_tag'>SVG<\/a>"},"readTime":{"min":0,"sec":33},"status":"publish","excerpt":""},{"id":166,"link":"https:\/\/kabramkrafts.com\/2014\/09\/free-pumpkin-svg-file-fall-is-here\/","name":"free-pumpkin-svg-file-fall-is-here","thumbnail":{"url":"https:\/\/kabramkrafts.com\/wp-content\/uploads\/2014\/09\/Pumpkin-1.png","alt":"Pumpkin "},"title":"Free Pumpkin SVG File - Fall is Here!","postMeta":[],"author":{"name":"kabram","link":"https:\/\/kabramkrafts.com\/author\/kabram\/"},"date":"Sep 9, 2014","dateGMT":"2014-09-09 19:04:00","modifiedDate":"2022-08-26 16:35:25","modifiedDateGMT":"2022-08-26 16:35:25","commentCount":"8","commentStatus":"open","categories":{"coma":"<a href=\"https:\/\/kabramkrafts.com\/category\/cutting-file\/\" rel=\"category tag\">Cutting File<\/a>, <a href=\"https:\/\/kabramkrafts.com\/category\/fall\/\" rel=\"category tag\">Fall<\/a>, <a href=\"https:\/\/kabramkrafts.com\/category\/silhouette-cameo\/\" rel=\"category tag\">Silhouette Cameo<\/a>, <a href=\"https:\/\/kabramkrafts.com\/category\/svg\/\" rel=\"category tag\">SVG<\/a>, <a href=\"https:\/\/kabramkrafts.com\/category\/thanksgiving\/\" rel=\"category tag\">Thanksgiving<\/a>","space":"<a href=\"https:\/\/kabramkrafts.com\/category\/cutting-file\/\" rel=\"category tag\">Cutting File<\/a> <a href=\"https:\/\/kabramkrafts.com\/category\/fall\/\" rel=\"category tag\">Fall<\/a> <a href=\"https:\/\/kabramkrafts.com\/category\/silhouette-cameo\/\" rel=\"category tag\">Silhouette Cameo<\/a> <a href=\"https:\/\/kabramkrafts.com\/category\/svg\/\" rel=\"category tag\">SVG<\/a> <a href=\"https:\/\/kabramkrafts.com\/category\/thanksgiving\/\" rel=\"category tag\">Thanksgiving<\/a>"},"taxonomies":{"post_tag":"<a href='https:\/\/kabramkrafts.com\/tag\/cutting-file\/' rel='post_tag'>Cutting File<\/a><a href='https:\/\/kabramkrafts.com\/tag\/diy\/' rel='post_tag'>DIY<\/a><a href='https:\/\/kabramkrafts.com\/tag\/fall\/' rel='post_tag'>Fall<\/a><a href='https:\/\/kabramkrafts.com\/tag\/silhouette-cameo\/' rel='post_tag'>Silhouette Cameo<\/a><a href='https:\/\/kabramkrafts.com\/tag\/svg\/' rel='post_tag'>SVG<\/a>"},"readTime":{"min":0,"sec":33},"status":"publish","excerpt":""}]
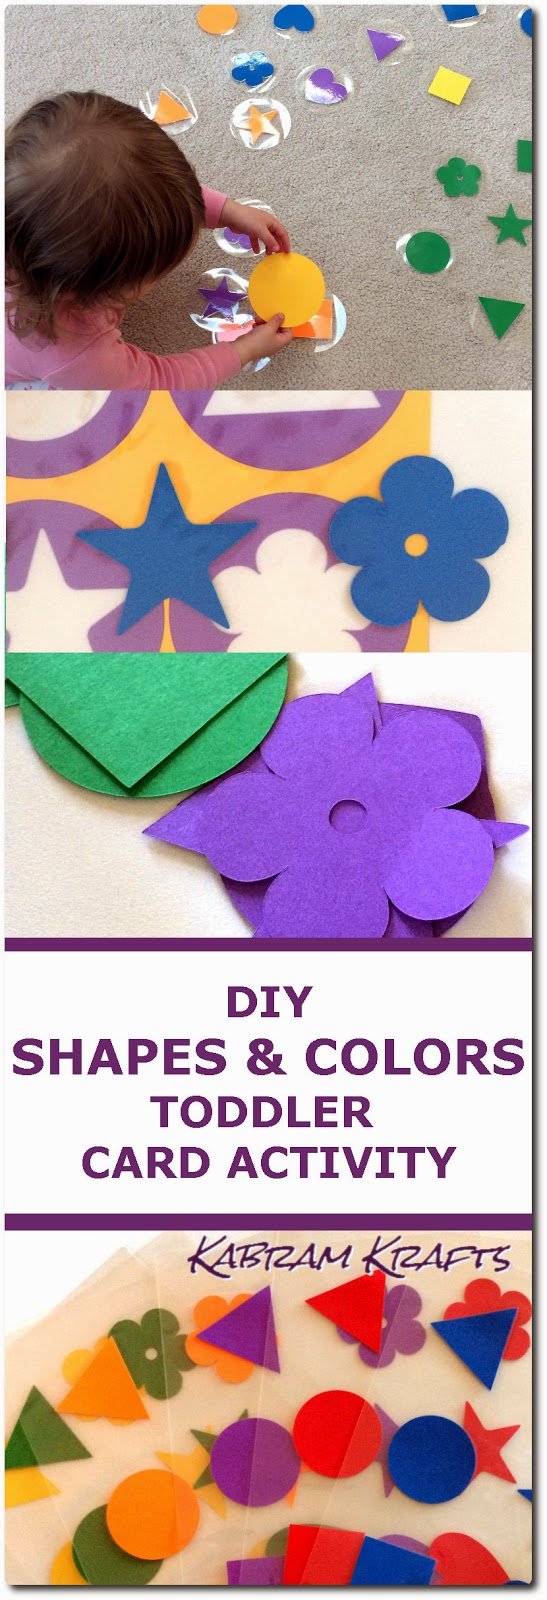
 My daughter is quickly nearing the age of two. Her interest in talking and learning new words is at a record high, and I have been wanting something for her to play with that would also help her to learn a few new things in the process.
 Naturally, I wanted to put my Silhouette Cameo cutting machine into the creative action, so I came up with some laminated shapes that I then cut out in circles. You could definitely do this without a cutting machine, however, and the laminating machine is not strictly necessary either. I wanted these to last a while, so I laminated them, but if you use a heavy cardstock, they should last a for a while also and be just as educational.
 In my set of colors and shapes, I picked out 6 of each, for a total of 36 cards. I choose the colors RED, BLUE, GREEN, YELLOW, PURPLE, and ORANGE. For the shapes, I went with CIRCLE, SQUARE, TRIANGLE, HEART, STAR, FLOWER. Now, I know “flower” isn’t really a traditional shape choice, but I didn’t like the other options I thought of, such as diamond (easily confused with square) and more elaborate polygons.
 The process was fairly simple, with only one small trick or two to get my machine to cut the circles around the shapes correctly (even if not quite perfectly).
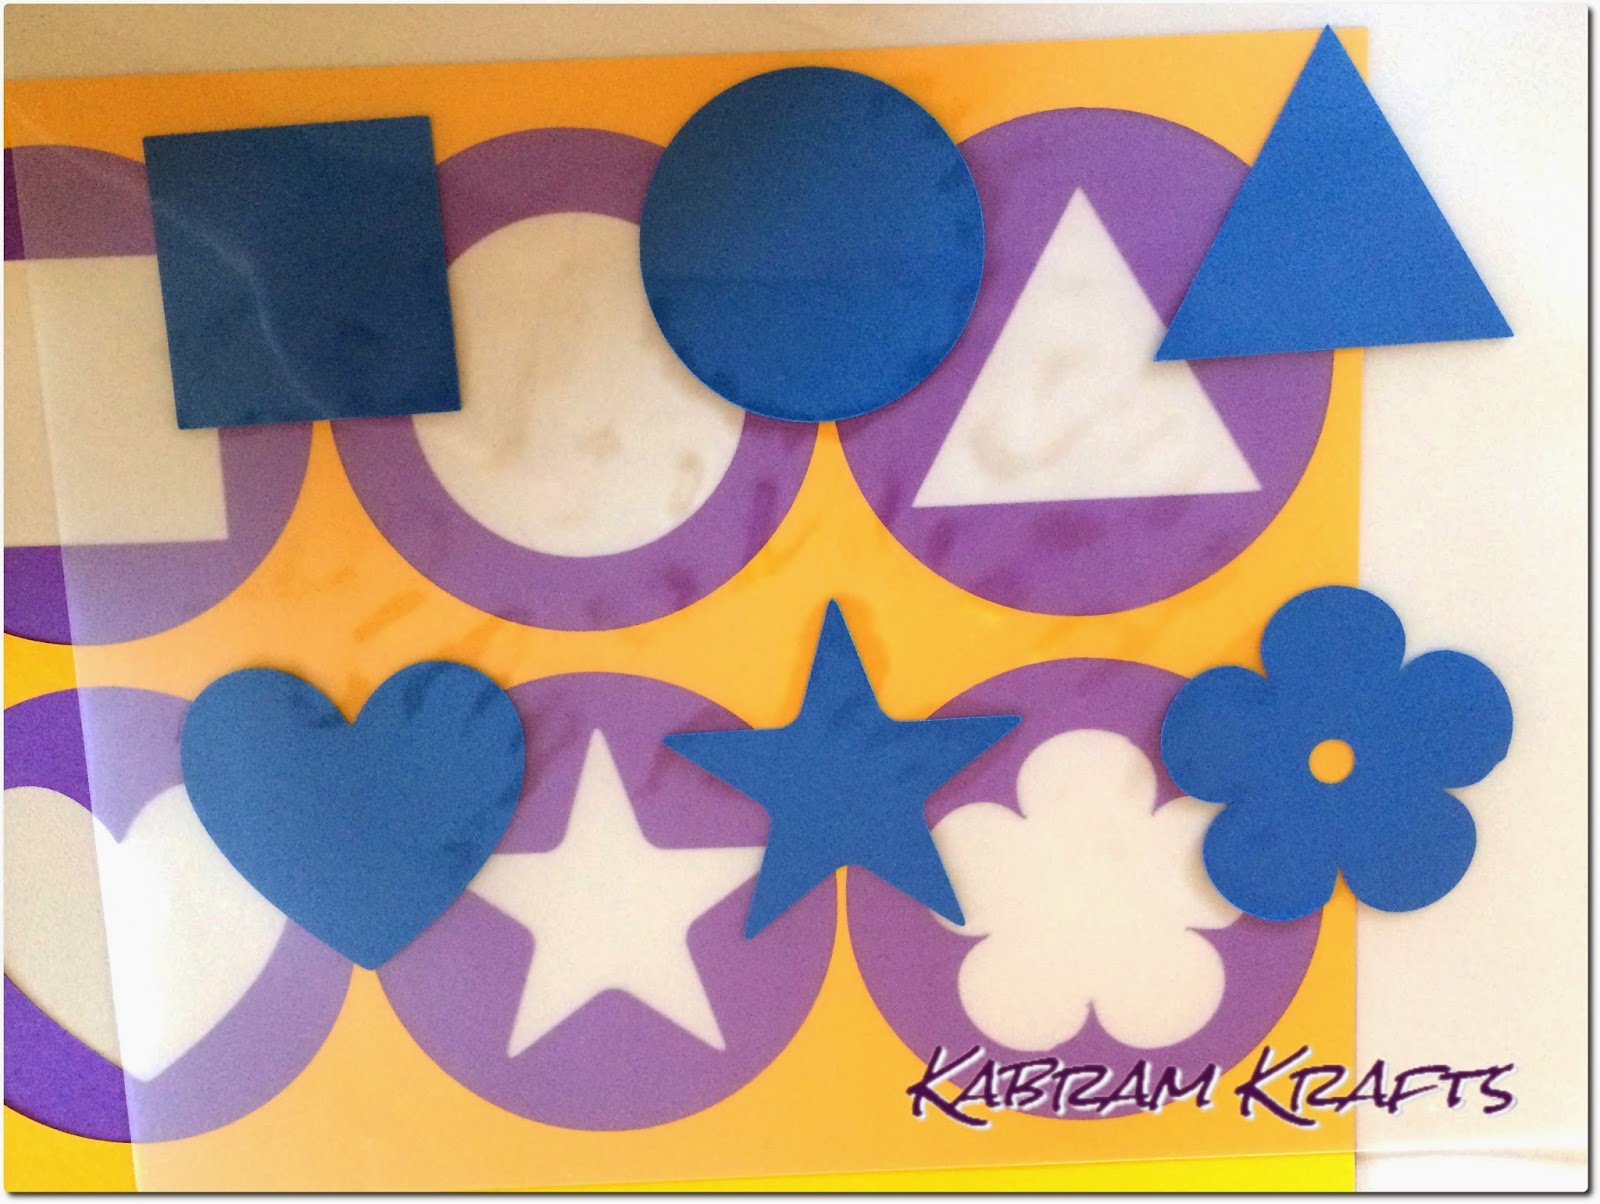
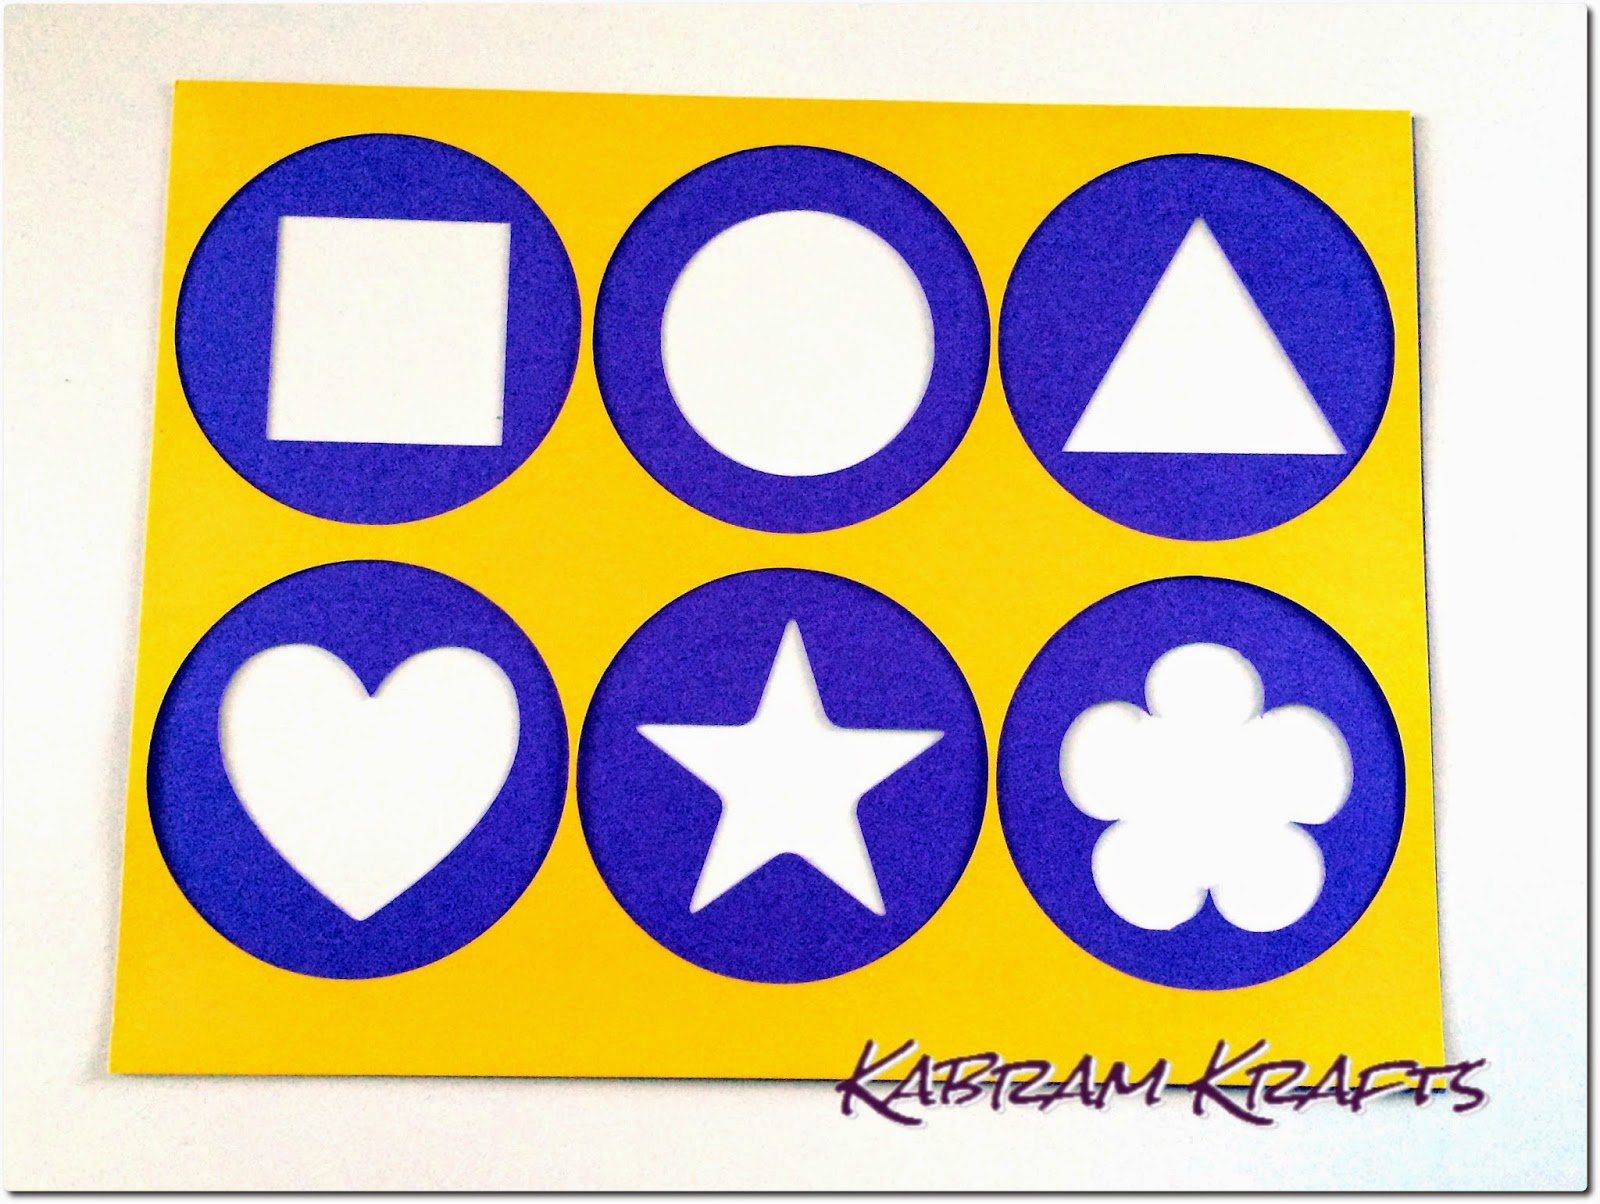 Now, it is time to laminate. I pulled out a laminating sheet and placed it on top of my template (the page with the shapes all lined up). Then, I took a set of shapes and placed them inside the laminating sheet using the template as a guide.
 Once you have all 6 sets of shapes laminated in the correct alignment, place the sheets back through your cutting machine one at a time. This time through, select “No Cut” for the shapes, and “Cut” for the 6 circles around the shapes. If you lined the shapes up correctly with your template and put the sheet in the correct way, it should cut out nice perfect circles around your newly laminated sheets.


