Posted on Leave a comment

Experimenting with my new Silhouette Cameo!

Engagement Silhouette

New Silhouette Cameo = Excitement

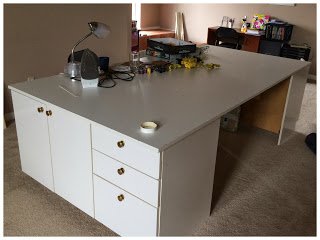
I can’t stop feeling thrilled about my new silhouette cameo, which I was really blessed to receive as a Christmas bonus from my work – LTIIT. And… working on my new craft table was awesome!

First Project

After opening up and marveling at how light it was compared to my ecraft, I knew exactly what I wanted to try cutting out first. Awhile ago, I had made a file from one of our engagement photos that I was really excited about. It is an image of us standing together and it made a great silhouette.

Unfortunately, the ecraft could not cut this image out no matter what I tried. It would always mess up either my husband’s pants, or my nose and face. I think that due to the no mat cutting approach of the ecraft, it would always slip a little. Or, maybe my machine is just out of alignment. At any rate – the cameo got it on the first pass! Here is a picture of the finished cut:

Feel free to download the SVG for this file below.
 

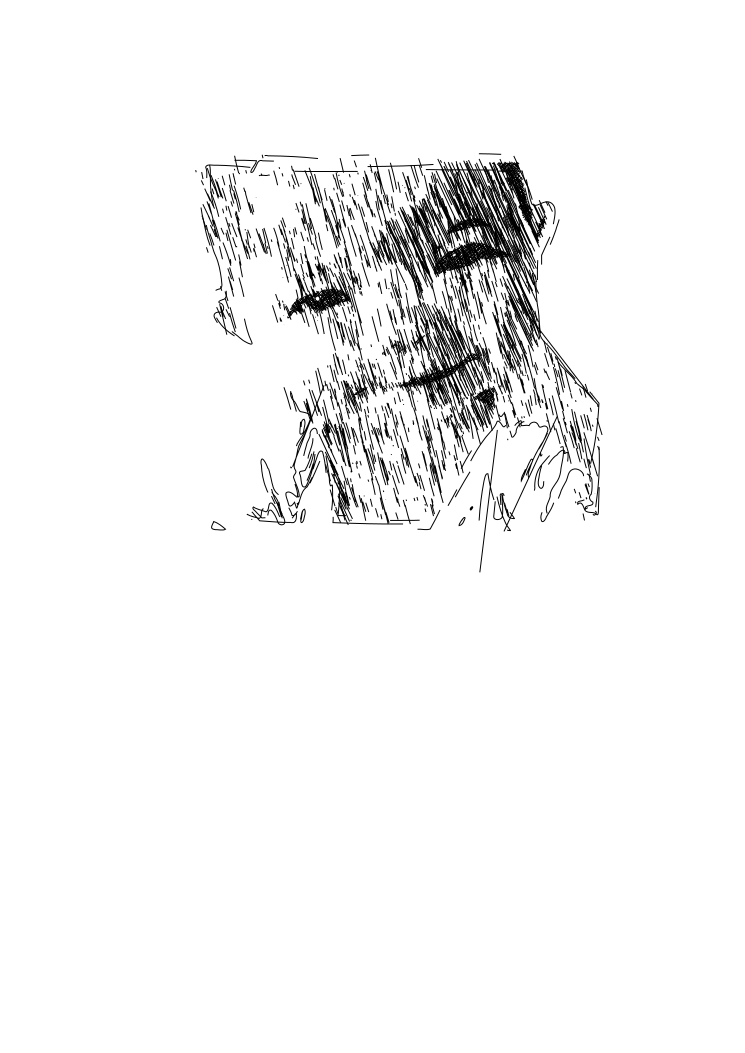
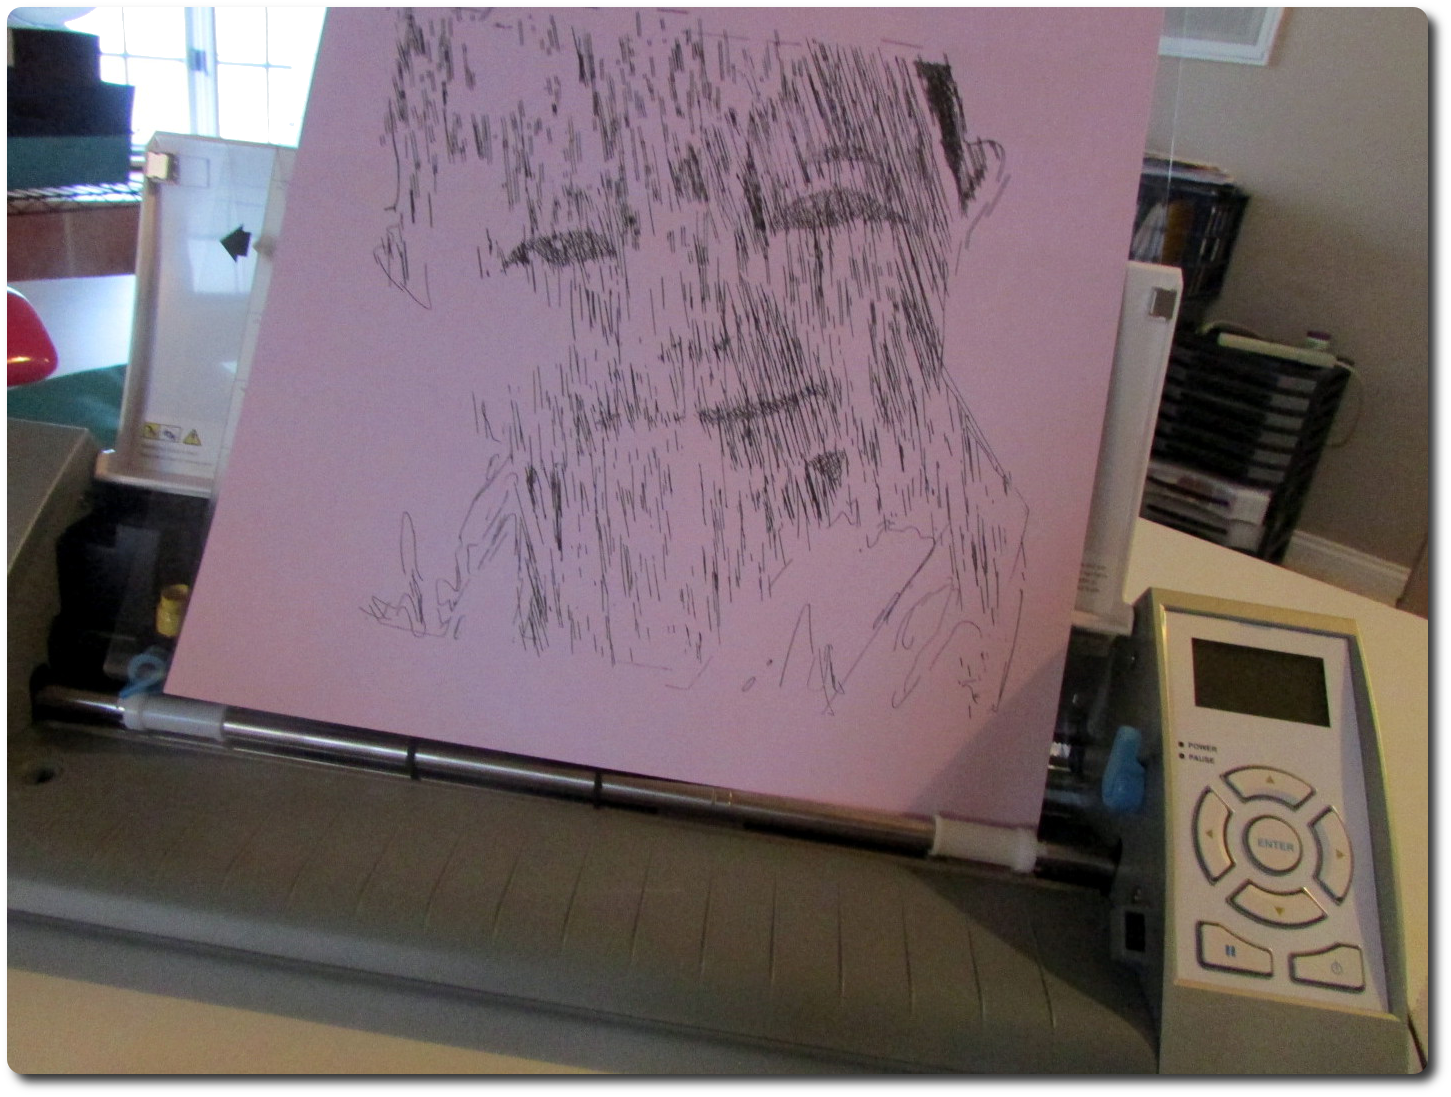
Sketching with my Silhouette Cameo

My next thought was about sketches. Now, while the ecraft has a pen and theoretically can cut and draw an image simultaneously, the results are always less than stellar. The pen usually skips or doesn’t write, and the cut is not lined up properly. So, though I don’t yet have the cameo’s sketch pens, I decided to try a makeshift option. I wrapped a pen in some cardstock, stuck it in the cameo, and tada! Here is what I got:


So, how did I do it?

Well, for both images, I played around in both gimp and inkscape – both free programs you can download online! For the engagement silhouette, I simply picked a photo that I thought would make a good silhouetted and played with it in gimp. I changed the brightness and contrast dramatically.  Turned the image to grayscale. Simplified it quite a bit and then pulled it into inkscape and hit “Object to Path”. Once I had a path, I simplified it further in inkscape and played a little with the nodes until I was satisfied. Since I don’t have the designer edition of the cameo software, I saved it as a dxf file for import into the cameo studio, and cut it out!

Making the Sketch File

The sketch was a bit more complicated. I started by following directions from this blog post that I pinned. The best thing I learned from that post was about the Eggbott Extension for Inkscape which allows you to fill a path with a hatch. This looks like a sketch and gives you a bunch of open paths – exactly what you want for a cameo sketch file.
 
However, I wasn’t satisfied with the very straight looking results in the post. I explored further and found the path effects editor already in Inkscape! Once you have a bunch of open paths, click one of them and go to Path -> Path Effect Editor. In the drop down, select “Sketch” and hit add. Then play around with the options until you get something you like. Once I had done this and liked my result, I then selected each part one at a time and hit “Object to Path” once more. The results of the Path Effect Editor aren’t turned into paths automatically, so I think this step is necessary. Now, you have a nice sketch! Save as a dxf file, and import it into your cameo software (this took more than a few seconds on my computer – it was a big file!).
Let me know if you have any questions!
Posted on Leave a comment

DIY Giant 8′ x 4′ Craft Table for under $90


My project is finally complete! It started as an idea while I was browsing the local thrift store. I had found, much to my husband’s dismay, a set of very awesome looking white cabinets for a total of about $20. Hmmm…those would make an awesome place to store my craft supplies and make a giant craft table too. So, with some moving help from my husband, I became the proud owner of 4 matching white cabinets. There were two with drawers, and two with doors.

It took a little TLC as these cabinets looked like they had been sitting out in a garage or some such place for quite some time, but nothing a little scrubbing and elbow grease couldn’t handle.

I then began to plan out the top. After measuring, I discovered that having two cabinets on each end got me almost exactly to 48″ – the same as the width of a standard melamine board.


Next, I was off to the lumber store:


 – 4′ x 8′ sheet of 3/4″ melamine board ($40)
 – 25′ of iron on melamine edging ($8)
 – Delivery ($20 – no truck, boo hoo…)


 – And, for good measure, 2 rolls of non-slip shelf liner ($2)

TOTAL COST: $90

Now, for the construction:

  1. Place all the cabinets in the desired spot – 2 on each end in my case. Basically, you just need to be sure that the top is well supported. My cabinets were the perfect width when placed two on each end, so it worked out very nicely.
  2. Place something in the center for a little added support (if needed) – I used a couple wooden shelves I had laying around, with a few boards on top to even out the height. I may have been able to do without this, but I wanted to be sure that the top could support my weightier hobbies like sewing!
  3. Now, because I wanted the top to be removable, I had to devise a way to prevent shifting without using screws or nails. So, I used some of the foam like shelf liner. Cut the shelf liner to fit on top of the cabinets and hot glue it on. I also placed some between the boards in the center to keep them in place as well.
  4. Put the top on! Not a hard step if you have some extra hands. Just make sure you get the top centered on your supports!
  5. Iron on the edging. The edging came with directions, so just follow those. I also used a rubber stamp roller to ensure that it was well adhered.
  6. Trim the edging down to size. My edging was 7/8″, so I had to cut a bit off with an exacto knife. This proved a little tricky, so be careful. I think I took a little more of the melamine top off in places, but since it wasn’t perfect to start, I wasn’t too upset. I will probably work on touching up the edge when I get a chance.
  7. Admire the finished table and start crafting!


That was it. Pretty easy. The hardest part was the edging, which as you can see I didn’t get perfect. Also, the melamine board arrived at my door a bit chipped around the edges… so I will probably be working to fix that soon too if I can.
Posted on Leave a comment

Vinyl Cutting File For a Church Sanctuary

My mother recently got excited about my electric cutting machine and the vinyl wall decals I have been making. Amazingly, it was just what her church had been looking for. She enlisted my help and we designed and cut out a message that my parents helped them install in their sanctuary.

The saying says “To know Jesus ….. and make Him known.” It wasn’t very hard to make. I use the free program Inkscape to make my svg files, and then simply import them into eCraftShop Pro for cutting out on my ecraft. The only trouble I had was that to make it large enough (we are talking a foot high, by many many feet long), we had to turn it vertically and made sure to put masking tape on the back (for the dual purpose of providing better traction for the rollers, and making sure the blade didn’t cut all the way through – for some reason it kept trying to, despite being on the lowest pressure setting). Anyhow, once all was in place, it turned out very nicely!

Check it out:

Feel free to download and use the SVG file HERE.


Posted on 16 Comments

How To Make T-Shirt Yarn from Jersey Sheets

Save Money! Make your own T-Shirt Yarn!

Browsing Pinterest, I saw an awesome pattern for a rug made of T-Shirt Yarn. Now, I had to make the rug (of course!), but didn’t want to buy the yarn. So, off to the thrift store for some T-Shirts, right!? That’s what I thought anyhow, but once at the thrift store, my friend checked out the used bed sheets section and found twin size jersey sheets. Brilliant! Instead of cutting up a ton of shirts and trying to get them all to match, a sheet or two is much simpler.

DIY T-shirt Yarn From Jersey Sheets

I bought five sheets which went very nicely together and spent less than $10! These five sheets made more than enough yarn for the rug that I made – check it out here.

Now, I had 5 sheets to turn into yarn. A green sheet and two each of purple and pink. Making the yarn turned out to be a fairly time consuming project, but also a pretty simple one.

I was tickled pink that I had gotten my supplies for under $10 and was equally pleased with the colors. It was time to start crocheting and get this done before baby arrived.

How To Make T-Shirt Yarn From Jersey Sheets

Making T-shirt Yarn from Jersey Sheets Isn’t hard.

  1. Buy Jersey Sheets

    First, you need to buy some jersey sheets. I would recommend checking in thrift stores. I was fortunate to find three bright colors that went together well. I used five sheets in total to make a crocheted rug. My rug was about 3 feet in diameter and I had some yarn left over.

  2. Trim Edges of Sheets


    Cut off any seams or elastic. For a fitted sheet, cut the elastic from the bottom edge, it is not critical that this be done perfectly. I happen to think that this elastic would make very cute headbands, but that is for another post!

    Update: I made a headband! Check it out. 

    Once you have removed the elastic, cut the corner seams off, and you will have what looks like a rectangle with squares cut into the corners. The key here is that it should now lay flat.  Diagram of Sheet with Corners cut out

  3. Cut Your Sheet into Strips

    Now, you are ready to cut the sheet into one long continuous strip. First look at the grain of the sheet. You want to be sure to cut ACROSS THE GRAIN so that the yarn will curl on itself correctly.

    Starting at the top, cut across the sheet – you want strips that are at least 1.5 inches wide. You can cut thicker strips if you want a thicker yarn, just be consistent.

    Continue to cut across the sheet, but DON’T cut all the the way to the end. Stop cutting about 2 inches from the end and turn the sheet around. Start a new cut about an inch and a half down from the last cut and again cut almost all the way to the other side.  

    I tried to make a diagram of what it looks like. It ends up zig-zagging through the sheet, and can be a bit tricky where the sheet goes from smaller to bigger width (where you removed the corner seams from if it was a fitted sheet). I marked in purple a bit you may want to cut off, but if you don’t make the widths of your strips quite even, you should be able to use the whole sheet. You will get corners on the ends, you can round these out if you like, just be careful not to let the cut get too close to the edge ( I goofed a couple of times and had to rejoin the yarn).

    Continue cutting in this way. Around the top, it won’t be quite perfect due to the seams you cut out, but it won’t matter too much in the finished yarn.

  4. Ball Your Yarn

    After you have a number of strips cut, you can start to ball your yarn. Take the start of your continuous strip and gently pull it. It should curl in on itself and stretch out a bit. I found this part REALLY FUN (don’t know why…)! After pulling it, you can start to wind the ball. 

    Keep cutting, pulling and winding until your sheet is gone! Then, you have a fabulous ball of T-shirt yarn. Each sheet I had made a ball approximately 9-10 inches in diameter. That is a lot of yarn!

    Have fun making awesome crafts from your T-shirt yarn!

EDIT: Several people have asked me what size hook I used. I used a hook very similar to this Aluminum 10 mm Crochet Hook
and it worked well for me.

Posted on 2 Comments

Crocheting up a Storm

Waiting for our baby girl, I have been crocheting in an attempt to be more patient for her arrival!

Here is what I have made so far – click for links to the tutorials and patterns I used:


Baby Bootie Completed

Baby Bootie Completed

Baby Bootie

Baby Bootie

Baby Sandal

Baby Sandal

Baby Sandals

Baby Sandals

Purple Flower

Purple Flower

Rug

Rug

Rug Close Up

Rug Close Up


Posted on Leave a comment

Dragon Birthday Card for my Nephew


I found this SVG file free online. If I remember where I got it I will post it up here. I think the card turned out very nicely though – despite a few minor issues! 

  • Finished Dragon Card

    Finished Dragon Card

  • Inside of the Dragon Card

    Inside of the Dragon Card


Posted on Leave a comment

A Mother’s Day Card


My ecraft came through! I made one of the most intricate cards I have attempted yet for Mother’s Day, and other than a little variation in the thickness of some of the lines, my ecraft managed it! I was a bit worried because it hasn’t been doing so well at alignment lately.

The lacy flower base came from Monica’s Creative Room – she has really awesome and intricate cut files that I am fairly sure she makes herself.For the lettering, I used Edwardian Script and I made the band with the heart clasp at the end to keep it all together. It came out beautifully I think!

Posted on Leave a comment

Happy Birthday Card

My first post, but not my first card!
I made a basic birthday card for my Dad based on this pin:
I think it came out fairly well. Here is the result:


  • Card Front

    Card Front

  • Card Inside

    Card Inside

  • Happy Birthday Card

    Happy Birthday Card