

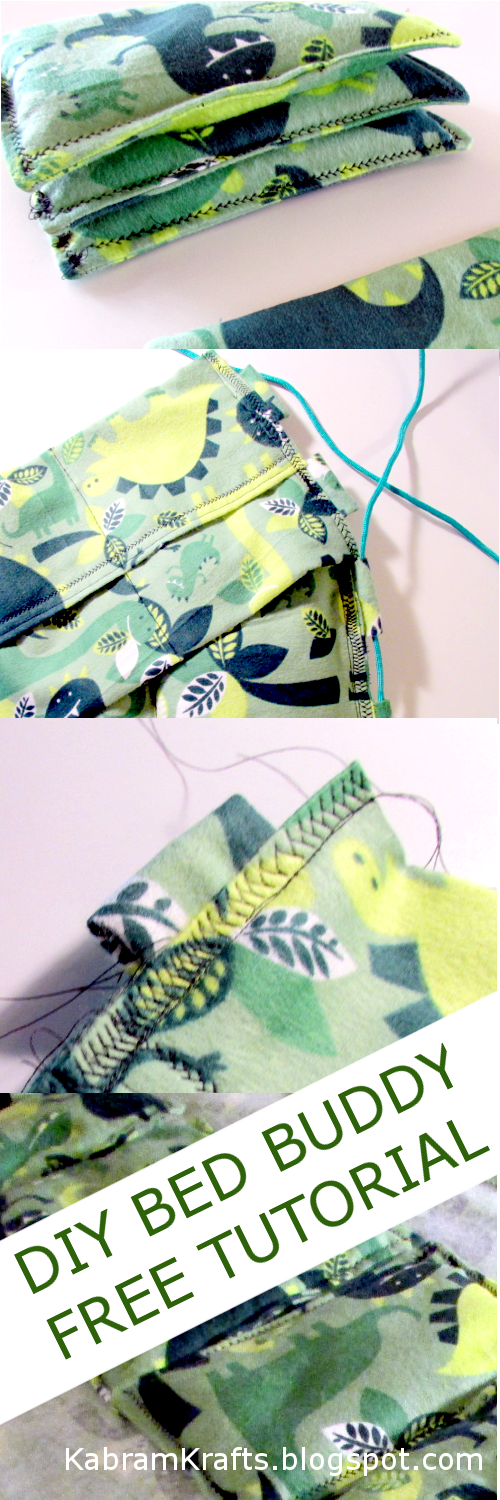
 One of my favorite things when I am cold, achy, or sick is my bed buddy. My older sister got me one a while back and I love it. It even had a nice smell to it when heated, which sadly is now mostly faded. However, lately, whenever I warm it up and snuggle up, my husband somehow manages to get his hands on it and steal it away! So… I thought I would make him one (and perhaps a new one for myself soon too).
At first, I was planning to make it rather simple – sew 2 rectangles together, fill with rice and tada! However there are a few things that I considered:
- It would be nice if the rice didn’t all fall to one side or the other and was more spaced out along the length of the bed buddy.
- Washing the bed buddy, or at least the outer layer, would come in very handy.
- If I was going to make an outer layer anyhow, it would be nice to be able to use the inserts individually as hand-warmers if needed.
So, after much thought, I came up with this design. Basically, I mbean rice bags and long rectangle with handles and pockets for the rice bags to slip into. Velcro was considered to hold each bag in its pocket, but I didn’t like the idea of it scratching me, so I found another way! I was actually very pleased with how the design turned out and really love the way it looks (even despite my sloppy sewing skills!).
ade 6 small
I hope you like this tutorial. Please let me know if you have any questions and I would love to see what anyone else makes based on this – even if it puts mine to shame! 😉
INSTRUCTIONS:
PART ONE: Making the “hand-warmer” inserts!

This is the easy part. Basically, you are making 6 “bean” bags. Dimensions don’t really matter as long as you make them all the same size. I decided I wanted each one to be about 5″x7″, so I cut 12 rectangles measuring 6″x8″ to allow ample room for seams:


- Cut 12 rectangles from your cotton fabric of choice (I used a dinosaur print flannel).
- Place them right sides together in pairs (for 6 total pairs).
- Sew around the edges, leaving an opening large enough to turn them right side out again.
- Turn each bag right side out.
- Top stitch along the edges (I played with my decorative stitches) to give it a finished look. Remember NOT to stitch over the opening!
- Optional: Mix rice with some drops of essential oil to give it a nice smell.
- Fill with rice. I used a funnel (I don’t know if I could have filled them without it) and put about 1 cup of rice in each bag.
- Finish the top stitch over the opening to seal in the rice. As you can probably see in the pictures, I am no expert here. I learned that I don’t know the proper way to turn the corner when using a decorative top stitch, and I ended up with lots of little nests of thread on the corners. Thankfully, I have learned not to get to distraught and decided that it didn’t really matter. The item still works very well, and my husband didn’t seem to mind its imperfections!
PART TWO: Making the bed buddy with pockets!
This part was much more challenging, but not that bad! And, as a caveat, it was by no means an exact science.
- First, I took my fabric and laid out my finished inserts on top. I was aiming for it to be slightly larger than all six of them laid out side by side. This put me at a little over 30 inches, plus extra for seam allowances. Since my fabric was a yard wide, I just used that.
- I then hemmed the fabric on each side with a basic straight stitch. I made extra wide hems since I had some extra fabric there. I suppose I could just as easily have trimmed off some of the extra – but where is the fun in that?
- I then laid my inserts along the center again and folded the sides over to get an idea of how much I needed to hem the long edges up.
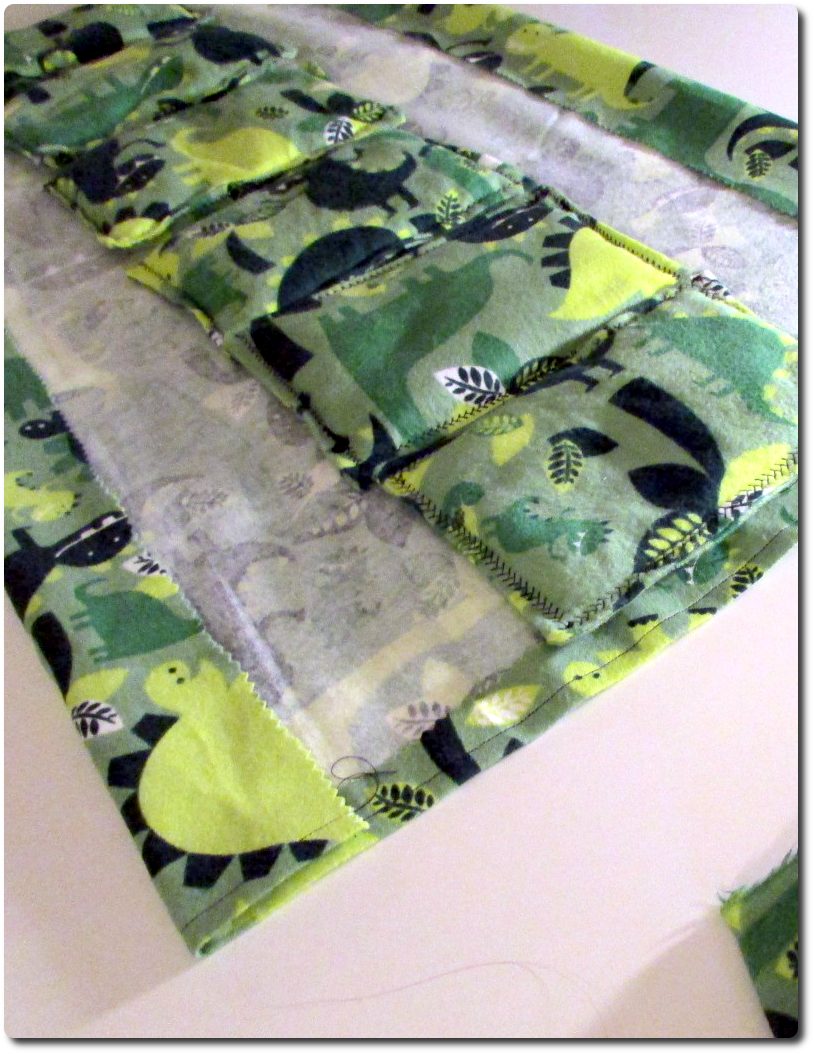
 My idea (which worked better than I anticipated!) was to make little pockets for each bag and have them held in by overlapping fabric flaps. I wanted the edge of the overlap to be slightly off center, and to make sure the bottom layer didn’t fold up too high and prevent the inserts from sliding into position.
So… I ended up with the bottom layer folding up about 5 inches (remember, my rice bag inserts are about 7 inches tall) and the top flap coming down about 4 inches too. This creates a 2 inch overlap to secure the inserts. In my final product, the inserts do go in and out, but I may decrease the overlap on future versions as it is a little challenging to take them in and out. - Once you have the fabric lined up, fold over the raw edges along the sides (the total width should be the 7 inches for the inserts along the back + 5 inches for the bottom flap layer + 4 inches for the top flap layer + seam allowance for the hems). Now, hem the raw edges close to the fold and your width should be right about 16 inches total.
- If you like, at this point, you can top stitch along the hems you just made.
- Before we get to carried away, we need to make fabric loops to hold the handles in place.
Take a somewhat long scrap of fabric, fold it in half lengthwise, and sew along the edge. Reverse it and you should have a nice fabric tube. Cut it into four equal pieces and iron them flat if you like. - Fold your cover lengthwise such that you have an overlap above where the rice inserts will go. If you want to make this part in the same way I did, you will have the bottom layer coming up 5 inches over top of the inserts, and the top layer over that coming up 4 inches from the edge.
- Pin the cover in place.
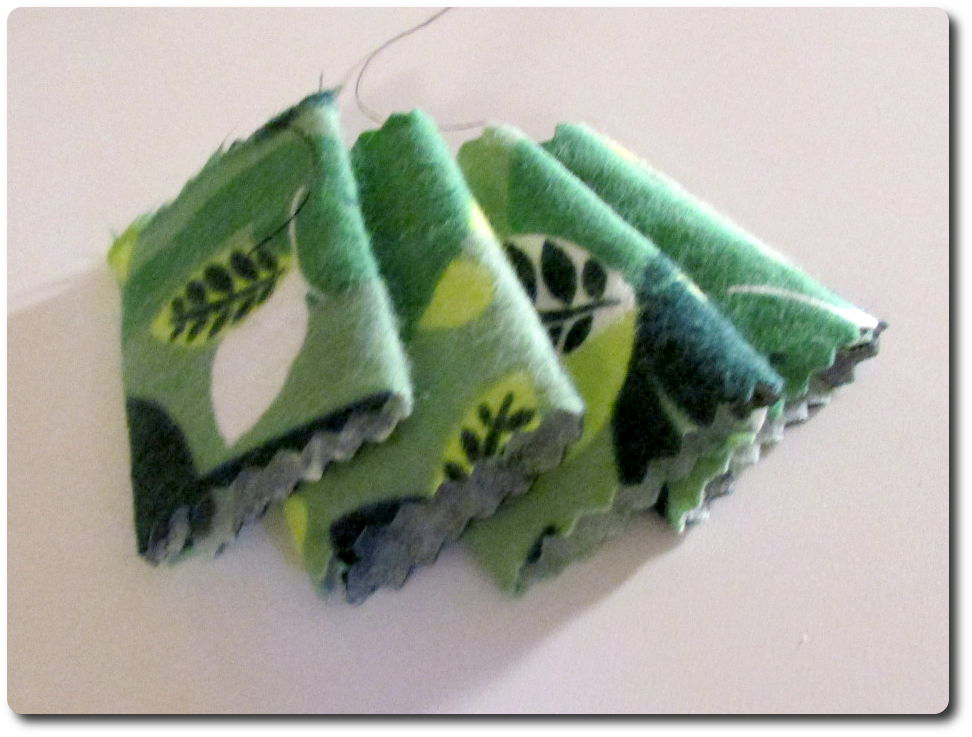
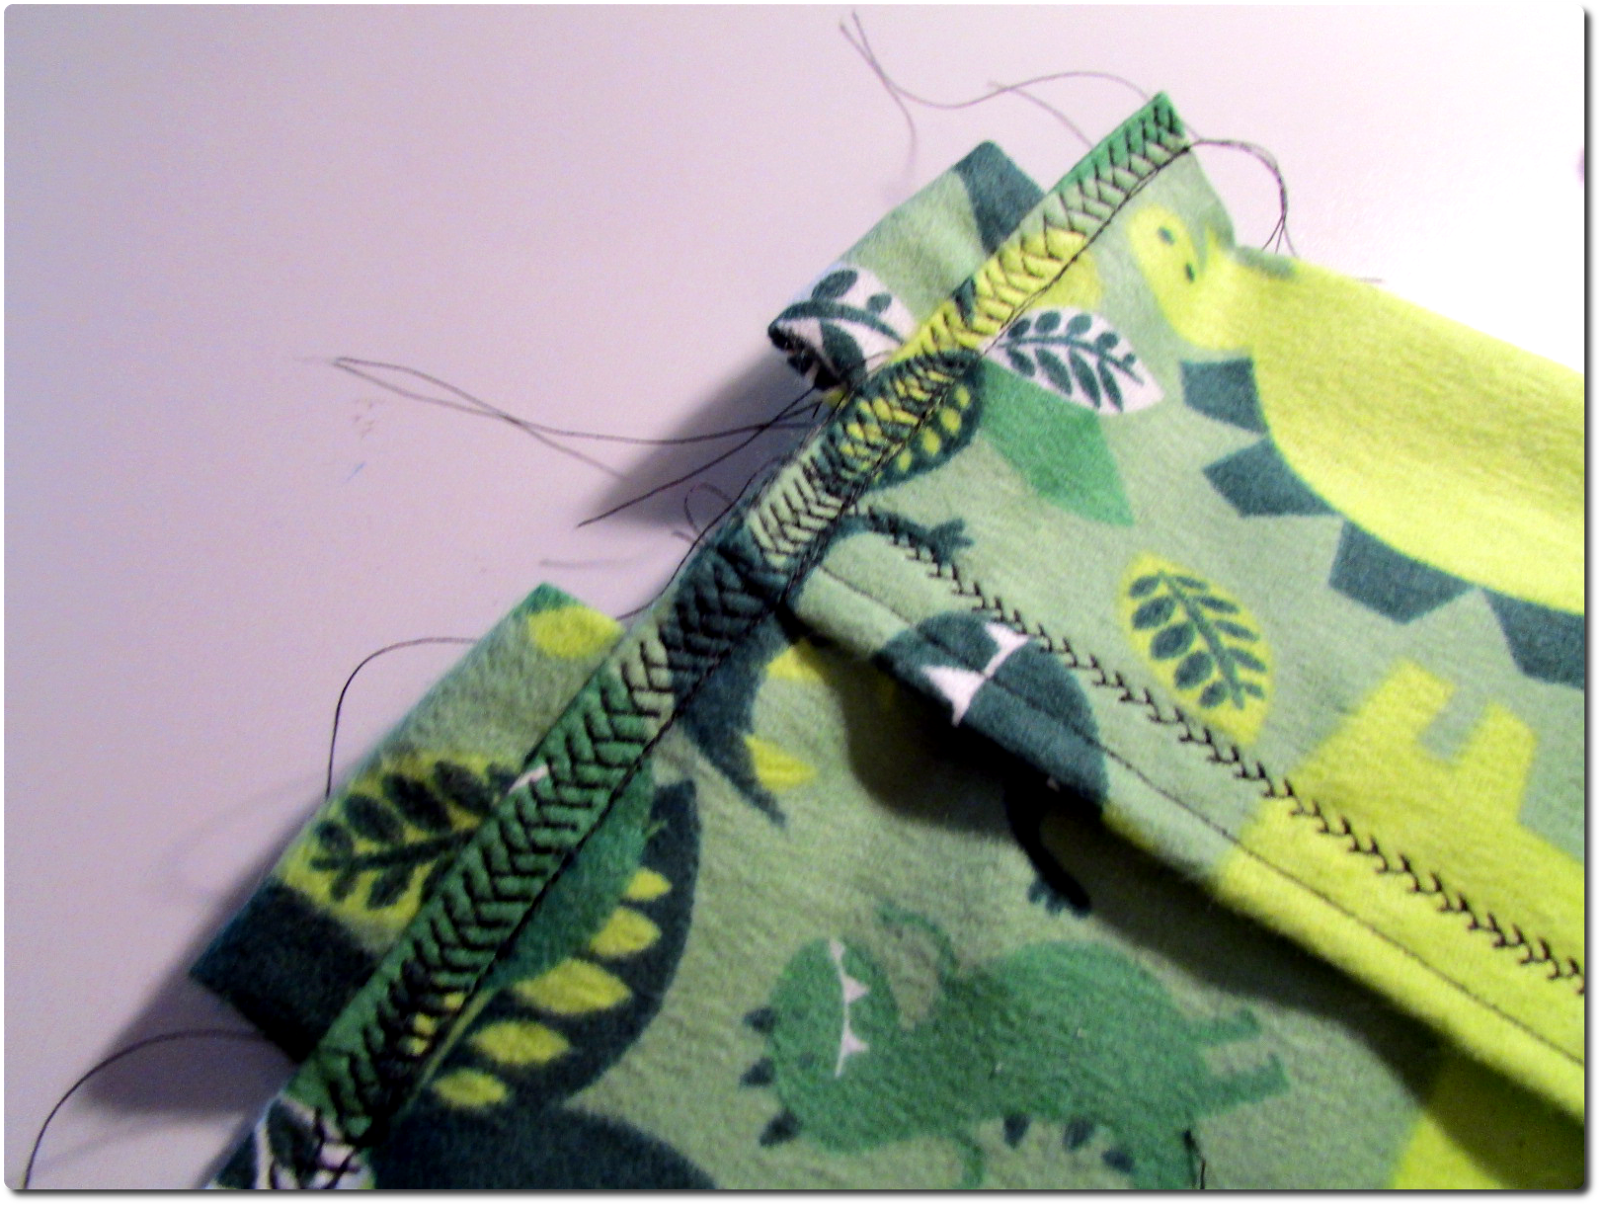
Then, fold each of the four handle holders you made in half and pin two on each short end of your cover. You want to position them so that they are between the layers of the cover and stick out enough to thread your nylon handle string through the hole. - Sew the ends of the cover together, ensuring that you also sew the handle loop holders in place as well. You can also top stitch with your decorative stitch over the ends as well to add style and stability.
- You are almost done! Right now, you should have a long cover that overlaps on one side to make one giant (and very long and skinny) pocket. The last step is to simply sew dividing lines to make a spot for each of your inserts. Measure, divide that number into six, and mark these spots along the length of your cover. Sew a simple line across the cover in each spot.
- Trim all your edges and threads.
- String your handle through the loops and tie it off. I used a candle to melt the ends and the knots together so they don’t have even a chance of coming undone!
- Insert your rice bean bag hand warmers into the pockets.

Congratulations! You are done. Warm up your new bed buddy in the microwave and enjoy! Mine takes about 3 – 3.5 minutes to get warm. Try warming yours for a couple minutes and then add 30 second increments until it is just right. Don’t heat it too hot or you can burn yourself!

Great idea. I’m going to make one. Is there a special rice to use since it will be heated in the microwave?
I have just used the cheapest rice I could find, and it has always done fine in the microwave. Thanks!
Took me time to read all the comments, but I really enjoyed the article. It proved to be Very helpful to me and I am sure to all the commenters here! It’s always nice when you can not only be informed, but also entertained!
too hot at night