Posted on 2 Comments

DIY Wooden Growth Ruler Chart

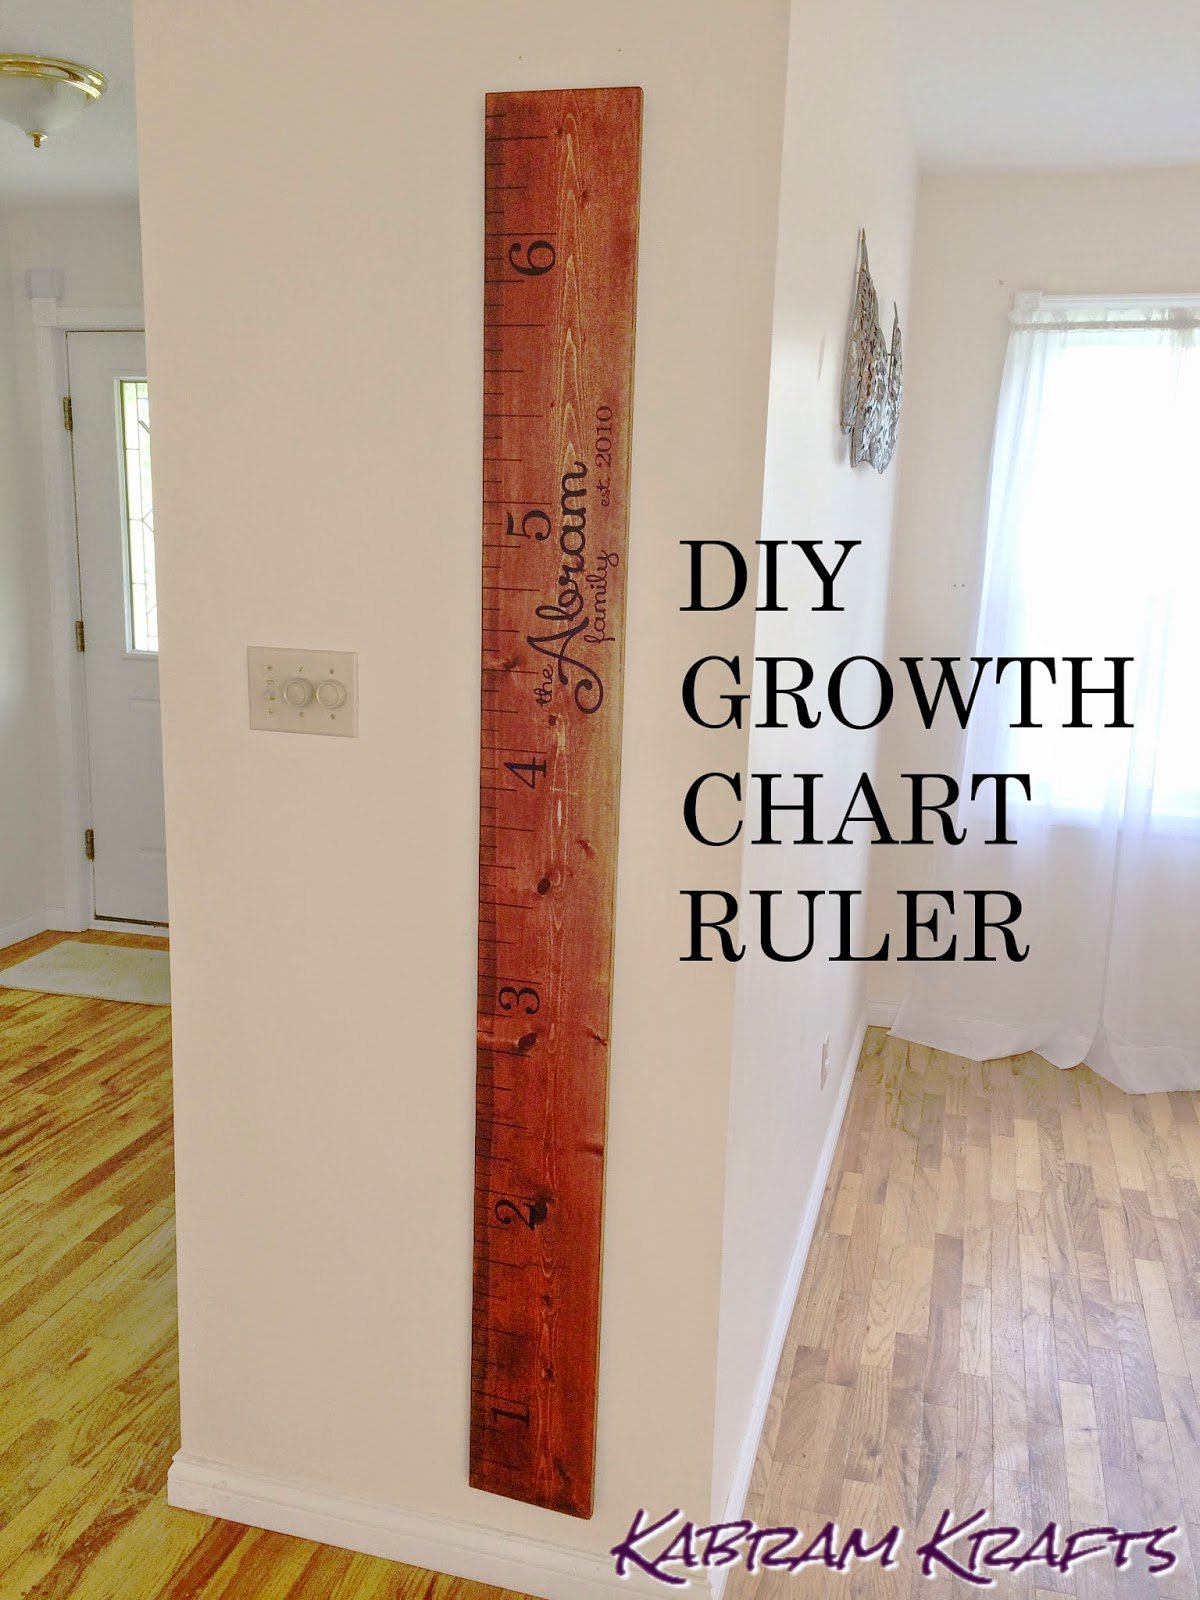
Well, this is one of those projects that I’m sure you have seen if you have spent any time on Pinterest. Despite its ubiquity, I wanted to give it a try since it has a wonderful appeal both in its practicality and in its decorative nature.

Once completed, you can chart your children’s growth without the worry of having to leave behind a chart on the wall. The ruler is also a beautiful keepsake for years to come!

I wanted to keep the cost of this project down, so I rummaged around the stash of paints and such that was left in our home by the previous owner. I found a can of stain – just what I was after. Now, this meant that I had to be content with the stain color I had (red oak), but it definitely kept the costs down.

Materials

  • 1″ x 8″ x 6′ board (I had them cut an 8′ pine board down to 6′, cost = $8)
  • Stain – whatever color you like, it really doesn’t take too much either
  • Sandpaper
  • Black Permanent Marker
  • Ruler / Square (Square is optional, but VERY helpful)
  • Silhouette Cameo (optional – can use printer and exacto to make a template instead)
  • Black Vinyl (optional, see above)
  • Clear Spray Coat (optional)
Directions
 

  1. Sand and Stain your wood.Tips: Sand a lot; I definitely should have sanded this some more, but oh well… Also, you can wipe your stain off after several minutes with a paper towel to get a lighter look (didn’t know this at first!)
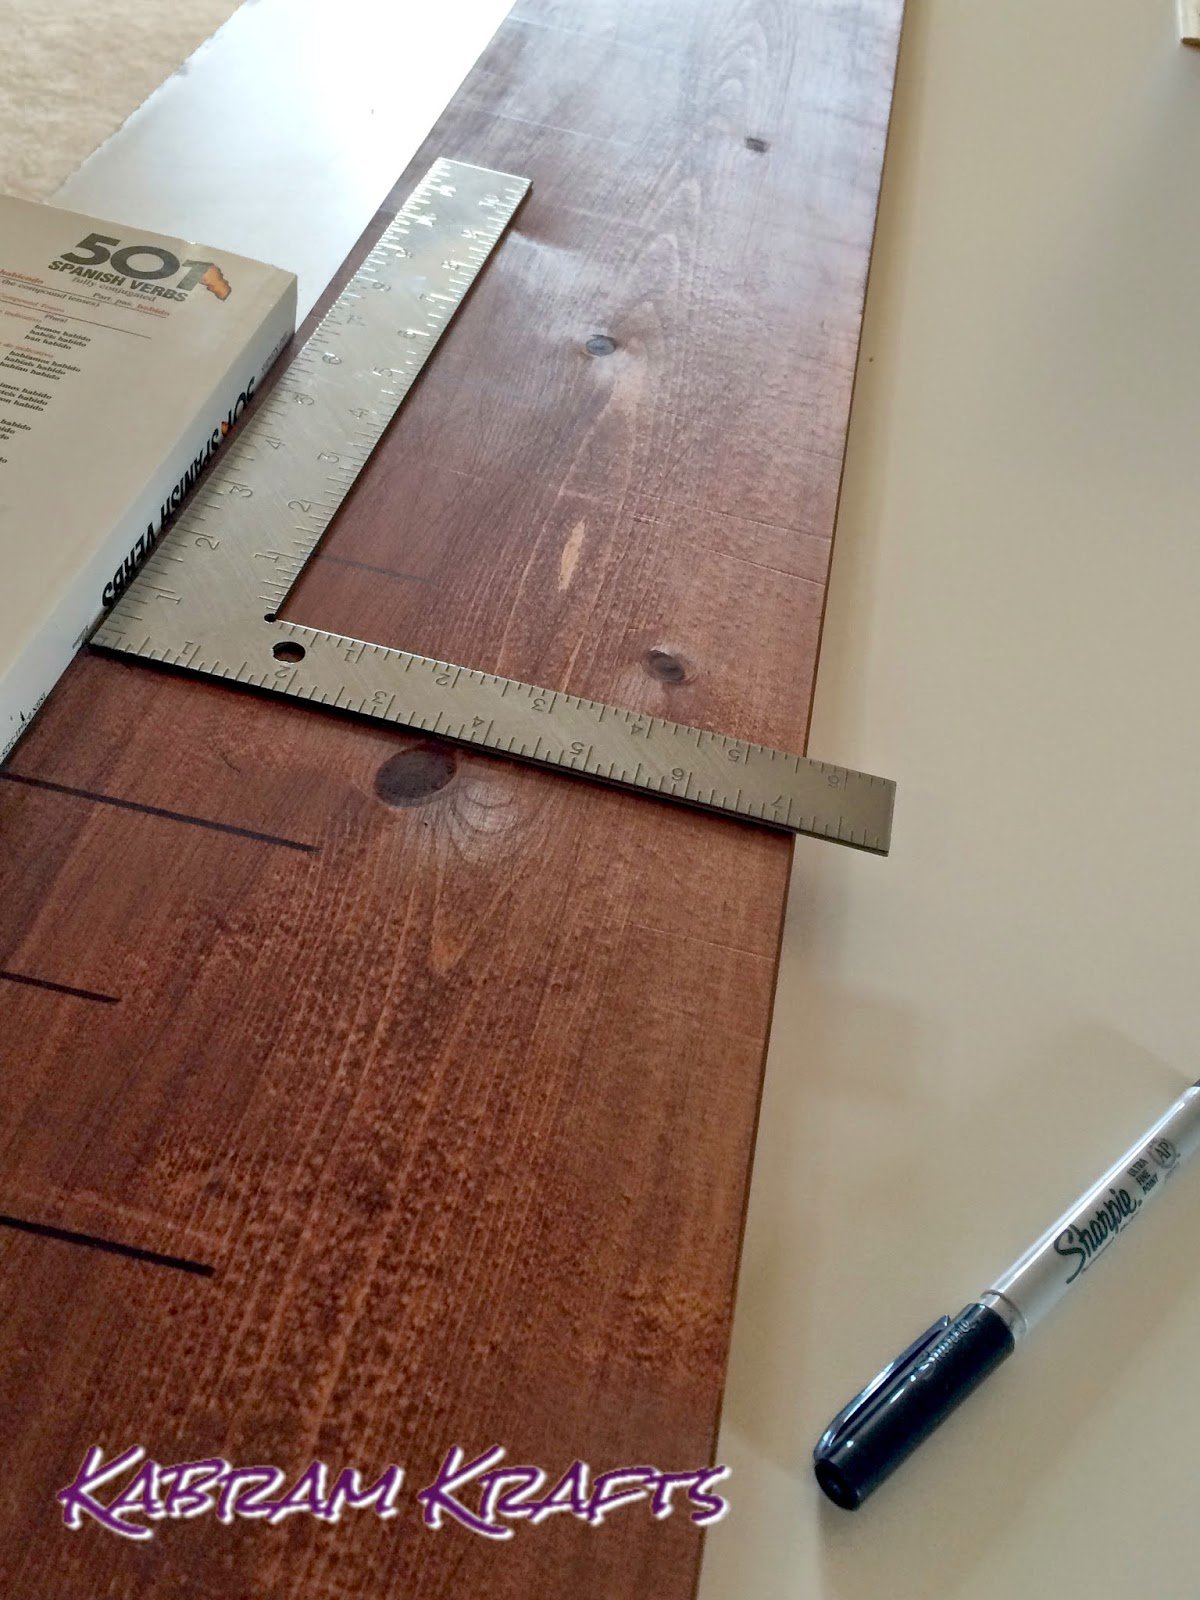
  2. Mark your lines every inch with your permanent marker and measuring device.Length of the lines I drew:
    – Each “foot” mark = 3.5″ long
    – Each 4″ between feet = 3″ long (these divide each foot in thirds)
    – Each 2″ withing the thirds = 2″ long (these divide each third in half)
    – Each remaing 1″ mark = 1″ longTips: Use a square if you have one! This allows you to make even, perpendicular lines. I began my board at 6″, so my 1 foot mark was 6″ up the board. Measure the baseboards where you plan to hang your finished product to ensure you start high enough. Also, if you have room, there is no shame in making a taller ruler – I probably could have had an extra foot on mine if I had thought ahead.


  3. Spray your wood with several light coats of your clear protective coat.Tips: I don’t know how essential this is. It seemed to smooth the surface, make me feel better about the projects durability, and perhaps prep it for the vinyl. Note that I did not spray the project after the vinyl was applied as this can make the vinyl peel up. 
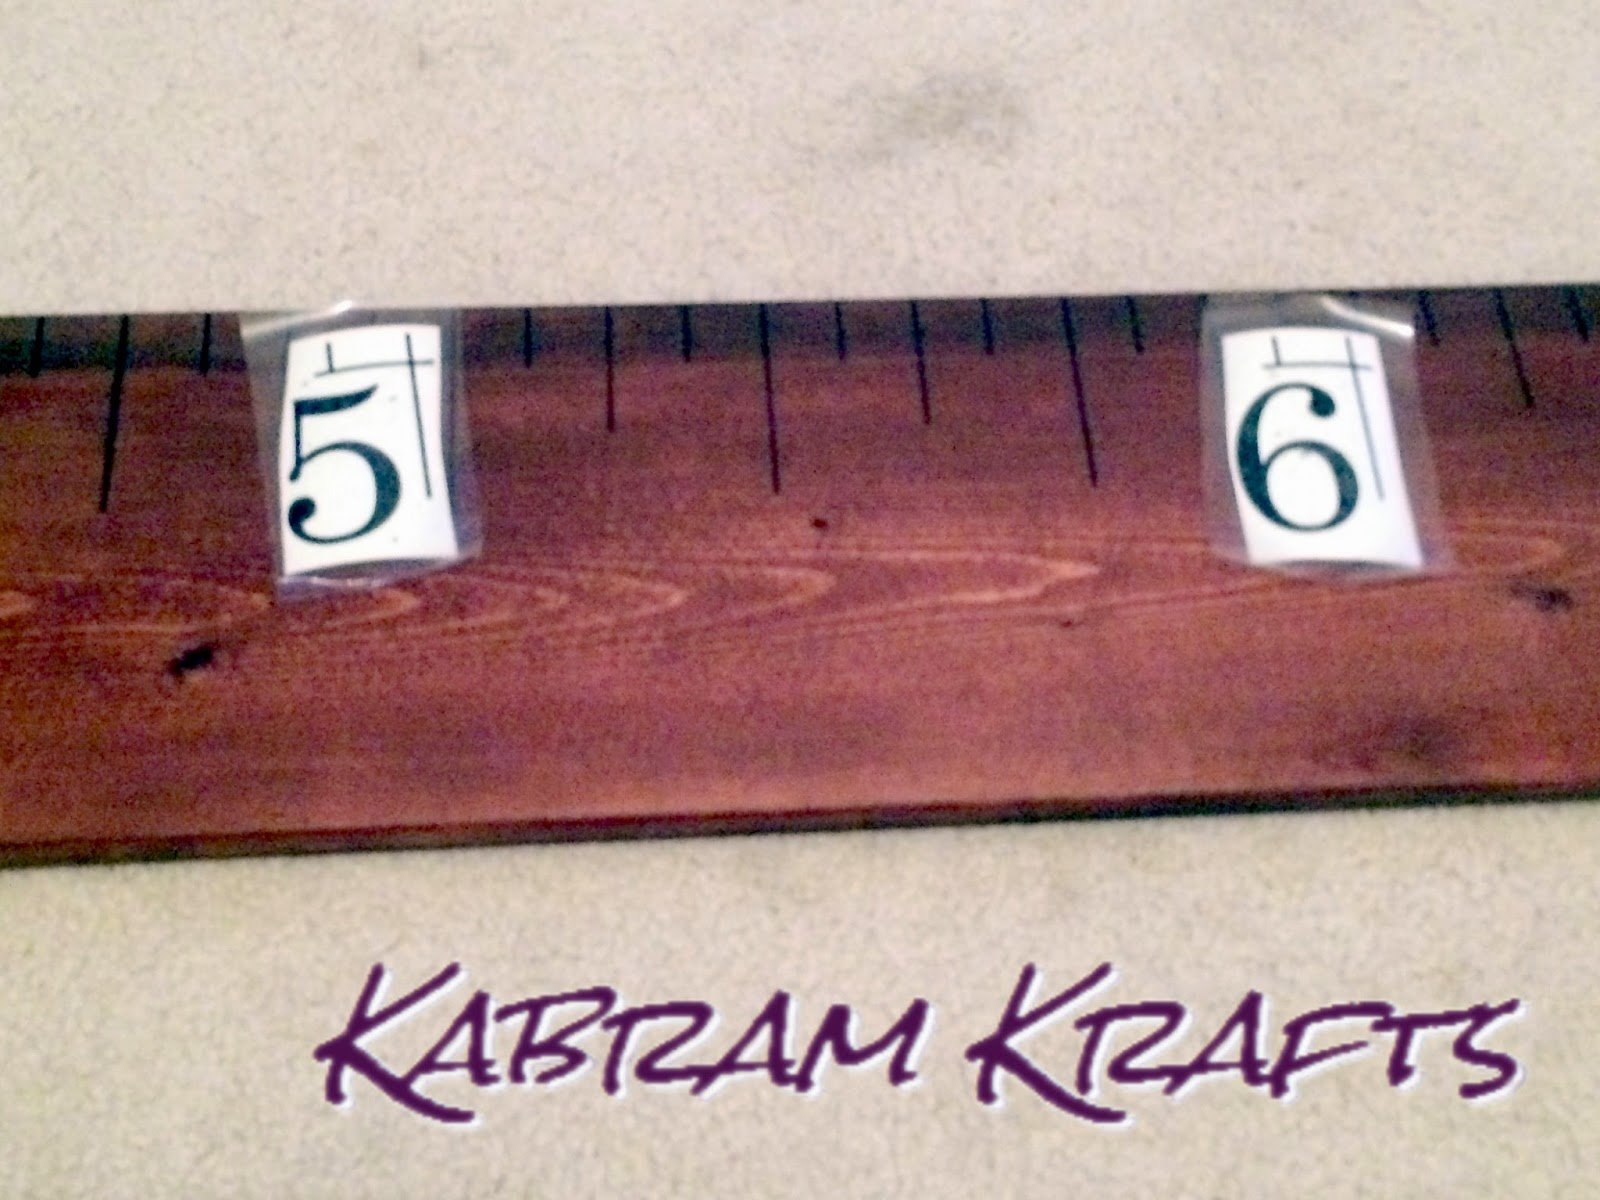
  4. Design and cut out your vinyl (or paper stencil). Feel free to use the numbers I made – here is my svg file.

    Tips: I used Century font and put a little bracket around each number to help me line it up. If you use my cut file, leave the bracket on while applying to get it straight, then pull it off your project. Play around with your name if you want it, I used Xiomara font with Century for the numbers.


  5. Apply your vinyl lettering and admire your work! (And, I suppose, hang it on the wall…)
If you made a wonderful growth chart like this, I would love to see how yours turned out.
Happy Crafting!
Posted on 2 Comments

Stars and Stripes Forever

Fireworks are just around the corner, so I thought I would turn my Inkscape experiments to something celebratory. Turns out that the clone tool is awesome! If I get a chance I may just write up a bit on how to clone and rotate shapes around a center.

I haven’t test cut this file, so if you use it, I would love to see how your project turns out. Please keep my files for personal use only.
Free SVG File
Posted on 15 Comments

Father’s Day Card SVG Download

Father’s Day is Coming!

My dad loves his tools! Here is a Father’s Day Card I made with a border of tools for him. I have included the free cut file with it, including the sentiment separately in case you want to add it to your own creation.


Also, check out my new Father’s Day Card Template too!

Check it out HERE.

Posted on 6 Comments

Free Flower SVG

Floral Stencil Cutting File

Okay, so this was just for fun. I really love exploring Inkscape! I was playing around and this is what I came up with. I think I will keep playing around, so look forward to some more files soon!

Free Flower Cutting File
Free SVG file download
Please credit me if you use this in any public projects, and I would love to see any projects it is used in!
Posted on Leave a comment

Graduation and Mother’s Day Cards

Cards for every Occasion

Well, I know that these occasions have now passed for most of us, but I thought I would share what I came up with anyhow.

I made a couple different Mother’s Day cards, and a graduation card for my little sister.

I was very happy with how the designs came out, though my color choices for the graduation card could have been improved. Oh well, I keep learning!

First, here is the graduation card and a free download of the svg and studio files:

2014 Graduation Card – Black Rose Font for the Year
Free SVG File Download

Below are the Mother’s Day cards I made. For the first one (purple), I used a floral card from the Silhouette Store and added a simple butterfly to it. The second one I used a frame I found on www.birdscards.com and added the sentiment in Blessed Day font. Here is the Mother’s Day card I made last year on my ecraft.

If you like my cards, be sure to check out the Birthday Cards I have made too!
Posted on 1 Comment

Free Duckling SVG file for Spring!

Ducklings

Spring has Sprung! Sadly, that statement doesn’t yet ring true here – but I have high hopes. We have warm weather for the next week (and by warm, I mean above freezing) – so thesnow should melt soon! Perhaps we may start seeing green too.

At any rate, I found this adorable sketch pinned on pinterest with a dead link and no searching on my part has turned up its origins. If anyone knows, let me know! I took the liberty of converting to a cutting file because I simply couldn’t resist.

Here it is in all its wonderful spring like glory:


And, of course, a cute little image for pinterest. Have a great day!

Ducklings
 
Posted on Leave a comment

Experimenting with my new Silhouette Cameo!

Engagement Silhouette

New Silhouette Cameo = Excitement

I can’t stop feeling thrilled about my new silhouette cameo, which I was really blessed to receive as a Christmas bonus from my work – LTIIT. And… working on my new craft table was awesome!

First Project

After opening up and marveling at how light it was compared to my ecraft, I knew exactly what I wanted to try cutting out first. Awhile ago, I had made a file from one of our engagement photos that I was really excited about. It is an image of us standing together and it made a great silhouette.

Unfortunately, the ecraft could not cut this image out no matter what I tried. It would always mess up either my husband’s pants, or my nose and face. I think that due to the no mat cutting approach of the ecraft, it would always slip a little. Or, maybe my machine is just out of alignment. At any rate – the cameo got it on the first pass! Here is a picture of the finished cut:

Feel free to download the SVG for this file below.
 

Sketching with my Silhouette Cameo

My next thought was about sketches. Now, while the ecraft has a pen and theoretically can cut and draw an image simultaneously, the results are always less than stellar. The pen usually skips or doesn’t write, and the cut is not lined up properly. So, though I don’t yet have the cameo’s sketch pens, I decided to try a makeshift option. I wrapped a pen in some cardstock, stuck it in the cameo, and tada! Here is what I got:


So, how did I do it?

Well, for both images, I played around in both gimp and inkscape – both free programs you can download online! For the engagement silhouette, I simply picked a photo that I thought would make a good silhouetted and played with it in gimp. I changed the brightness and contrast dramatically.  Turned the image to grayscale. Simplified it quite a bit and then pulled it into inkscape and hit “Object to Path”. Once I had a path, I simplified it further in inkscape and played a little with the nodes until I was satisfied. Since I don’t have the designer edition of the cameo software, I saved it as a dxf file for import into the cameo studio, and cut it out!

Making the Sketch File

The sketch was a bit more complicated. I started by following directions from this blog post that I pinned. The best thing I learned from that post was about the Eggbott Extension for Inkscape which allows you to fill a path with a hatch. This looks like a sketch and gives you a bunch of open paths – exactly what you want for a cameo sketch file.
 
However, I wasn’t satisfied with the very straight looking results in the post. I explored further and found the path effects editor already in Inkscape! Once you have a bunch of open paths, click one of them and go to Path -> Path Effect Editor. In the drop down, select “Sketch” and hit add. Then play around with the options until you get something you like. Once I had done this and liked my result, I then selected each part one at a time and hit “Object to Path” once more. The results of the Path Effect Editor aren’t turned into paths automatically, so I think this step is necessary. Now, you have a nice sketch! Save as a dxf file, and import it into your cameo software (this took more than a few seconds on my computer – it was a big file!).
Let me know if you have any questions!